Off-Cycle Pay Imports and Adjustable Line Items
Importing a New Off-Cycle Paystub
Off-cycle paystubs can be used to make corrections to time cards needed to reflect PWA compliance.
Off-Cycle Paystub Import Template
Importing an off-cycle paystub requires a filled out paystub template. The template can be found here. This is the same template used for on-cycle paystub imports. For more details on the template and on-cycle paystub imports, please review our help document here.
Importing an Off-Cycle Paystub
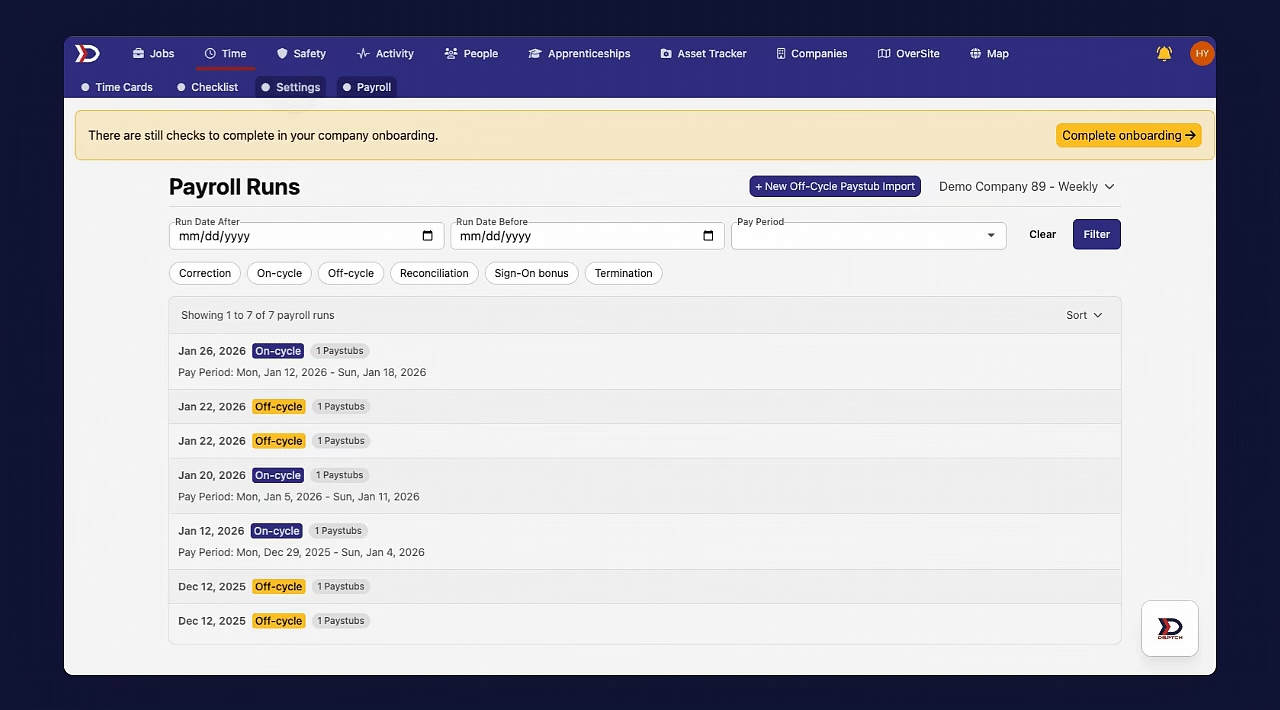
To upload an off-cycle pay import, start by clicking the "Time" tab in primary navigation bar at the top of the page. Next, click the "Payroll" tab in the sub navigation bar at the top of the page. This will open the "Payroll Runs" page. Finally click the "+ New Off-Cycle Paystub Import" button near the top right corner of the page. This will open the "New Import" form.
See the video below for a demonstration:
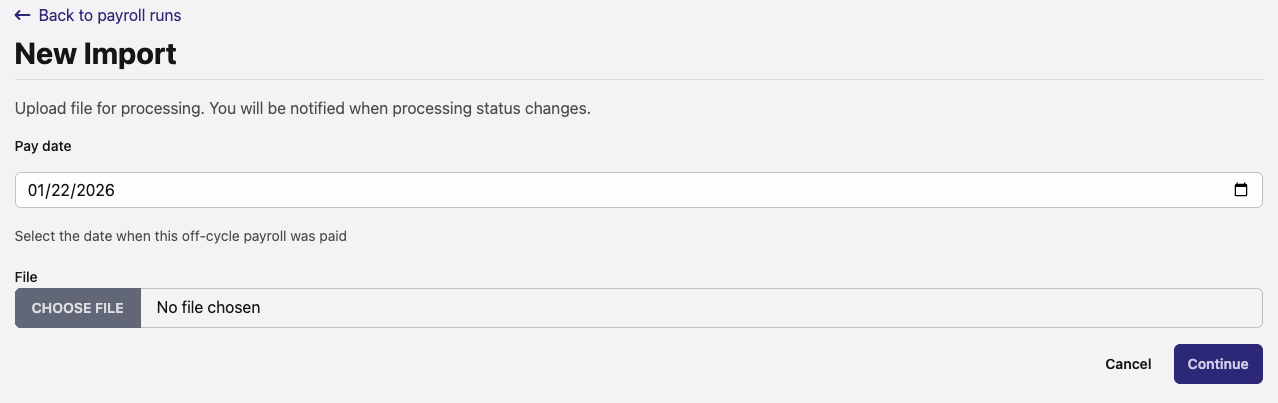
The "New Import" form has two fields.
-
Pay Date (Required)
-
Indicate the date that the payment was made. As this payment does not align with the pay schedule, the pay date must be specified.
-
File (Required)
-
Drag and drop the off-cycle paystub import into the field. Alternatively, you may click the "CHOOSE FILE" button to select the file from your computer's directory.
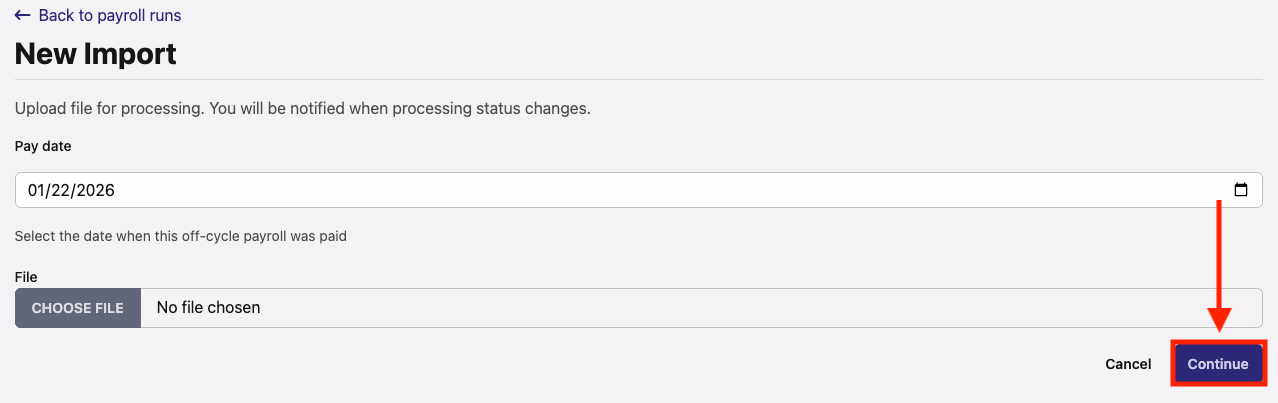
Once the fields have been filled out click the "Continue" button in the bottom right corner of the page (indicated by the red box and arrow in the image below).
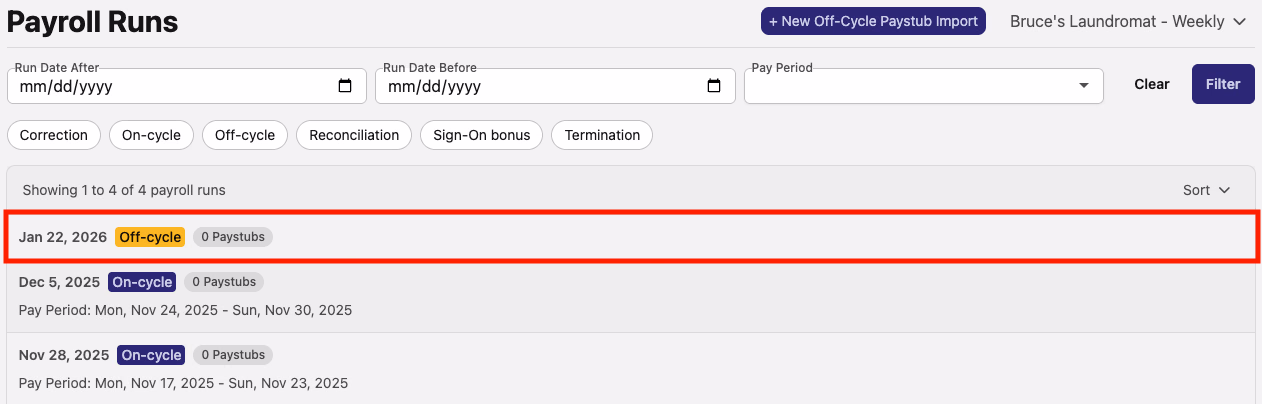
The new off-cycle import will now be included in the list on the "Payroll Runs" page (indicated by the red box in the image below).
Mapping Line Items
If this is the first time an off-cycle paystub has been imported, then it is likely that the line item (indicated by the value in the "field_name" column of the import file) will need to be mapped to a category in DSPTCH.
To do this, start by clicking the "Settings" tab in the sub navigation bar at the top of the page. Then, click the "Integrations" tab in the menu on the left side of the page.
See the video below for a demonstration:
To map the line item to a DSPTCH Category, click on the pencil and paper icon on the right side of the unknown mapping (indicated by the red box in the image below).

This will open the "Edit Mapping" form, pictured below.
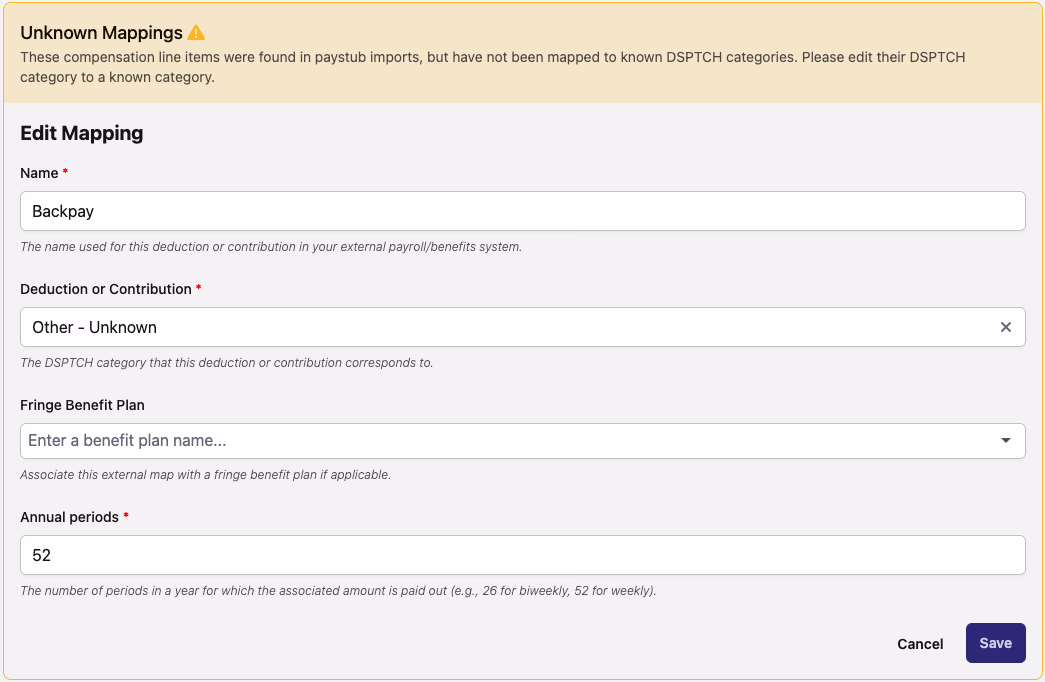
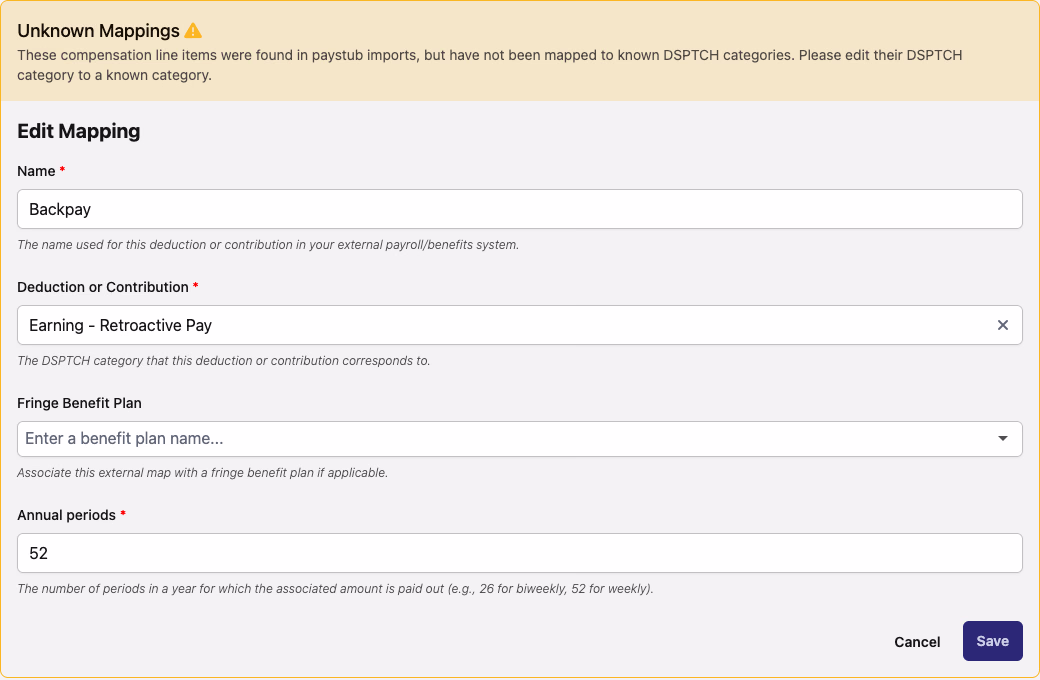
To map the line item to a DSPTCH category, click the "x" on the right side of the "Deduction or Contribution" field to remove the "Other - Unknown" default category. Then, click on the field to open the dropdown menu of options and select the appropriate DSPTCH category. For example, backpay line items should be mapped to the "Earning - Retroactive Pay" category, as seen in the image below.
If you are unsure about what DSPTCH category to map a line item to, please contact your DSPTCH onboarding specialist. Once a line item is mapped it cannot be edited.
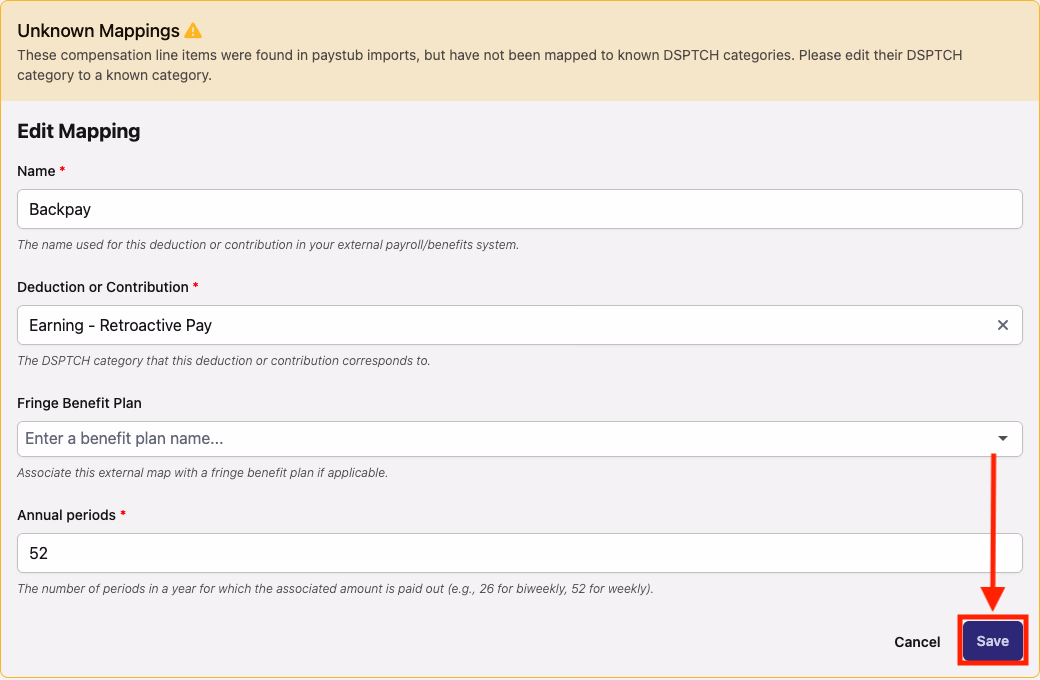
Once the appropriate DSPTCH category is selected, click the "Save" button at the bottom right corner of the form (indicated by the red box and arrow in the image below).
Adjustable Line Items
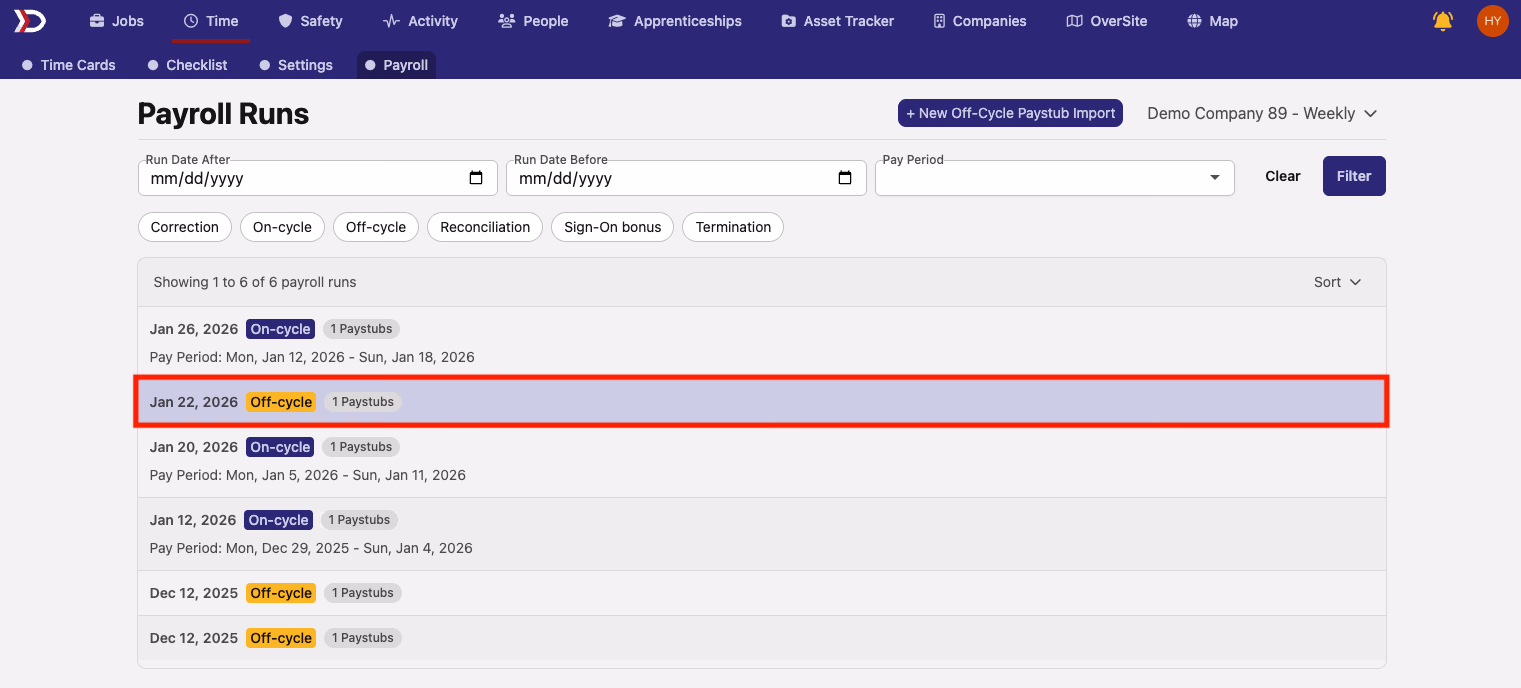
Once an off-cycle paystub is imported the line items must be applied to the appropriate pay periods. To do this, click on the relevant off-cycle paystub import in the list on the "Payroll Runs" page (indicated by the red box in the image below.
This will open the page for the selected off-cycle paystub. From this page, click on the "Adjustable" button for the relevant worker (indicated by the red box and arrow in the image below).
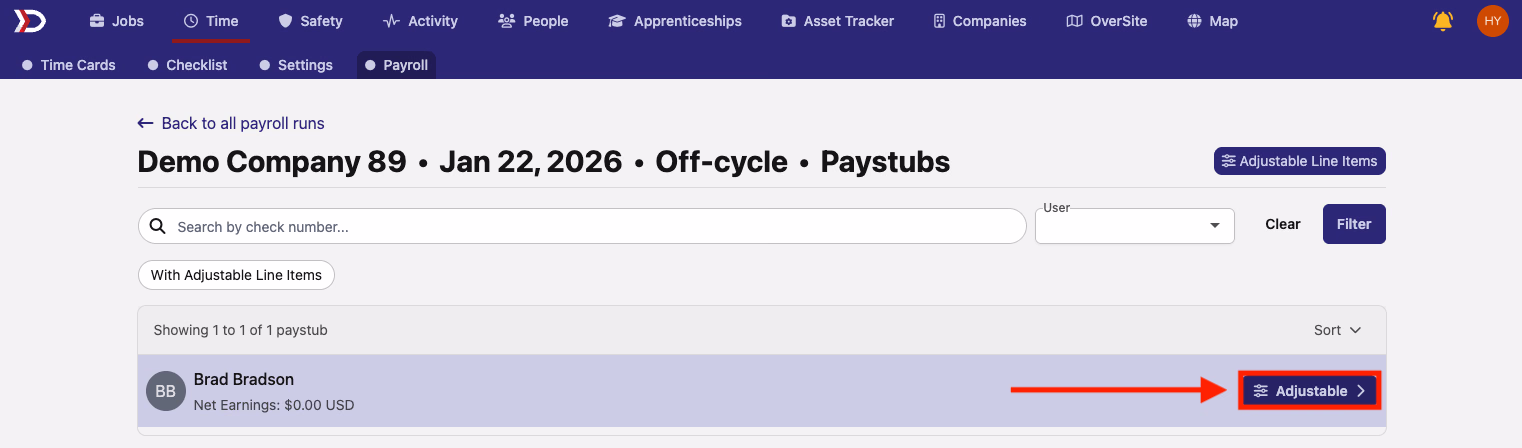
If there is no "Adjustable" button, it is likely that the line item has not been mapped to a DSPTCH category. To do this please review the Mapping Line Items section of this help document.
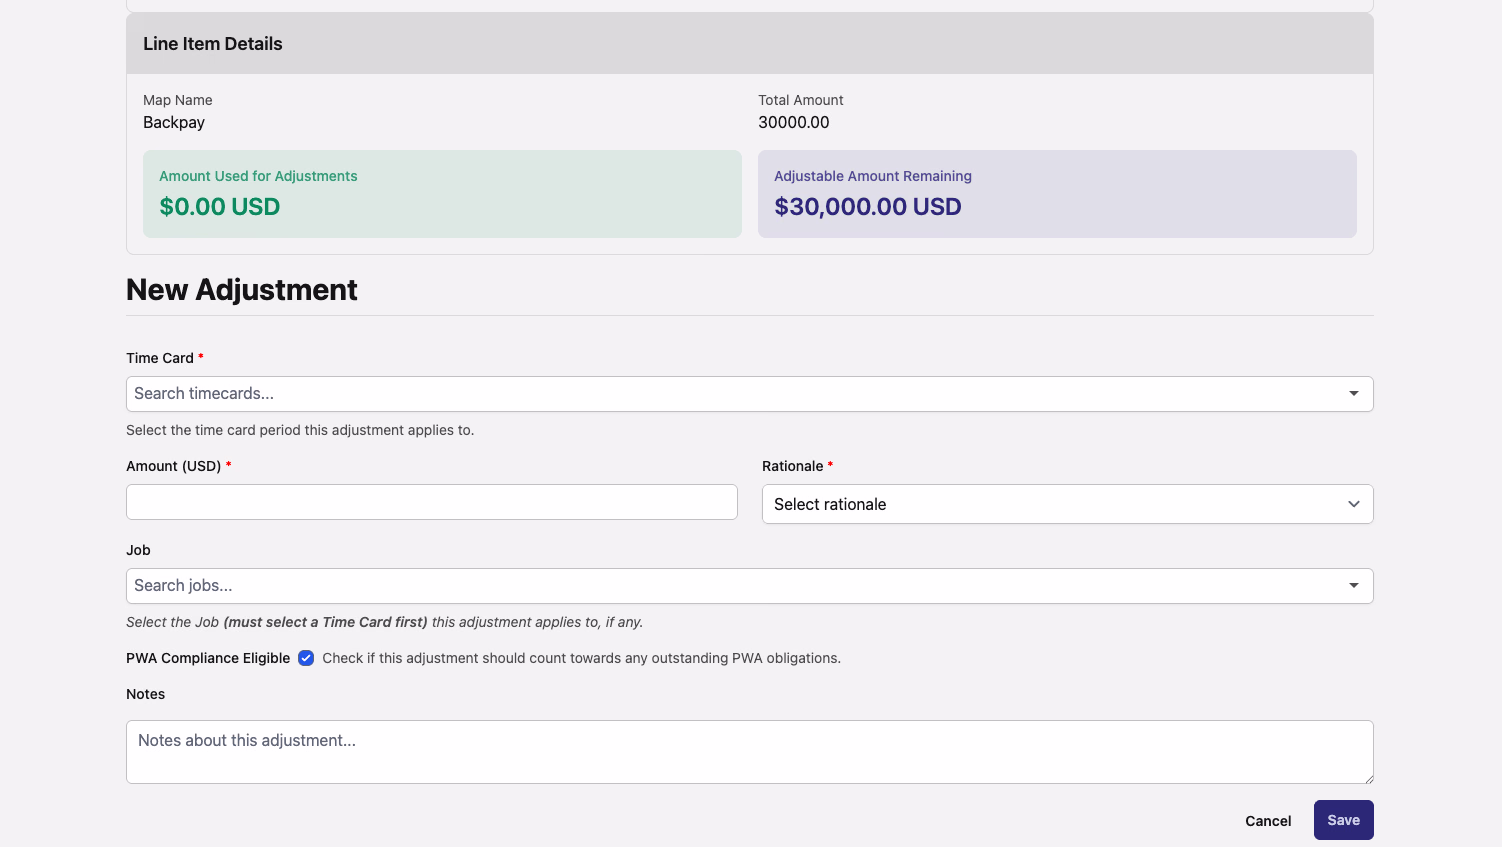
This will open the page for the adjustable line item. In the "Line Item Details" section of the page (indicated by the red box in the image below) the amount that has already been allocated can be seen in the green box titled "Amount Used for Adjustments," while the amount that remains to be allocated can be seen in the blue "Adjusted Amount Remaining" box.
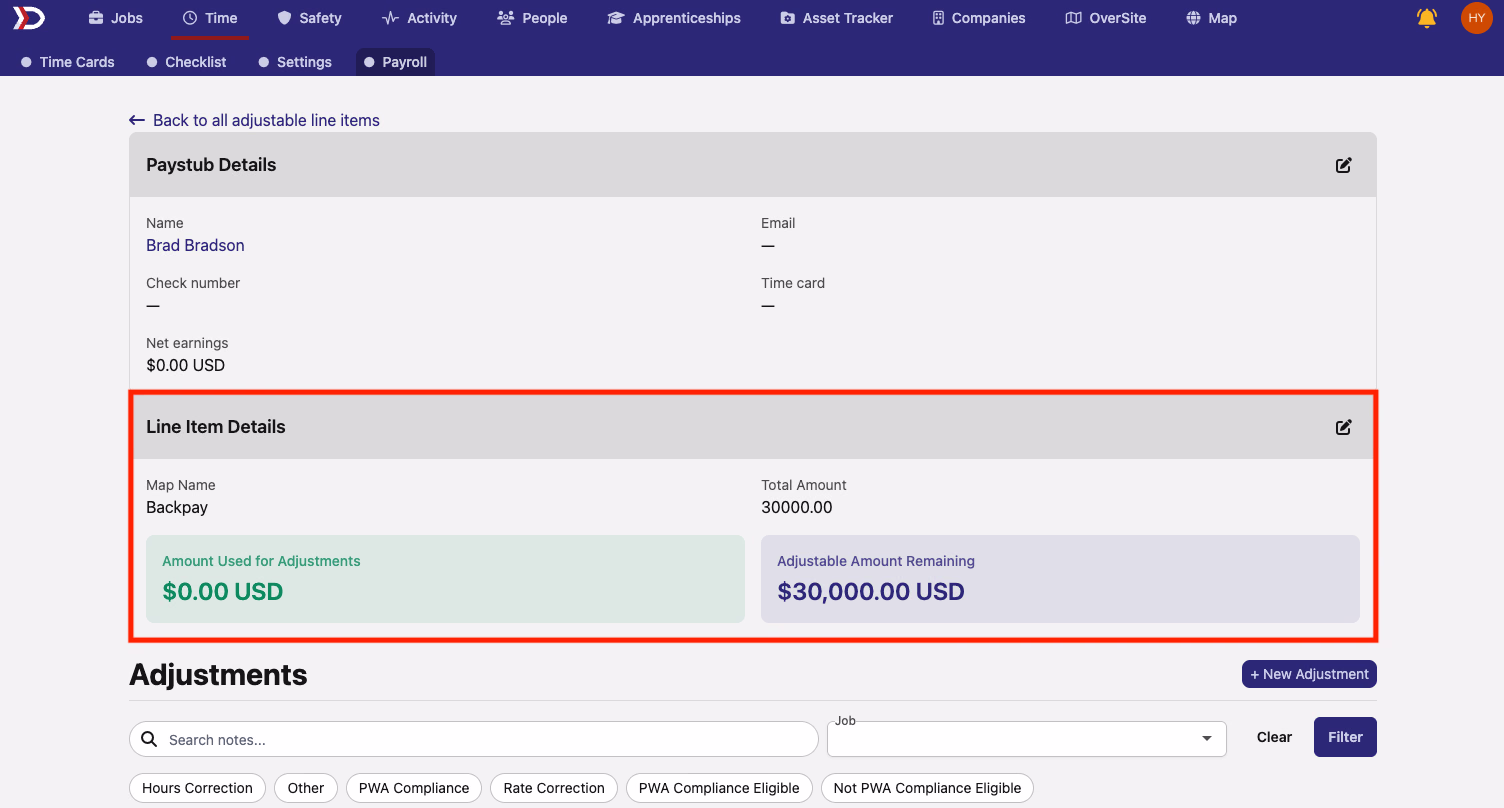
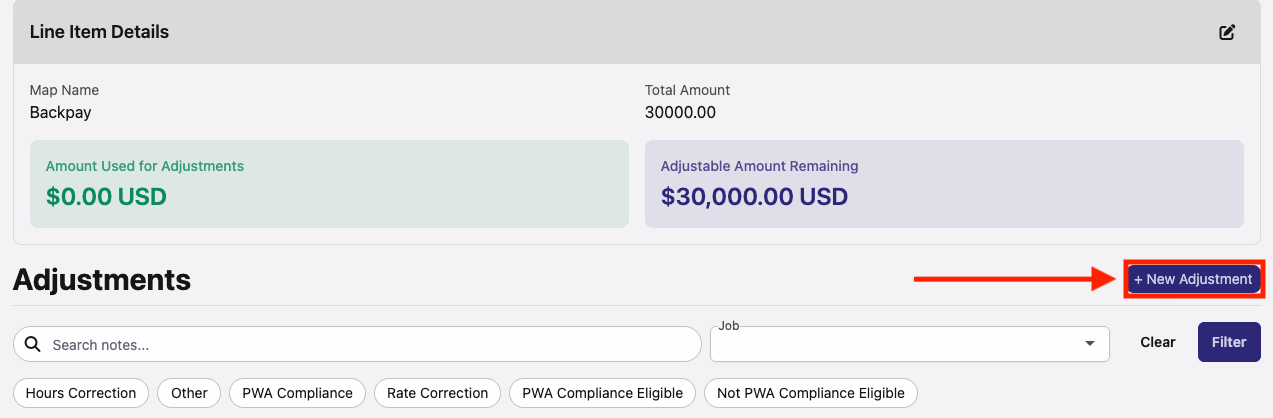
To allocate part or all of the line item to a specific pay period, click the "+ New Adjustment" (indicated by the red box and arrow in the image below).
This will open the "New Adjustment" form. This form has several fields:
-
Time Card (Required)
-
Select the time card that this adjustment will apply to
-
Amount (Required)
-
Enter the amount of this adjustment
-
Rationale (Required)
-
Select the reason for this adjustment
-
For example, the rationale for backpay will be "PWA Compliance"
-
Job (Optional)
-
Select that job associated with this adjustment
-
PWA Compliance Eligible (Optional)
-
Make sure this is toggled on if the adjustment should count towards outstanding PWA obligations
-
Notes (Optional)
-
Include any additional notes related to this adjustment
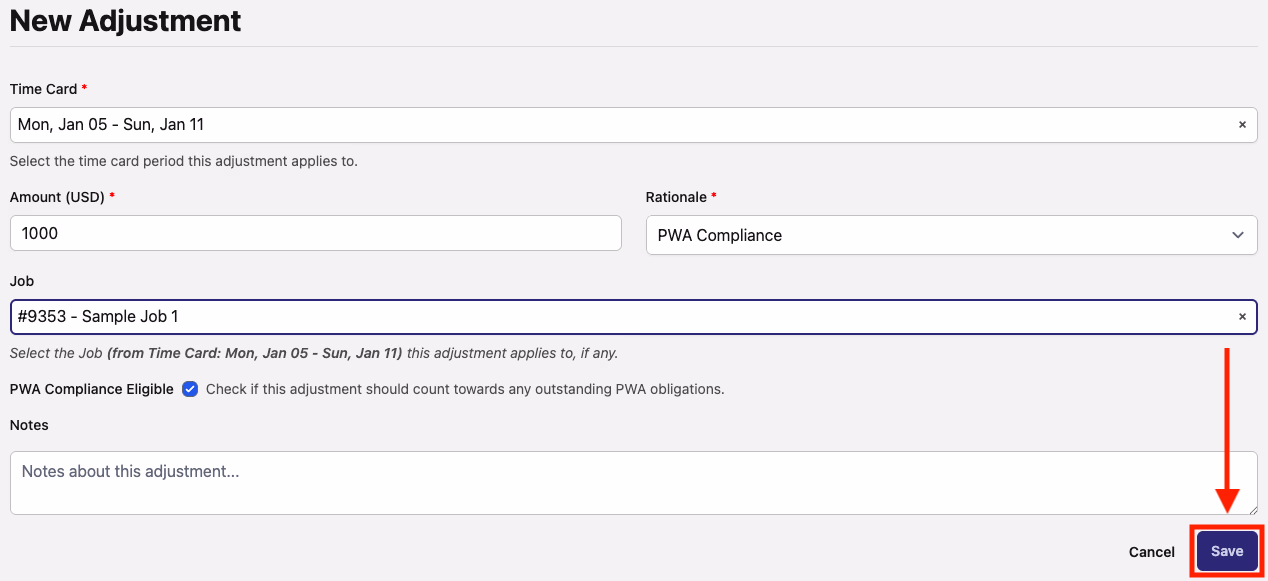
Once all fields have been filled out, click the "Save" button in the bottom right corner of the form (indicated by the red box and arrow in the image below).
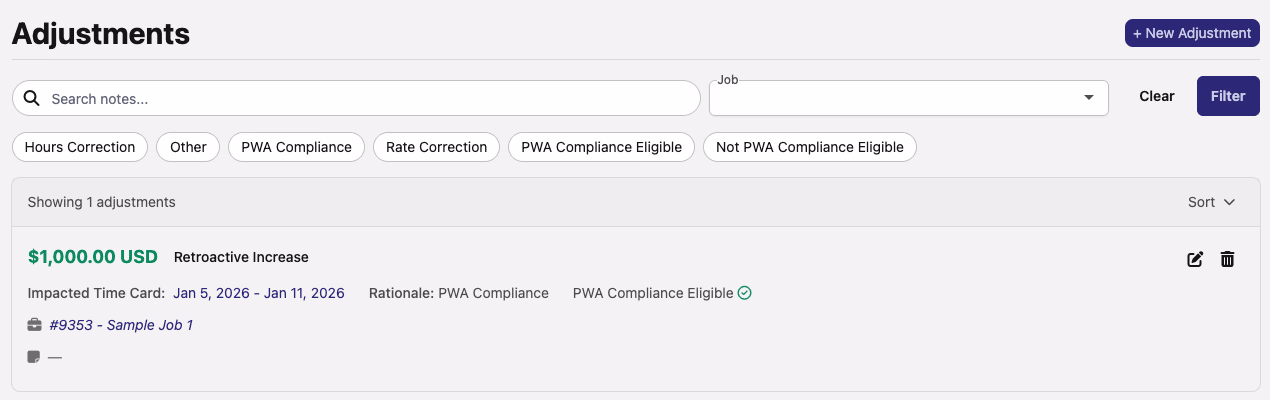
The adjustment will now be included in the list of adjustments at the bottom of the page.
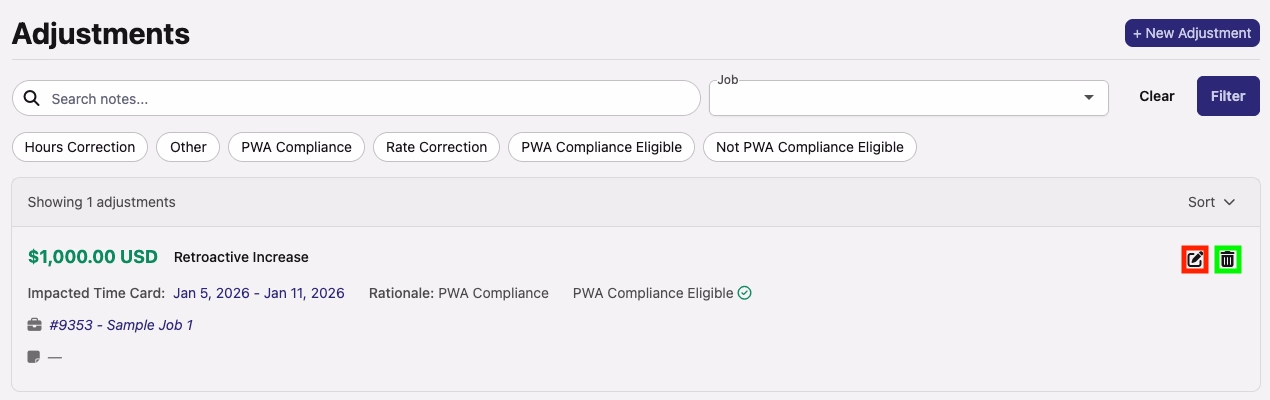
To edit an adjustment, click the pencil and paper icon to the right of the adjustment (indicated by the red box in the image below). This will open the "Edit Adjustment" form, where you can edit the same fields as the "New Adjustment" form. When finished, click the "Save" button in the bottom right corner of the form. To delete an adjustment, click the trashcan icon to the right of the adjustment (indicated by the green box in the image below).
Once an adjustment is created, it will have an immediate effect on the relevant time card. For example, if $1000 of backpay is owed to a worker and a PWA compliance adjustment of $1000 is created for that time card, the backpay flag on that worker's time card will disappear.

Before the adjustment

After the adjustment