Compliance
Navigating to the Compliance Tab
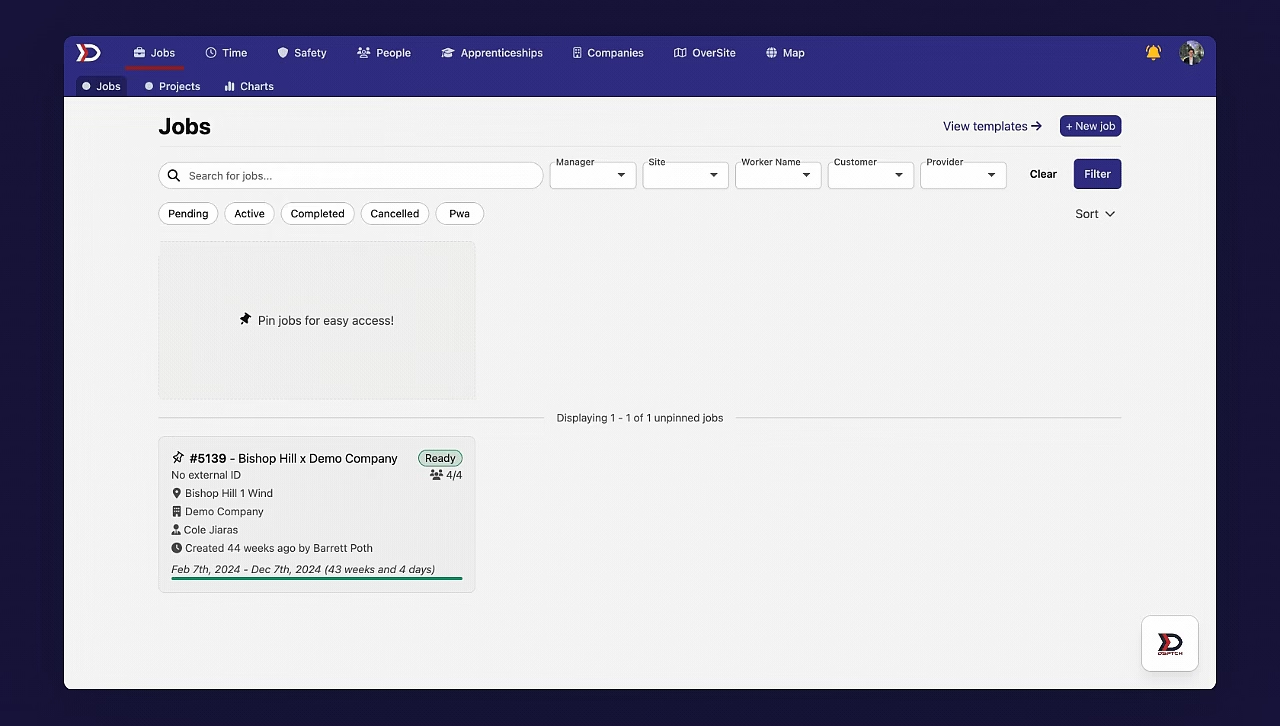
To navigate to the Compliance Tab, start by clicking on the "Jobs" tab from the main navigation bar at the top of the screen. Then, select the relevant Job Card. From the Job Card interface, select the "Compliance" Tab from the sub-navigation bar. View the video below for a demonstration:
For the Compliance Tab to be available on a Job Card, the Job must have enabled "Prevailing wage and apprenticeship (PWA) tracking" in the Create New Job Form.
For information on how to enable PWA tracking in the Create New Job Form, please read our Creating a Job – Web Help Document.
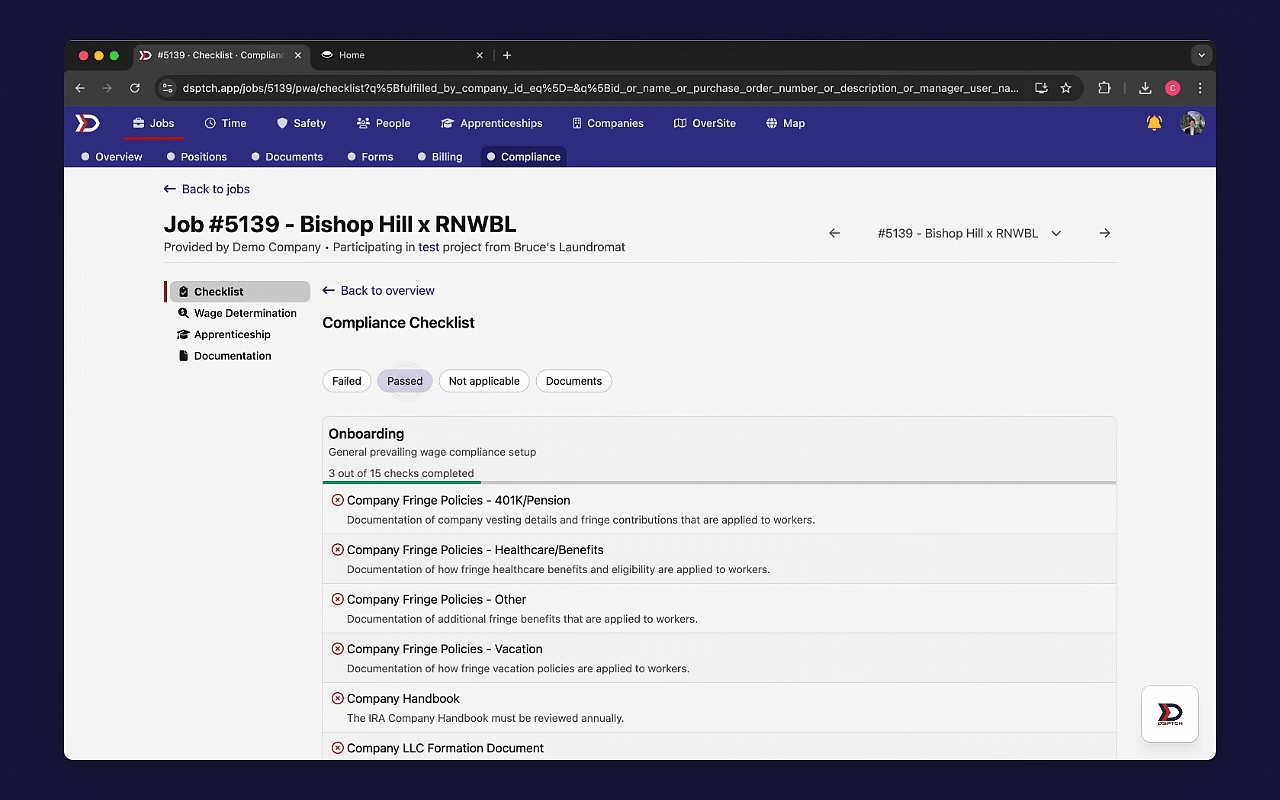
Compliance Checklist Page Overview
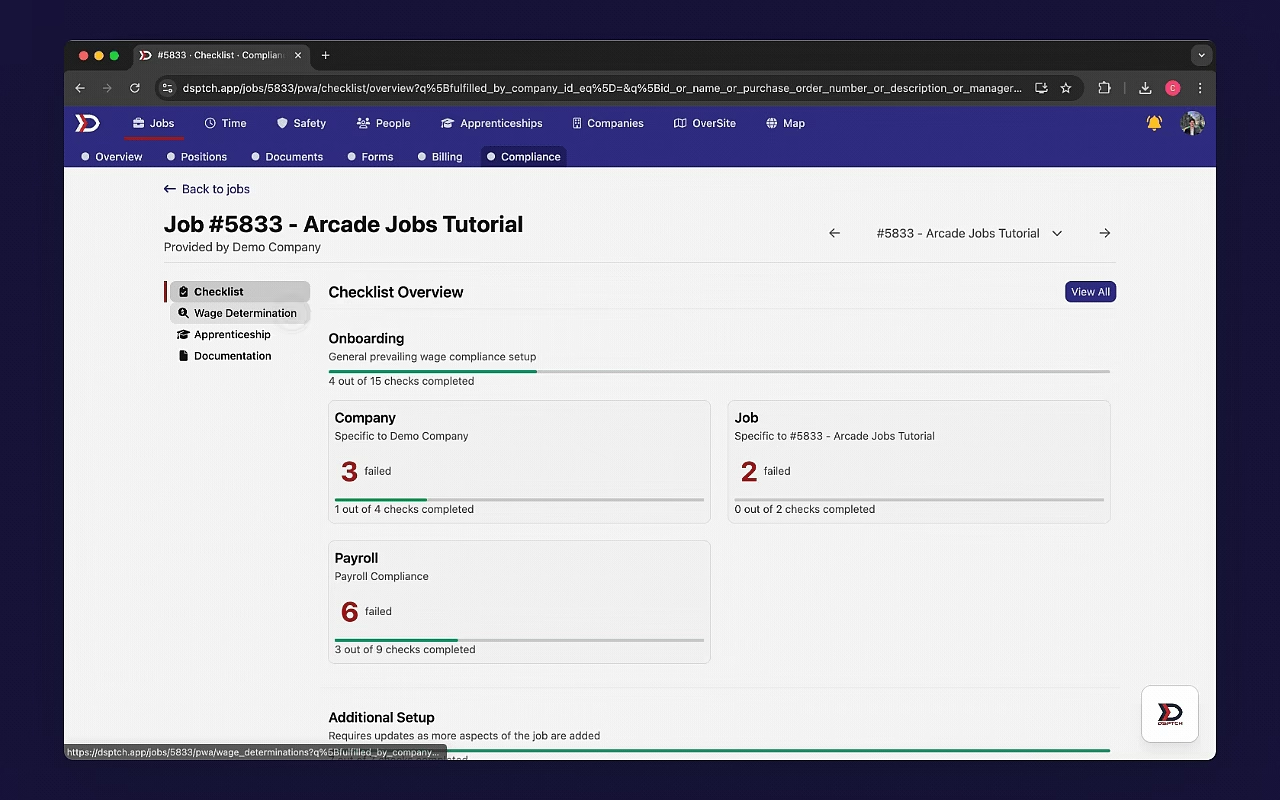
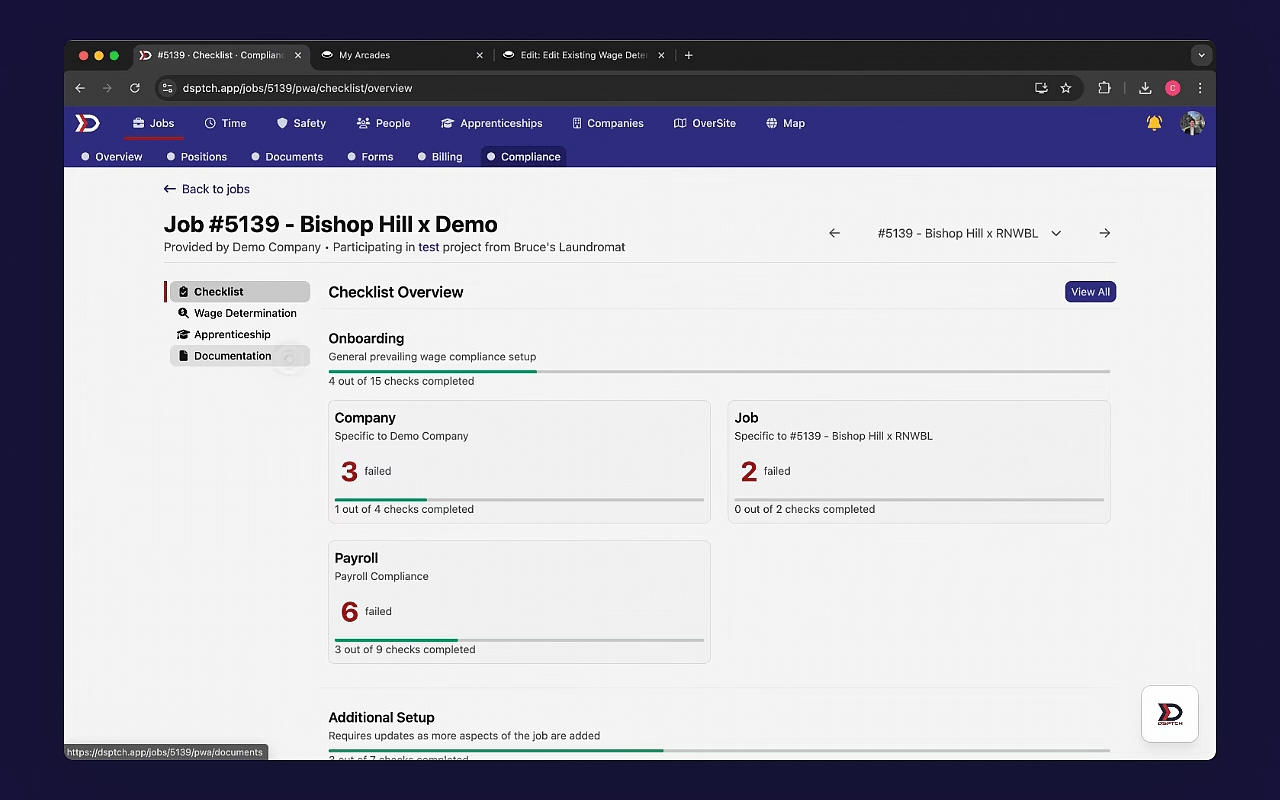
DSPTCH performs 117+ Compliance Checks to ensure adherence to prevailing wage requirements. These checks are grouped into three sections: Onboarding, Additional Setup, and Ongoing Maintenance.
- Onboarding Compliance Checks verify that all prevailing wage compliance requirements are properly set up for the Company, Jobs, and Payroll System.
- Additional Setup Compliance Checks confirm that required updates are made as new data is added to Jobs.
- Ongoing Maintenance Compliance Checks provide continuous monitoring to maintain compliance throughout the Job.
Each section includes a Progress Bar organized by category, offering a view of the Job’s Compliance Status. See image below for an example:

Filtering Compliance Checks
On the Compliance Check List View, there are filtering options based on the status of the check (highlighted in the red box in the image below):
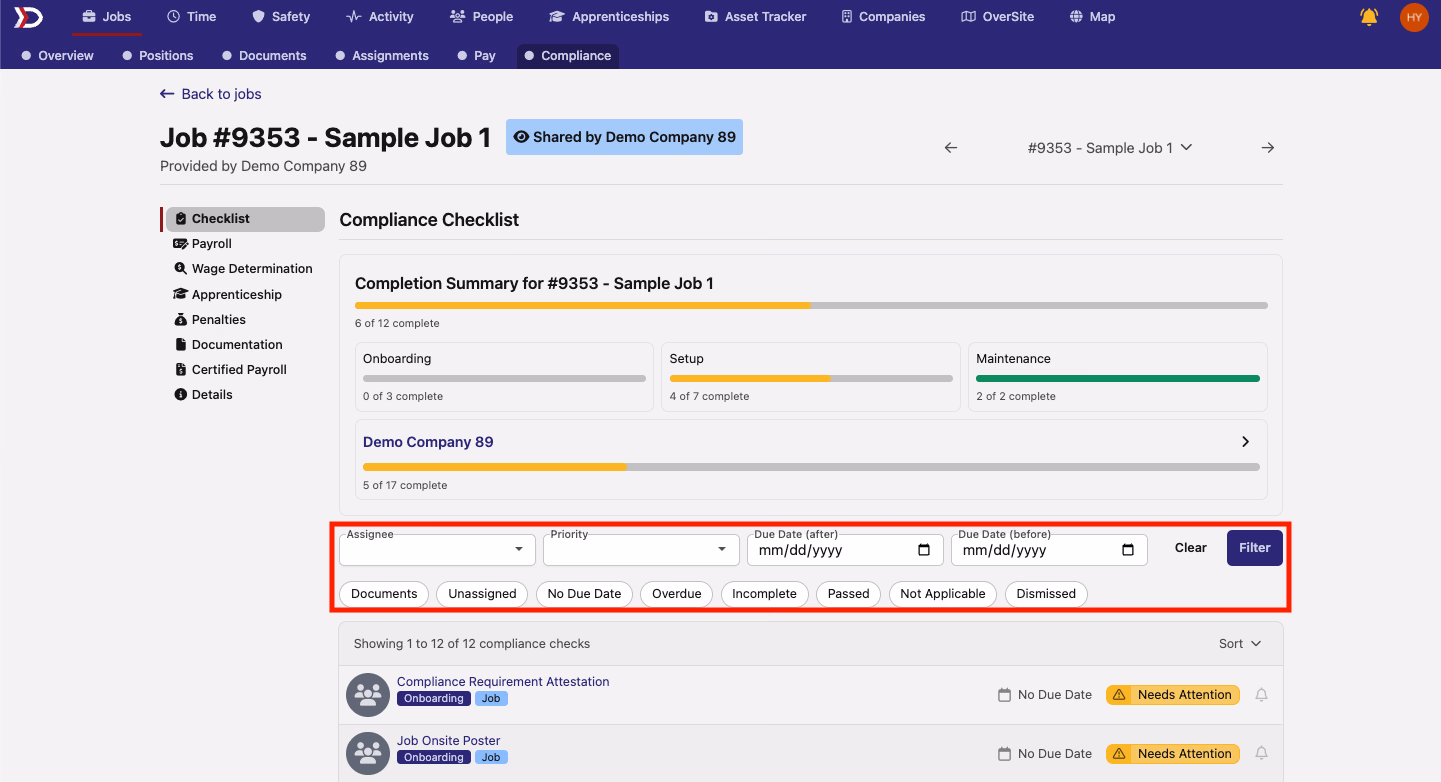
- Documents: Filters for all Compliance Checks which require a Document upload
- Unassigned: Filters for all Compliance Checks that have not been assigned
- No Due Date: Filters for all Compliance Checks that do not have a due date
- Overdue: Filters for all Compliance Checks that have a due date that has passed
- Incomplete: Filters for all Compliance Checks which are non-compliant
- Passed: Filters for all Compliance Checks which are compliant
- Not Applicable: Filters for all Compliance Checks which are non-applicable to your Job
- Dismissed: Filters for all Compliance Checks which have been dismissed
These filters are a select-all-that-apply option, meaning more than one filter can be applied at once. See the video below for a demonstration of filters:
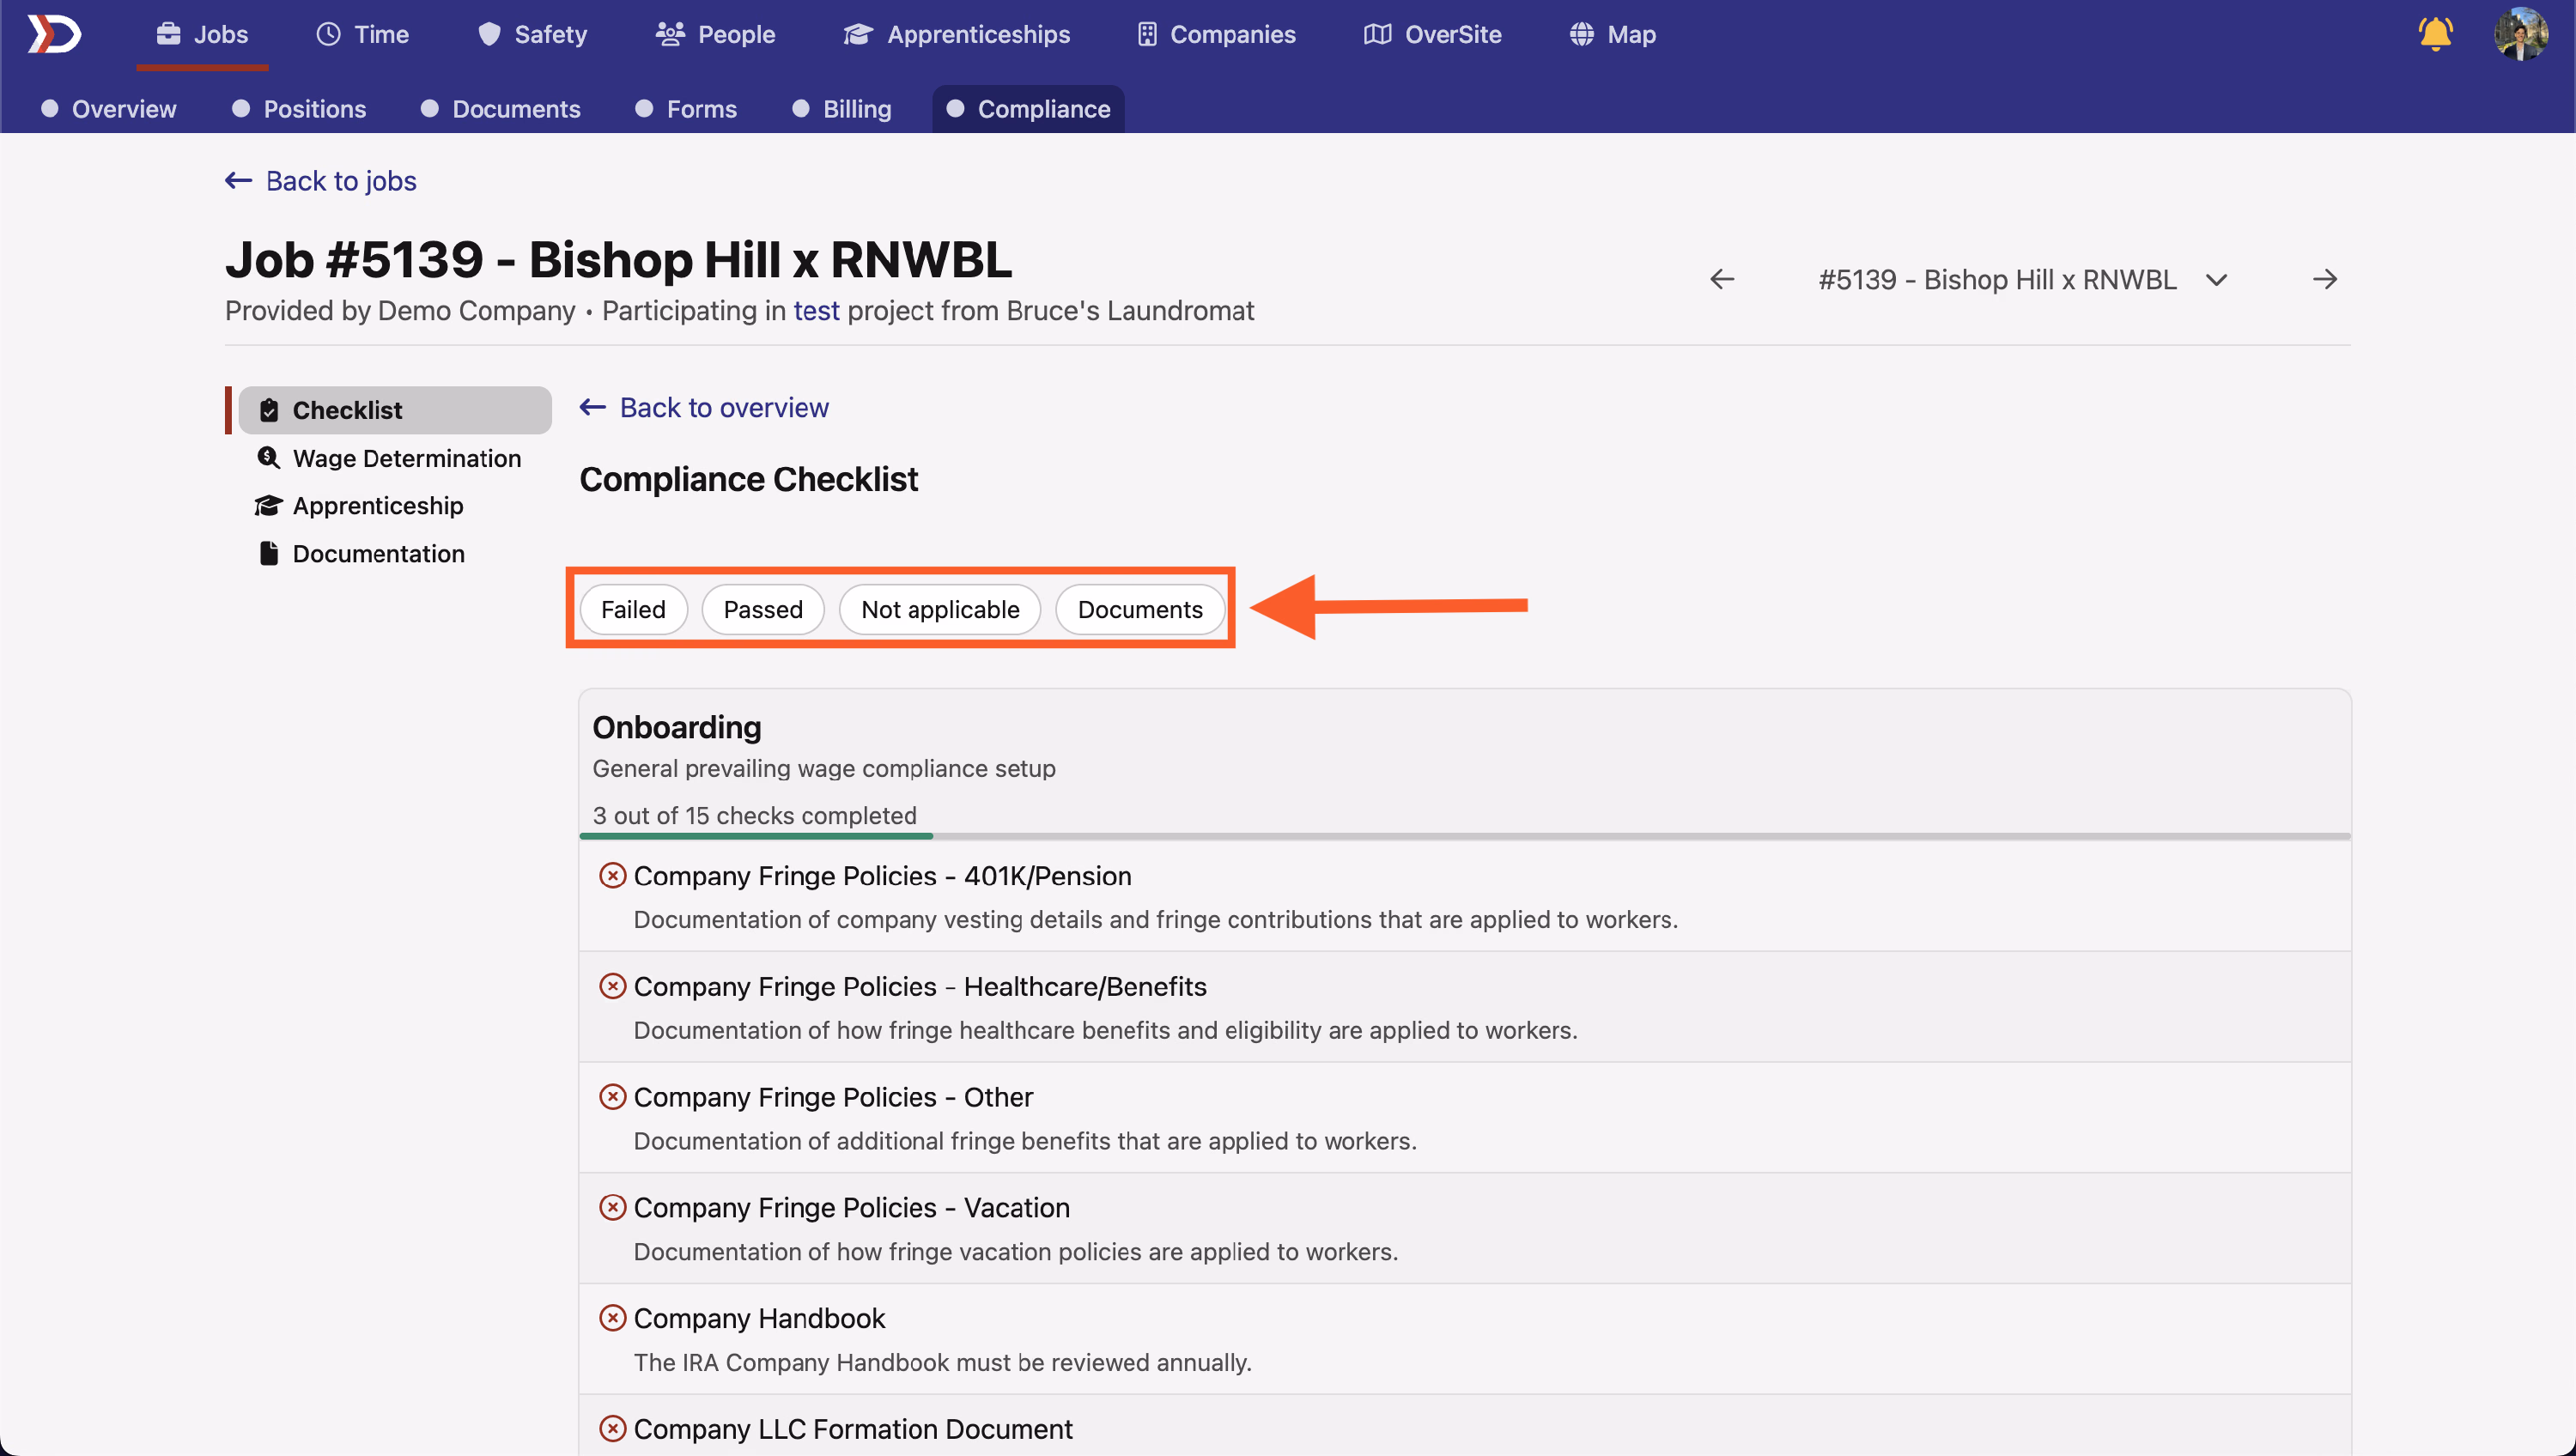
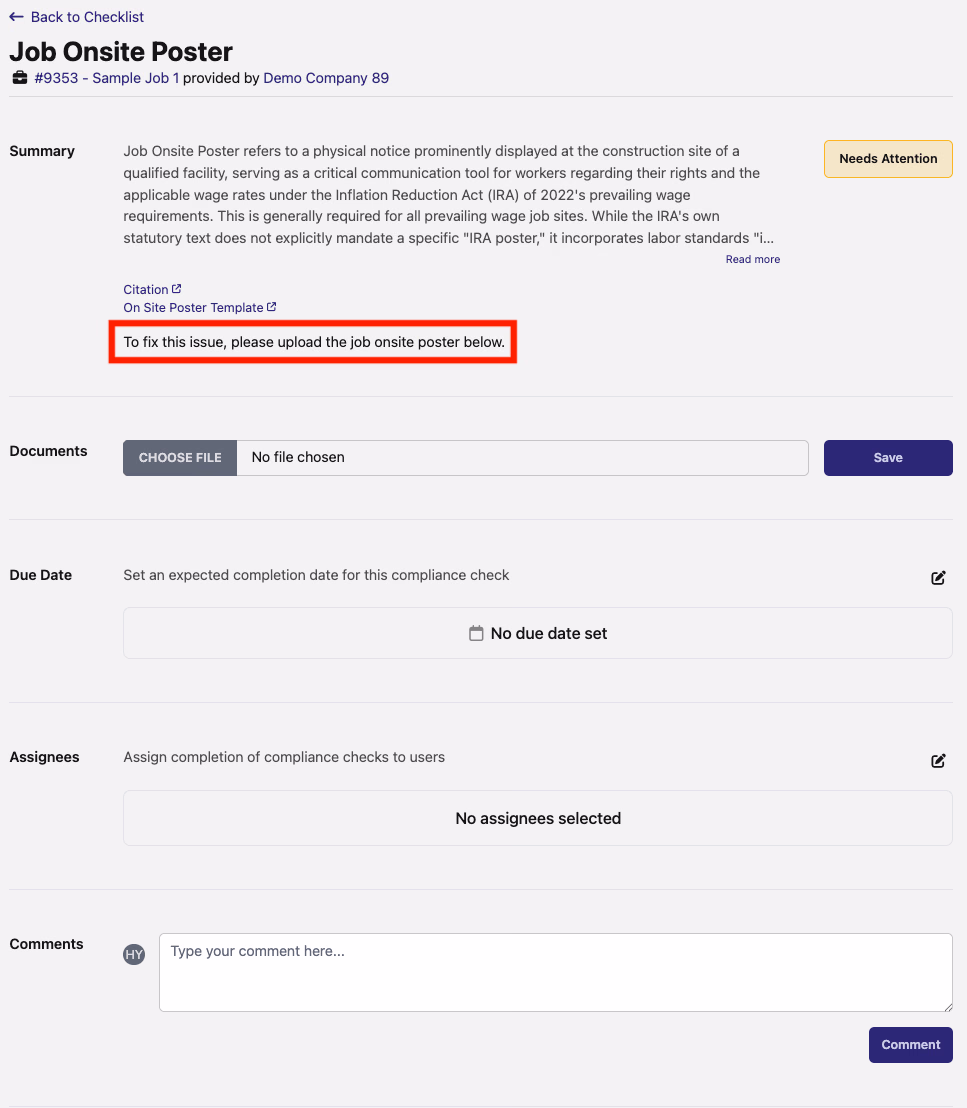
Resolving Failed Compliance Checks
Each Compliance Check contains instructions on how to complete the check (highlighted in the red box in the image below):
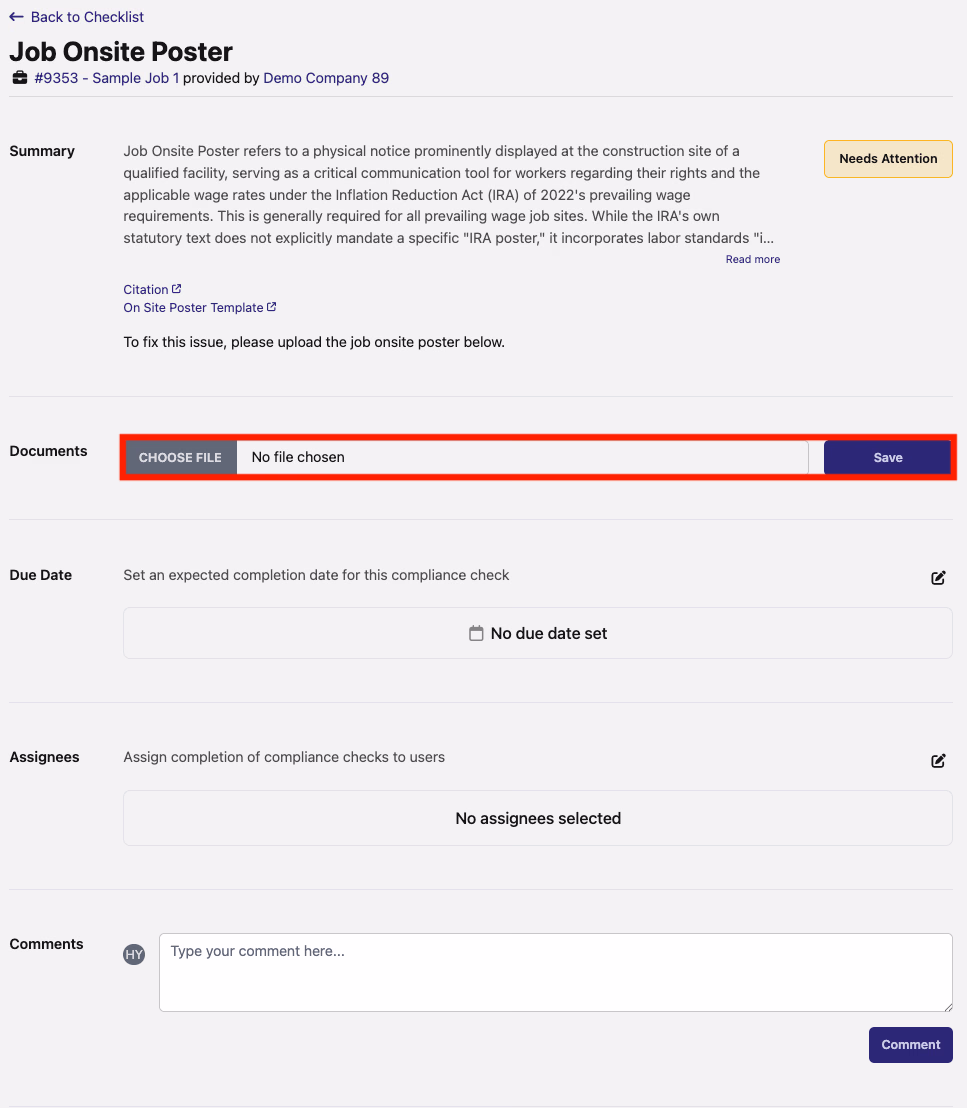
For Compliance Checks that require a document upload, there will be a file upload option available directly within the check (highlighted in the red box in the image below):
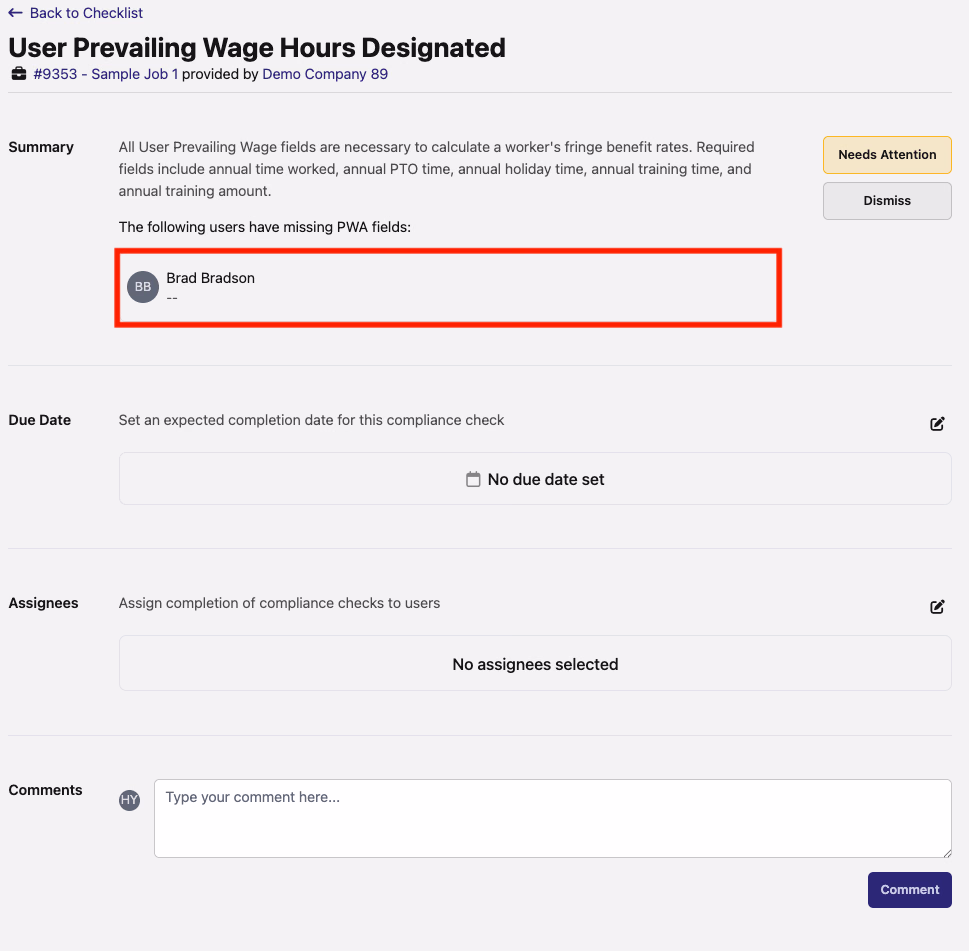
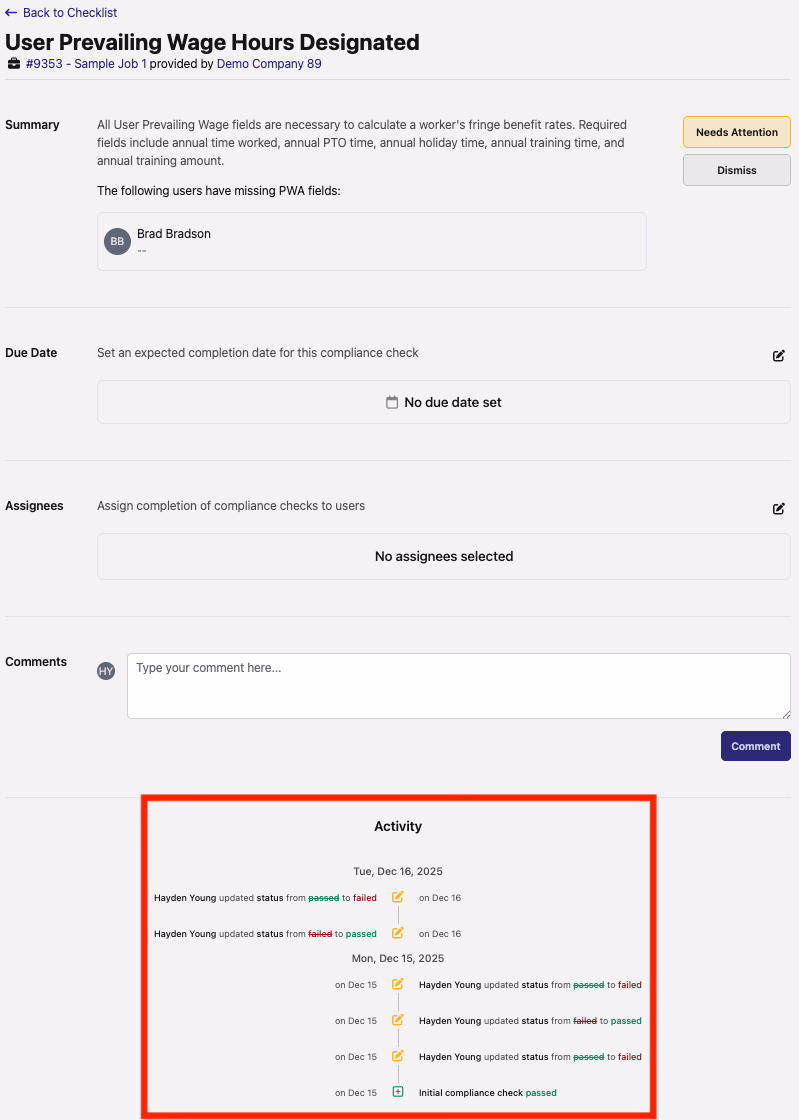
For Compliance Checks that require a specific action (such as designating a user's Prevailing Wage fields in the example below), DSPTCH will flag which users are not in compliance (highlighted in the red box in the image below):
Compliance Check Activity History Log
Each Compliance Check contains an Activity History Log which shows a running log of all changes to the compliance status. Each change is timestamped, logs which user was responsible for the change, and provides a brief description of the change (highlighted in the red box in the image below):
How to Create a Wage Determination
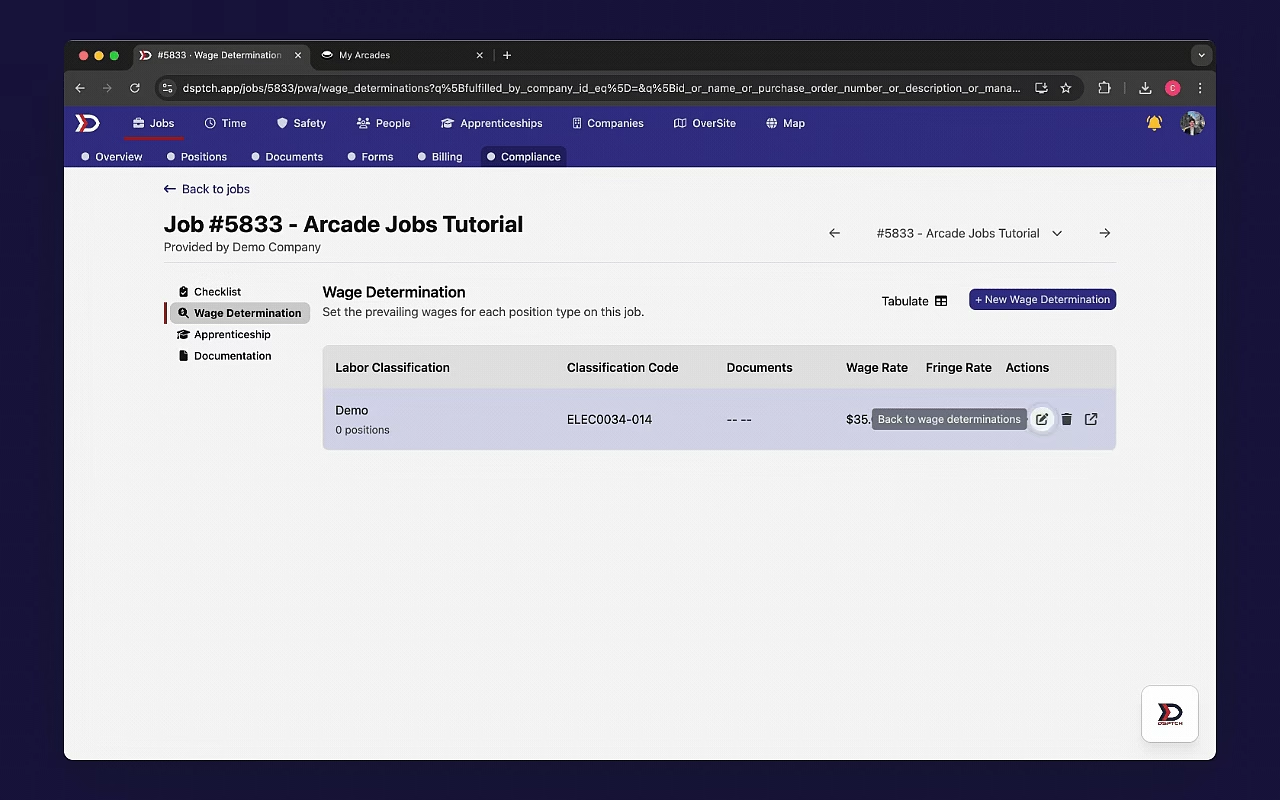
Start by navigating to the Compliance Tab (view instructions here). Then, click the "Wage Determinations" Tab from the menu on the left hand side of the screen. To create a new Wage Determination, click the "+ New Wage Determination" Button on the top right of the screen. See video below for a demonstration:
The Create New Wage Determination Form will open.
Fill out the Wage Determination information based upon the Wage Determination sheet that applies to your job.
The image below shows an example of a Wage Classification, and where the required values are on the sheet.
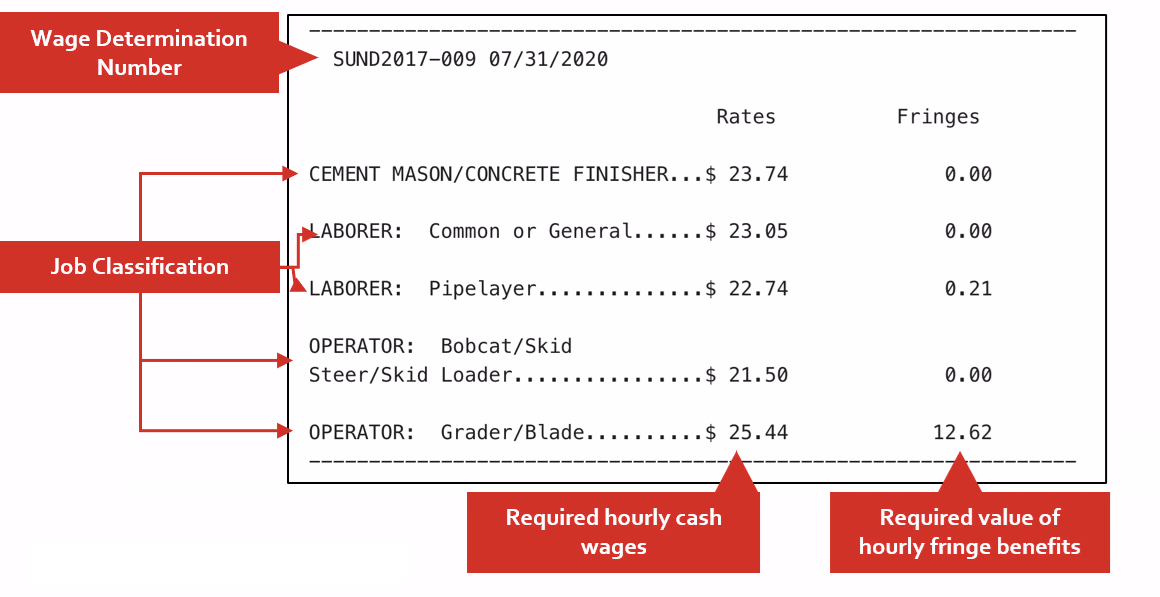
Example of a single Classification Code on a Wage Determination Sheet
Using "Laborer: Pipelayer" from the image above as an example, a filled out Wage Determination would look like this:
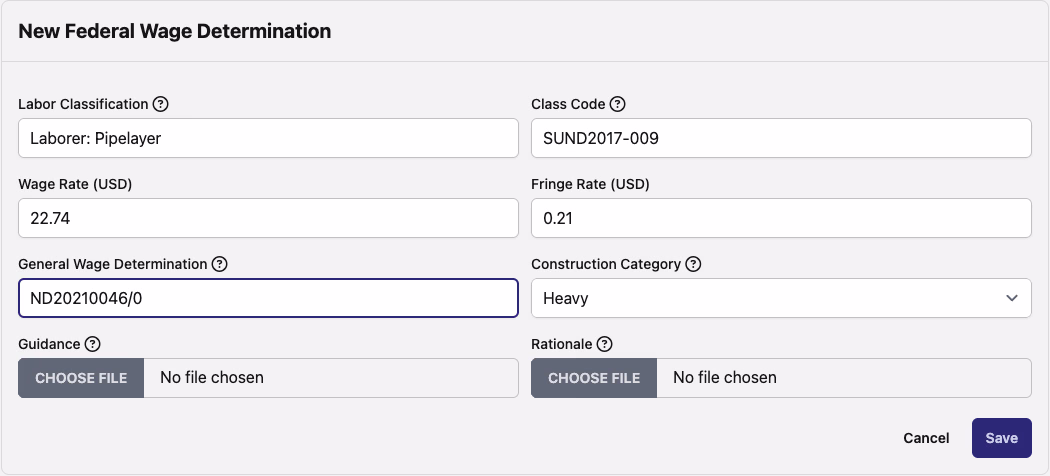
- Labor Classification (Required)
- The name of the Labor Classification from the reference document or wage determination.
- Class Code (Optional):
- 12-digit Alphanumeric ID for the Labor Classification. A classification code can have multiple labor classifications.
- Wage Rate (Optional):
- The Wage Rate, in dollars, of the Labor Classification.
- Fringe Rate (Optional):
- The fringe rate, in dollars, of the Labor Classification.
- General Wage Determination (Optional):
- The reference number of the wage determination document.
- Formatted as <State><Year><Number>/<Revision>
- This can be found on the document, or on the suffix of the url for the wage determination.
How to Edit an Existing Wage Determination
Changes to the wage rate may cause hourly rates to change on positions. Check out our Hourly Rates article to learn more.
Apprenticeship Tab Overview
Start by navigating to the Compliance Tab (view instructions here). Then, click the "Apprenticeship" Tab from the menu on the left hand side of the screen. This will load the Apprenticeship Page (pictured below):
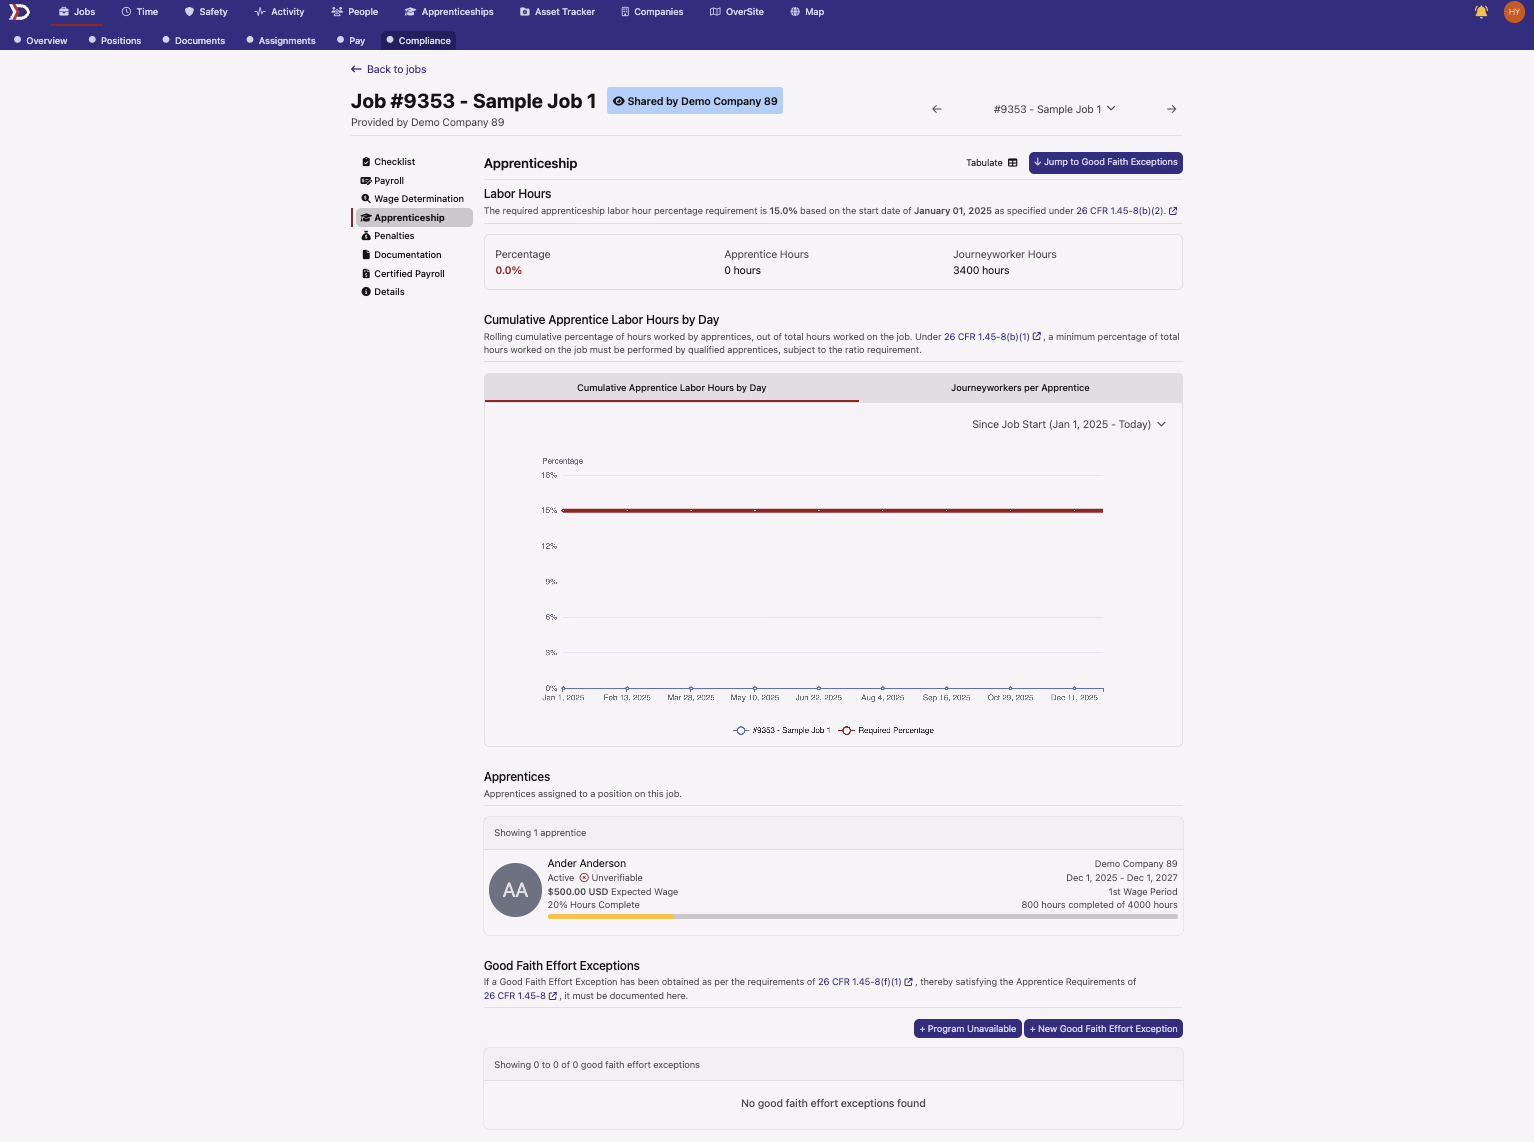
Apprenticeship Labor Hours Dashboard
The Apprenticeship Labor Hours Dashboard provides the ratio of Apprentice hours. For Jobs beginning after 2024, the required ratio of Apprentice to Non-Apprentice hours is 15%.

- Percentage:
- Shows the ratio of Apprentice to Non-Apprentice Hours in % terms
- A green value implies a compliant percentage; a red value implies a non-compliant percentage
- Apprentice Hours:
- Lists the total number of hours worked by Apprentices on the Job
- Journeyworker Hours :
- Lists the total number of hours worked by Non-Apprentices on the Job
Daily Labor Hours Dashboard
Background:
- Cumulative Apprentice Labor Hours:
- For Jobs requiring compliance with PWA standards, it is required that qualified apprentices must be perform at least 15% of the total hours worked. DSPTCH recommends consulting these guidelines to ensure your project remains compliant.
- Journeyworkers per Apprentice:
- For Jobs requiring compliance with PWA standards, it is also required that the number of apprentices to journeyworkers on a project cannot exceed the ratio established by the Department of Labor (DOL) or the applicable state apprenticeship agency, or the registered apprenticeship program itself. DSPTCH recommends consulting these guidelines to ensure your project remains compliant.
Both the Cumulative Apprentice Labor Hours and Journeyworkers per Apprentice are graphically represented in the Daily Labor Hours Dashboard.
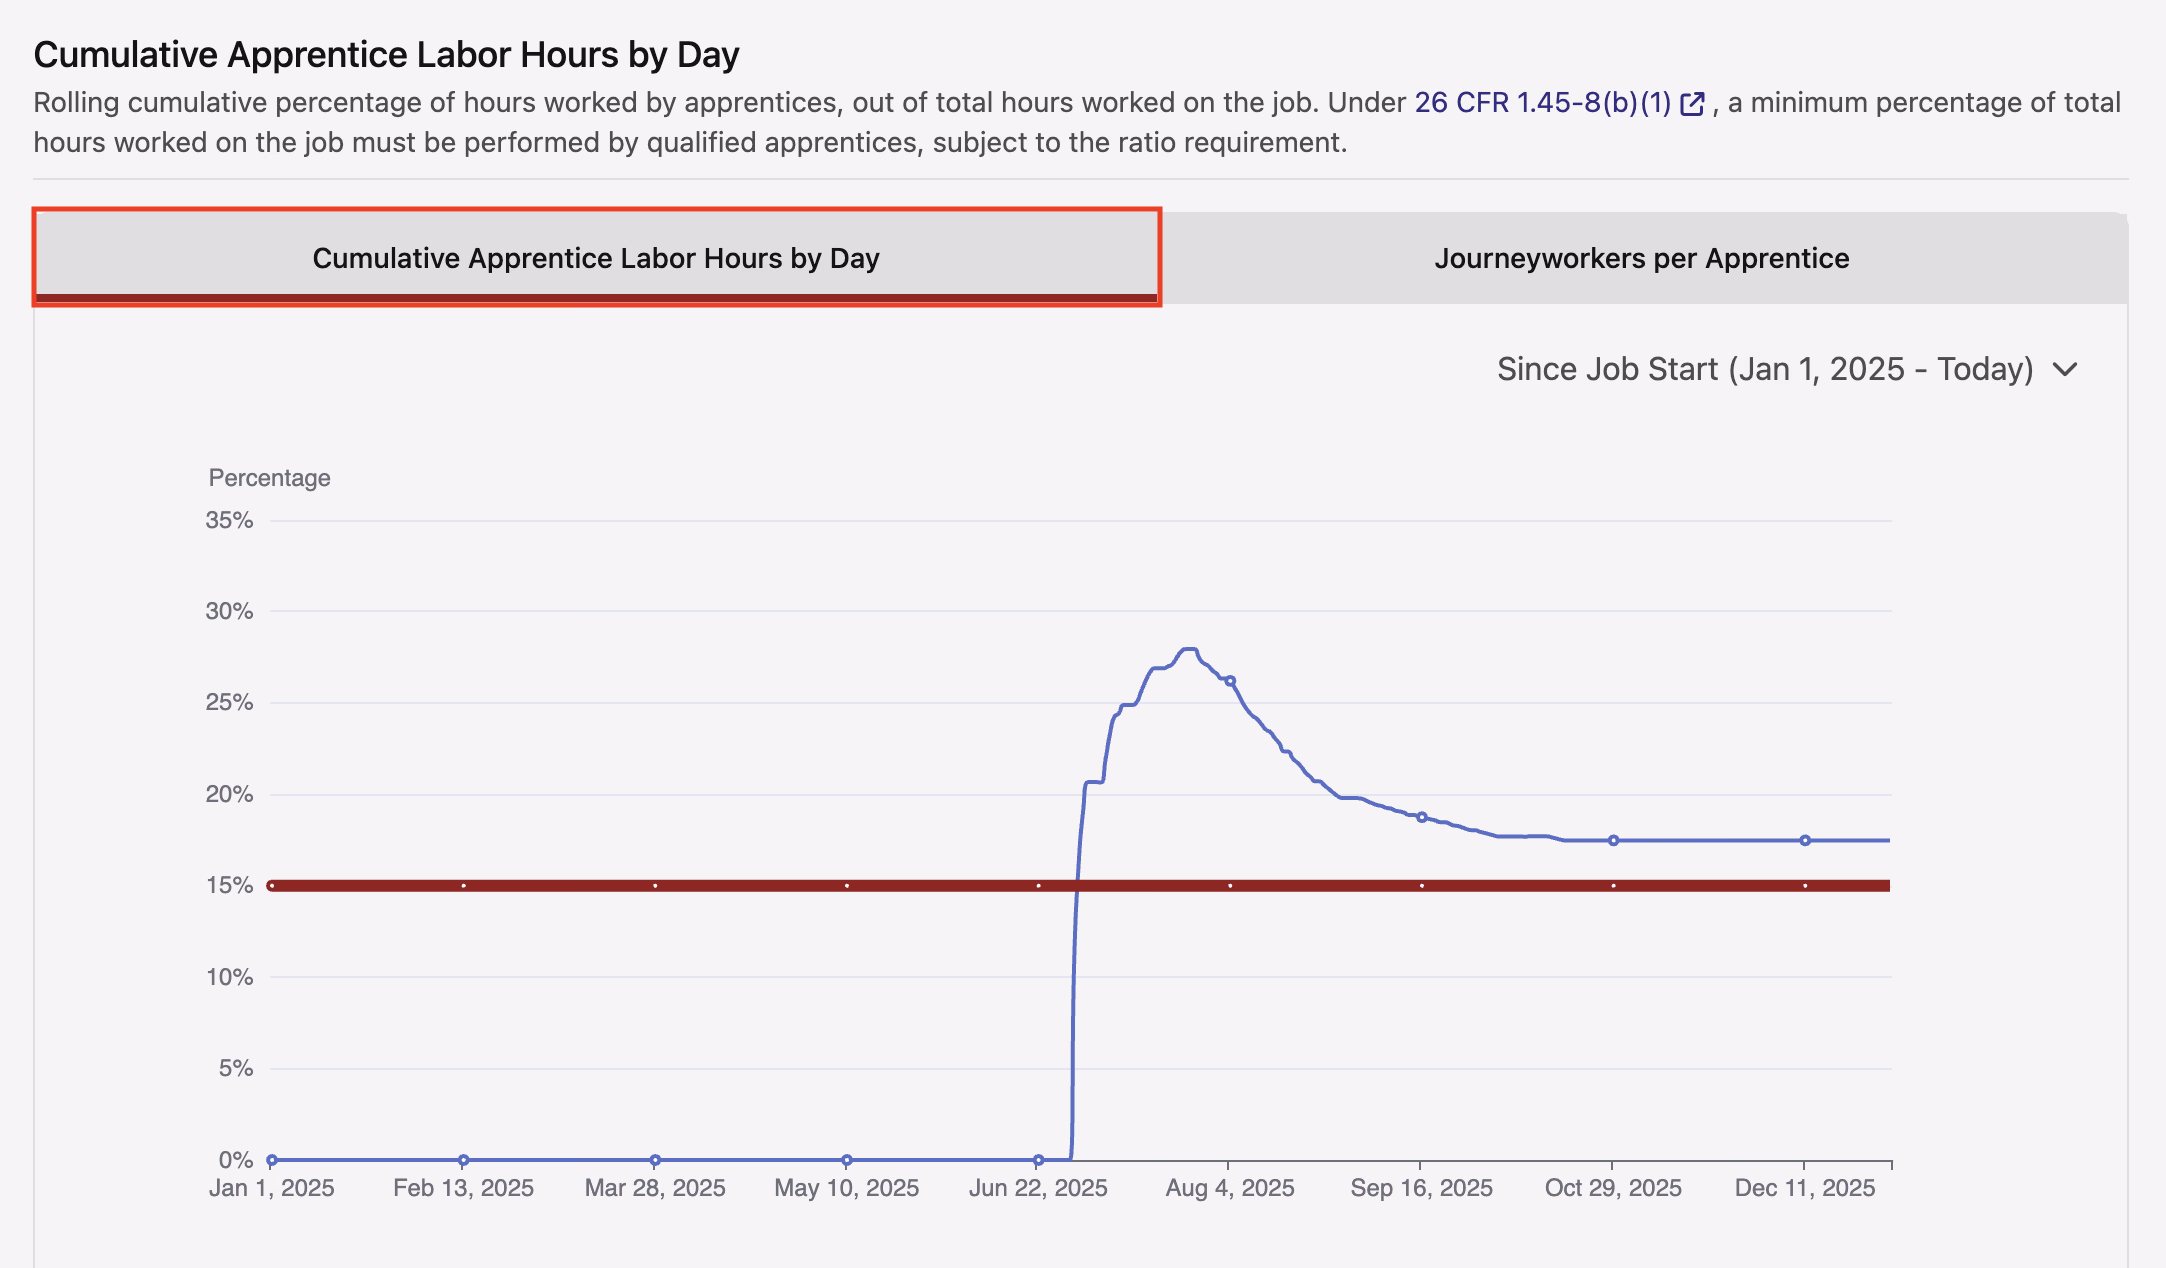
The Cumulative Apprentice Labor Hours Data is available under the "Cumulative Apprentice Labor Hours by Day" View (highlighted in the red box in the image below). The Cumulative Apprentice Labor Hours by Day view provides a daily breakdown of the percentage of hours worked by Apprentices, with a red line marking the 15% minimum requirement.
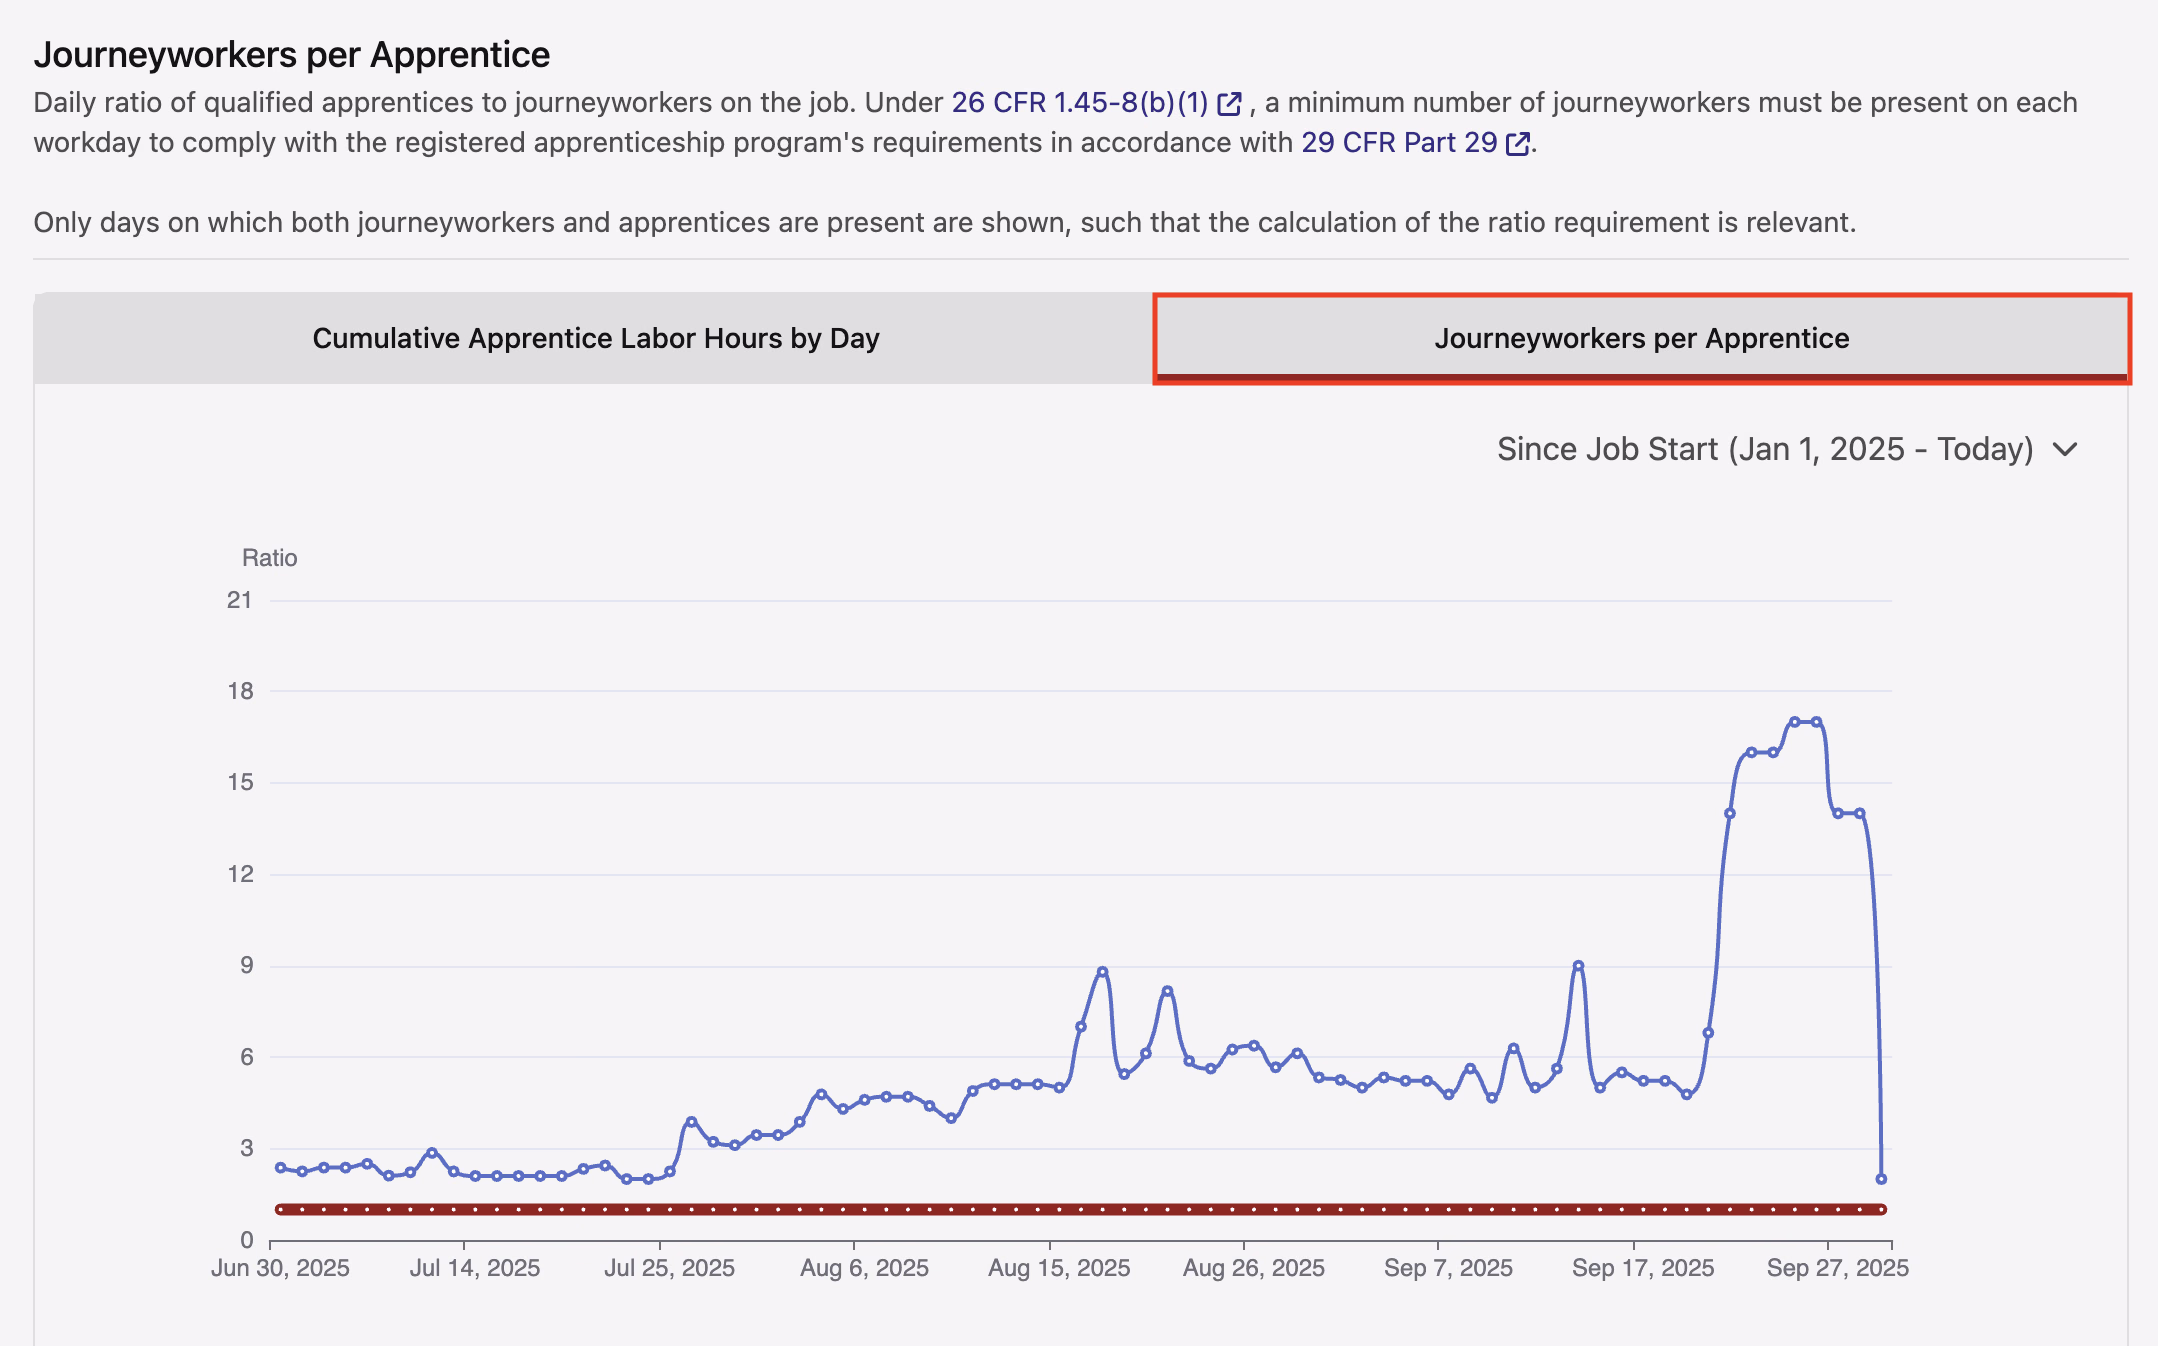
The Journeyworkers per Apprentice Data is available under the "Journeywokers per Apprentice" View (highlighted in the red box in the image below). The Apprentices per Journey Worker View provides a daily breakdown of the ratio of Apprentices to Non-Apprentices actively working on the Job.
List of Apprentices on the Job
A List of all Apprentices working on the Job is available at the bottom of the Apprenticeship Tab (pictured below).
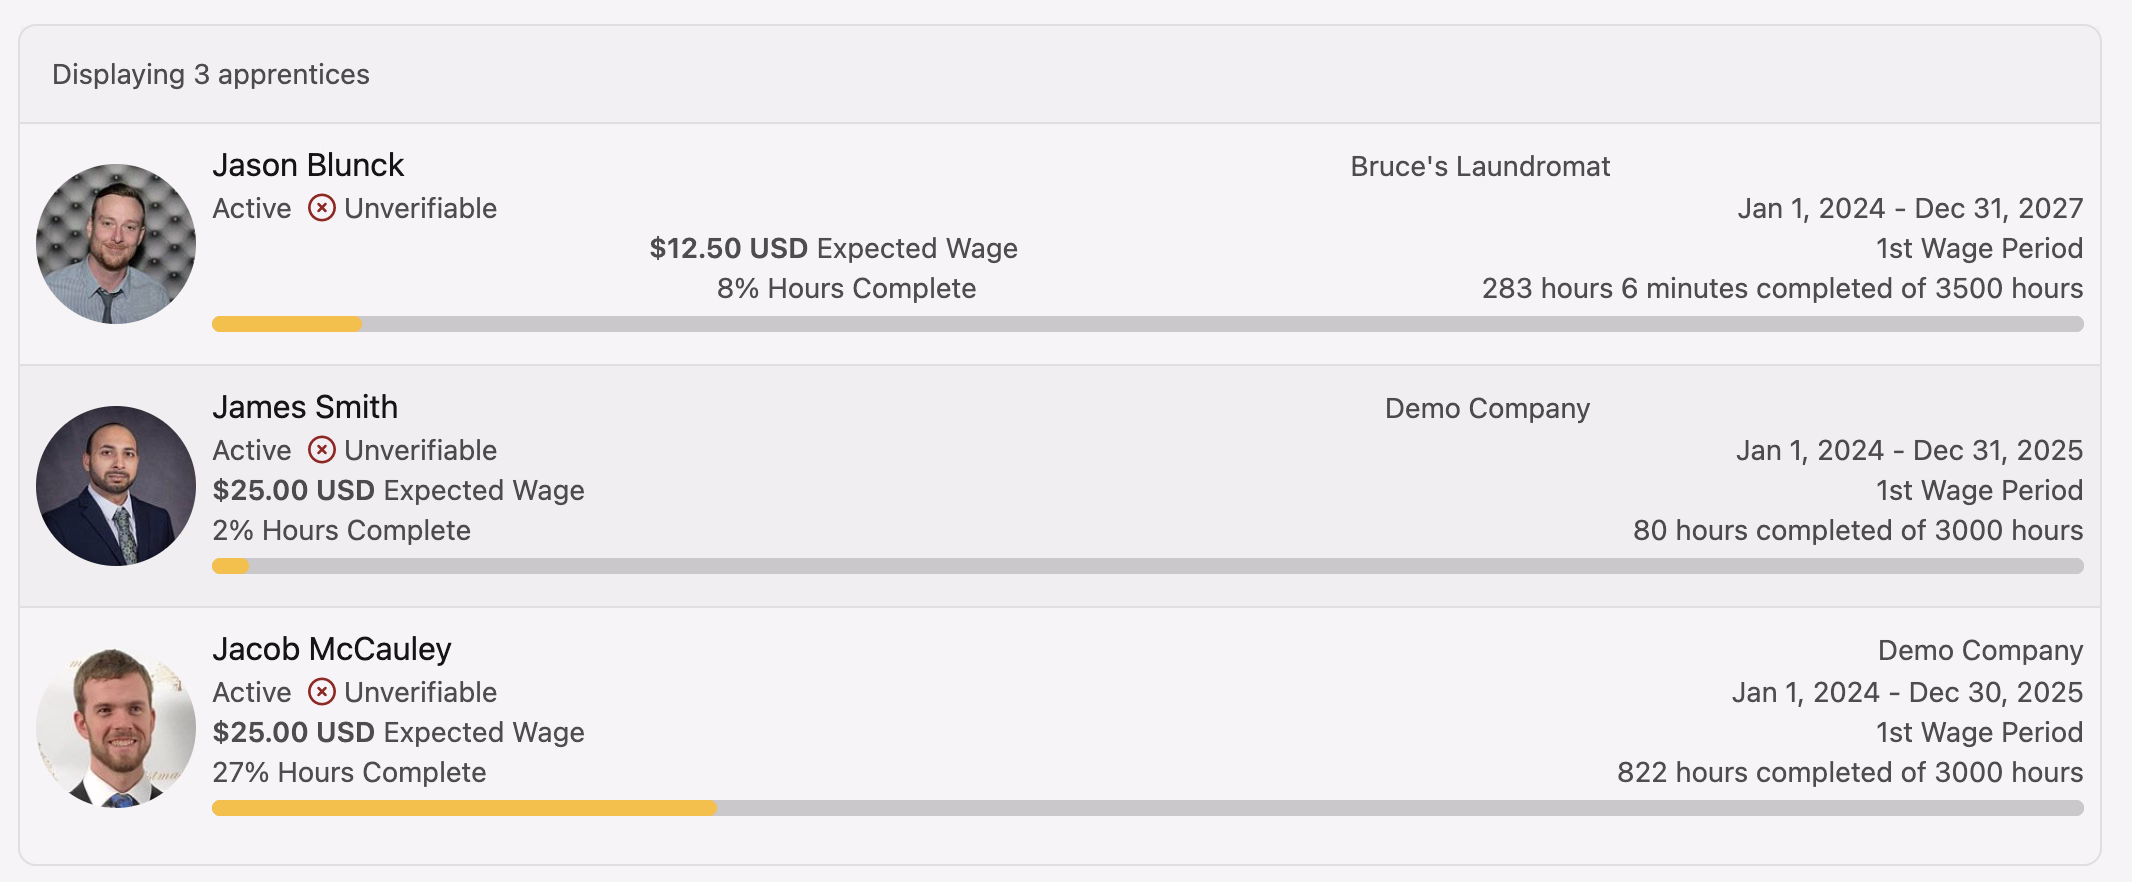
Each Apprentice's Profile contains useful information. Each Profile contains the Apprentice's Status (active/inactive), expected Hourly Rate, and a Progress Bar towards their Apprenticeship Hour Requirements.
The Progress Bar also lists the number of hours that have already been completed and the total number of hours required by the Apprenticeship Program.
Documentation Page Overview
Navigating to the Documentation Page
Start by navigating to the Compliance Tab (view instructions here). Then, click the "Documentation" Tab from the menu on the left hand side of the screen. See video below for a demonstration:
Create New Documentation
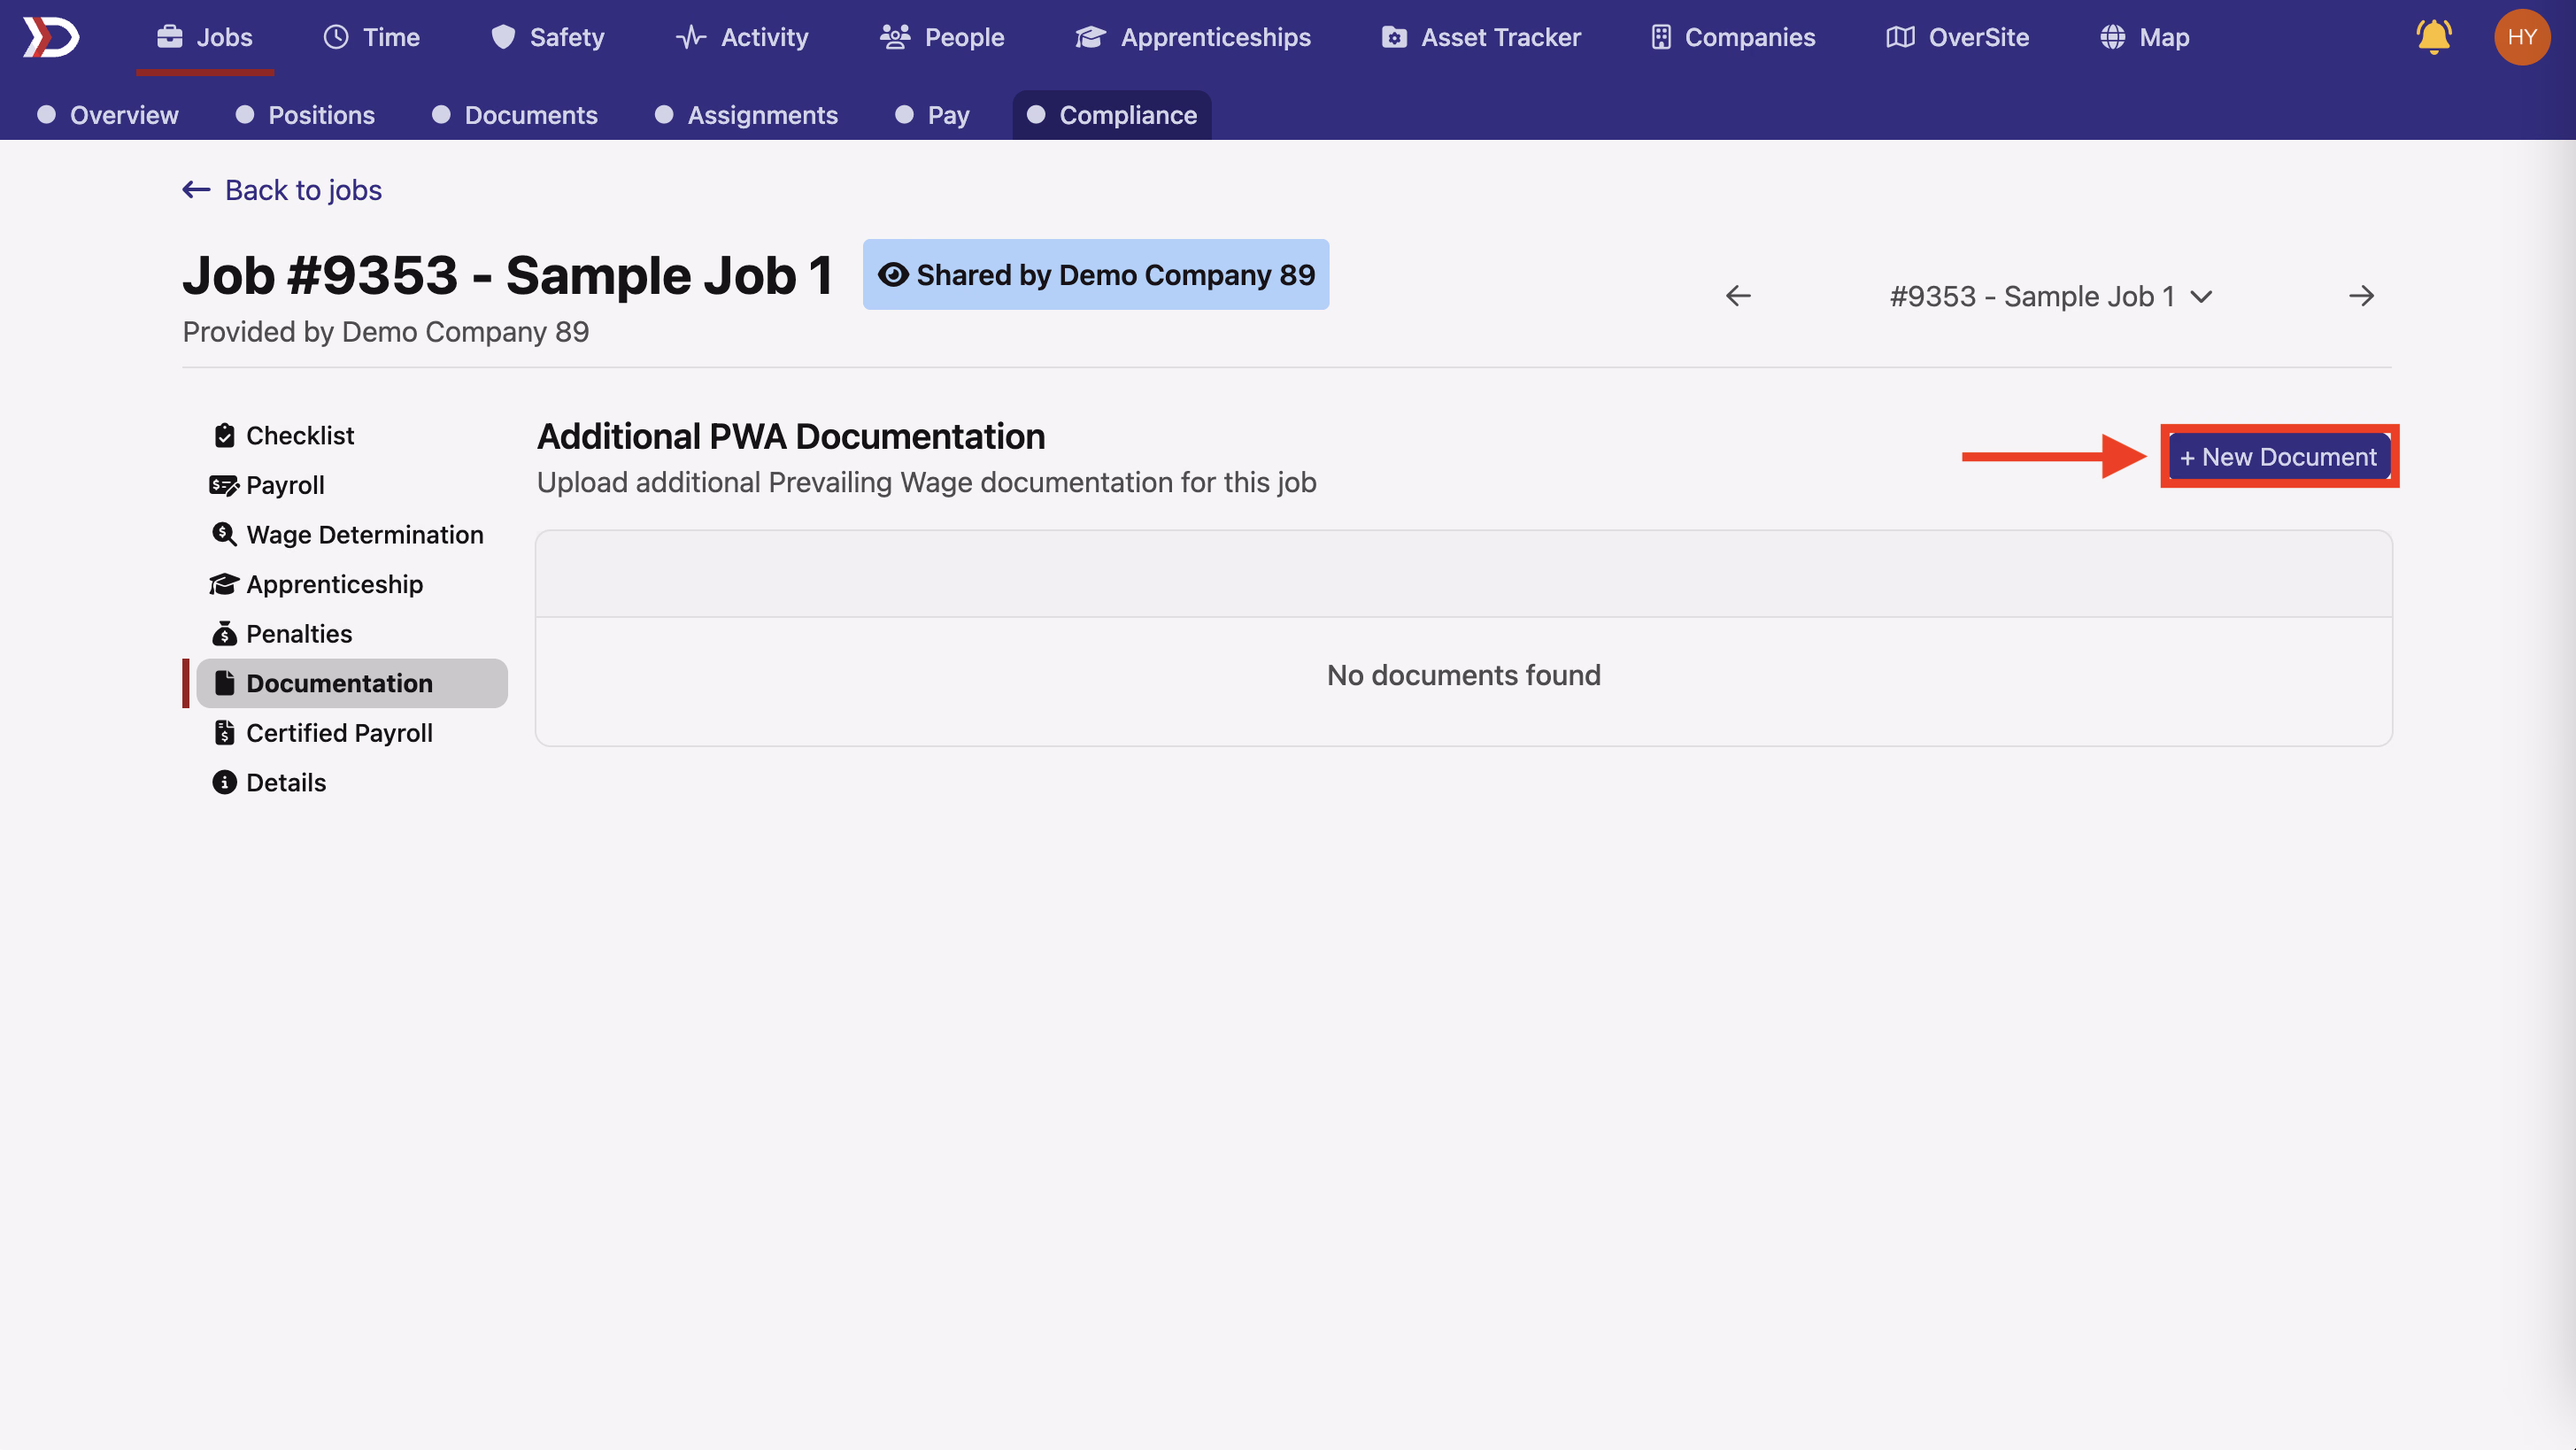
To create new Documentation, click the "+ New Document" button at the top right of the screen (highlighted in the red box in the image below):
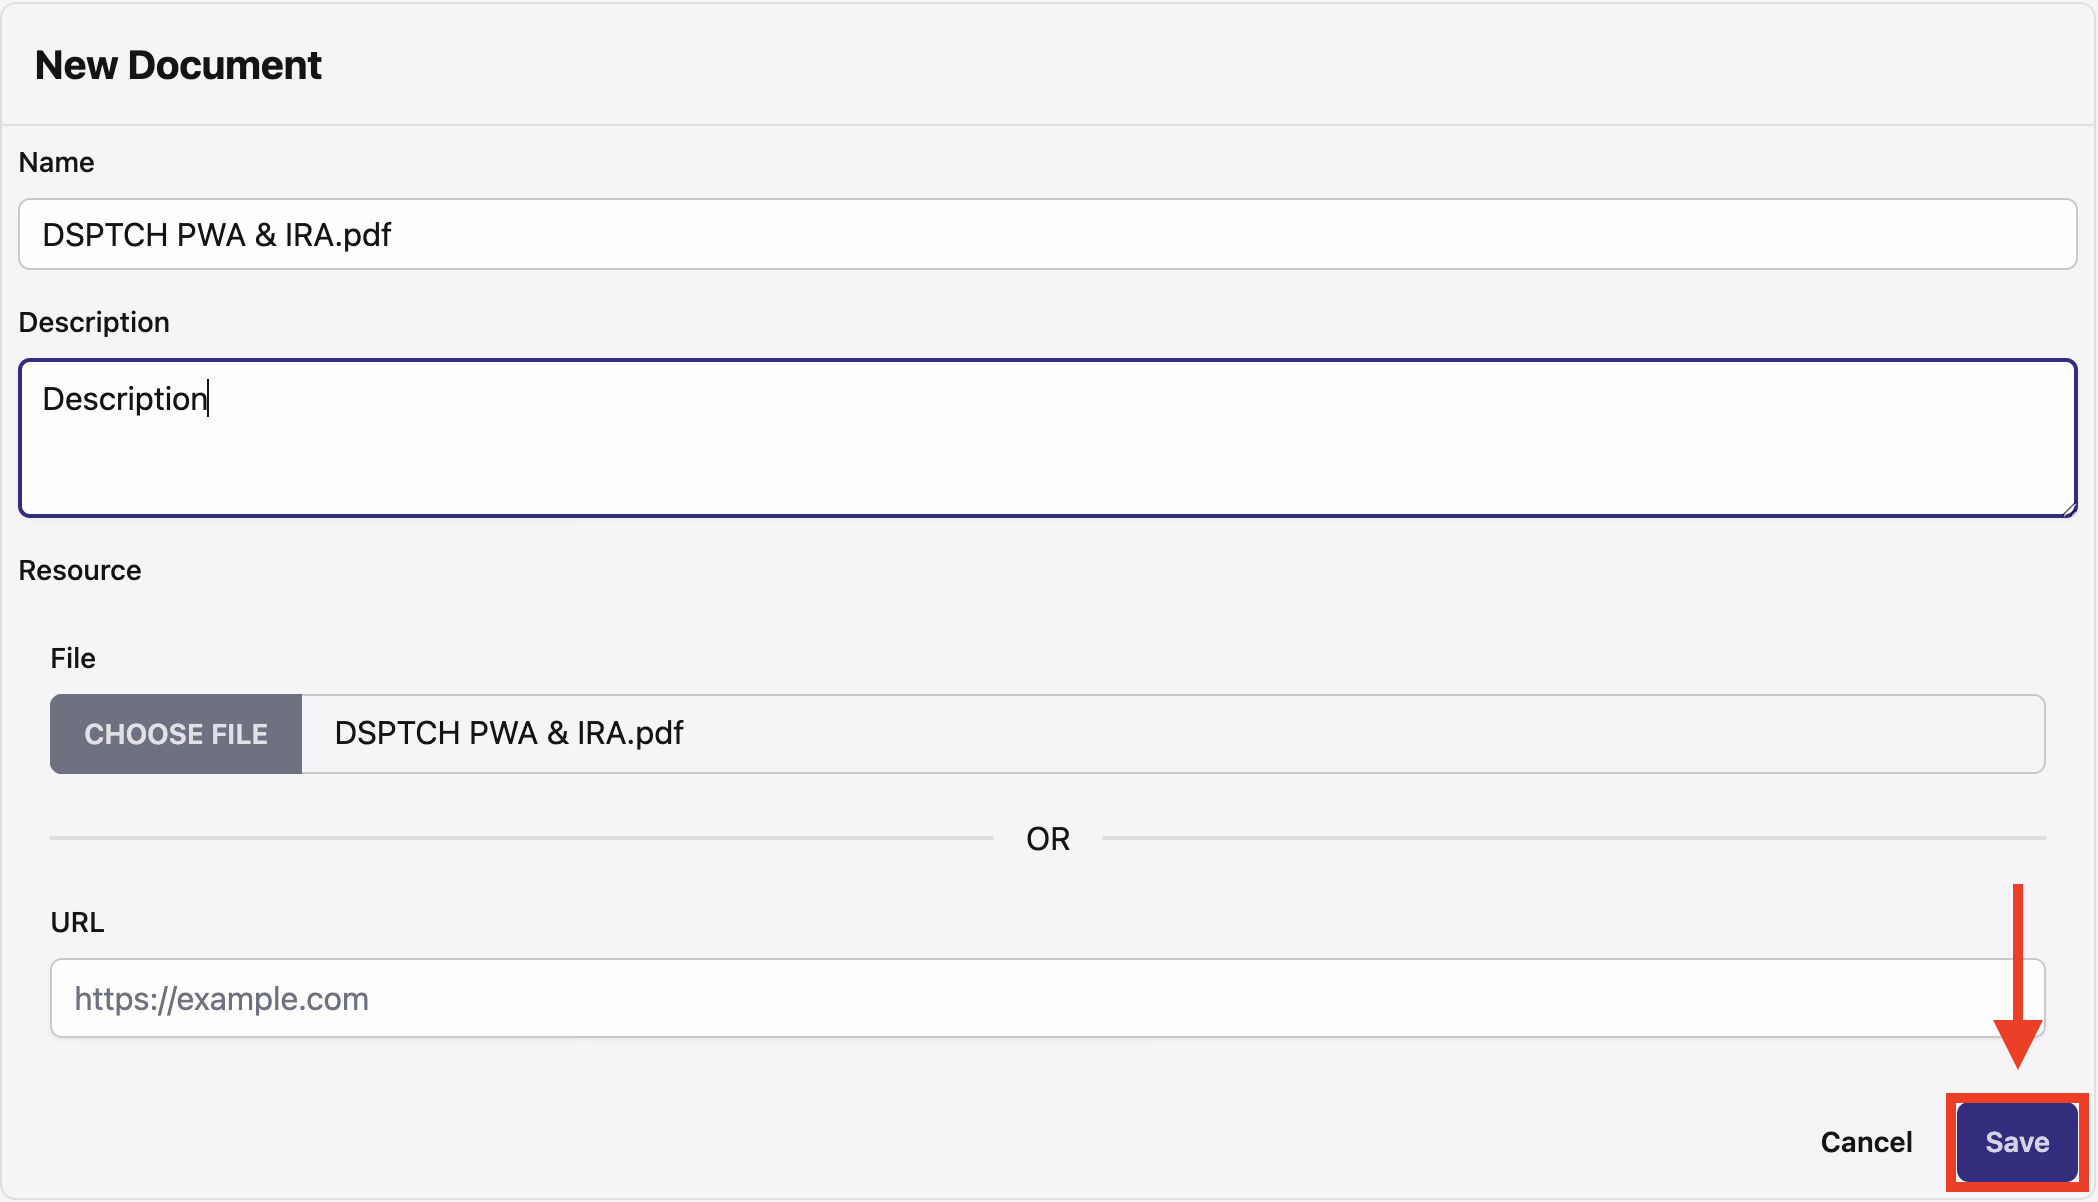
This will open the Create New Document Form (pictured below):
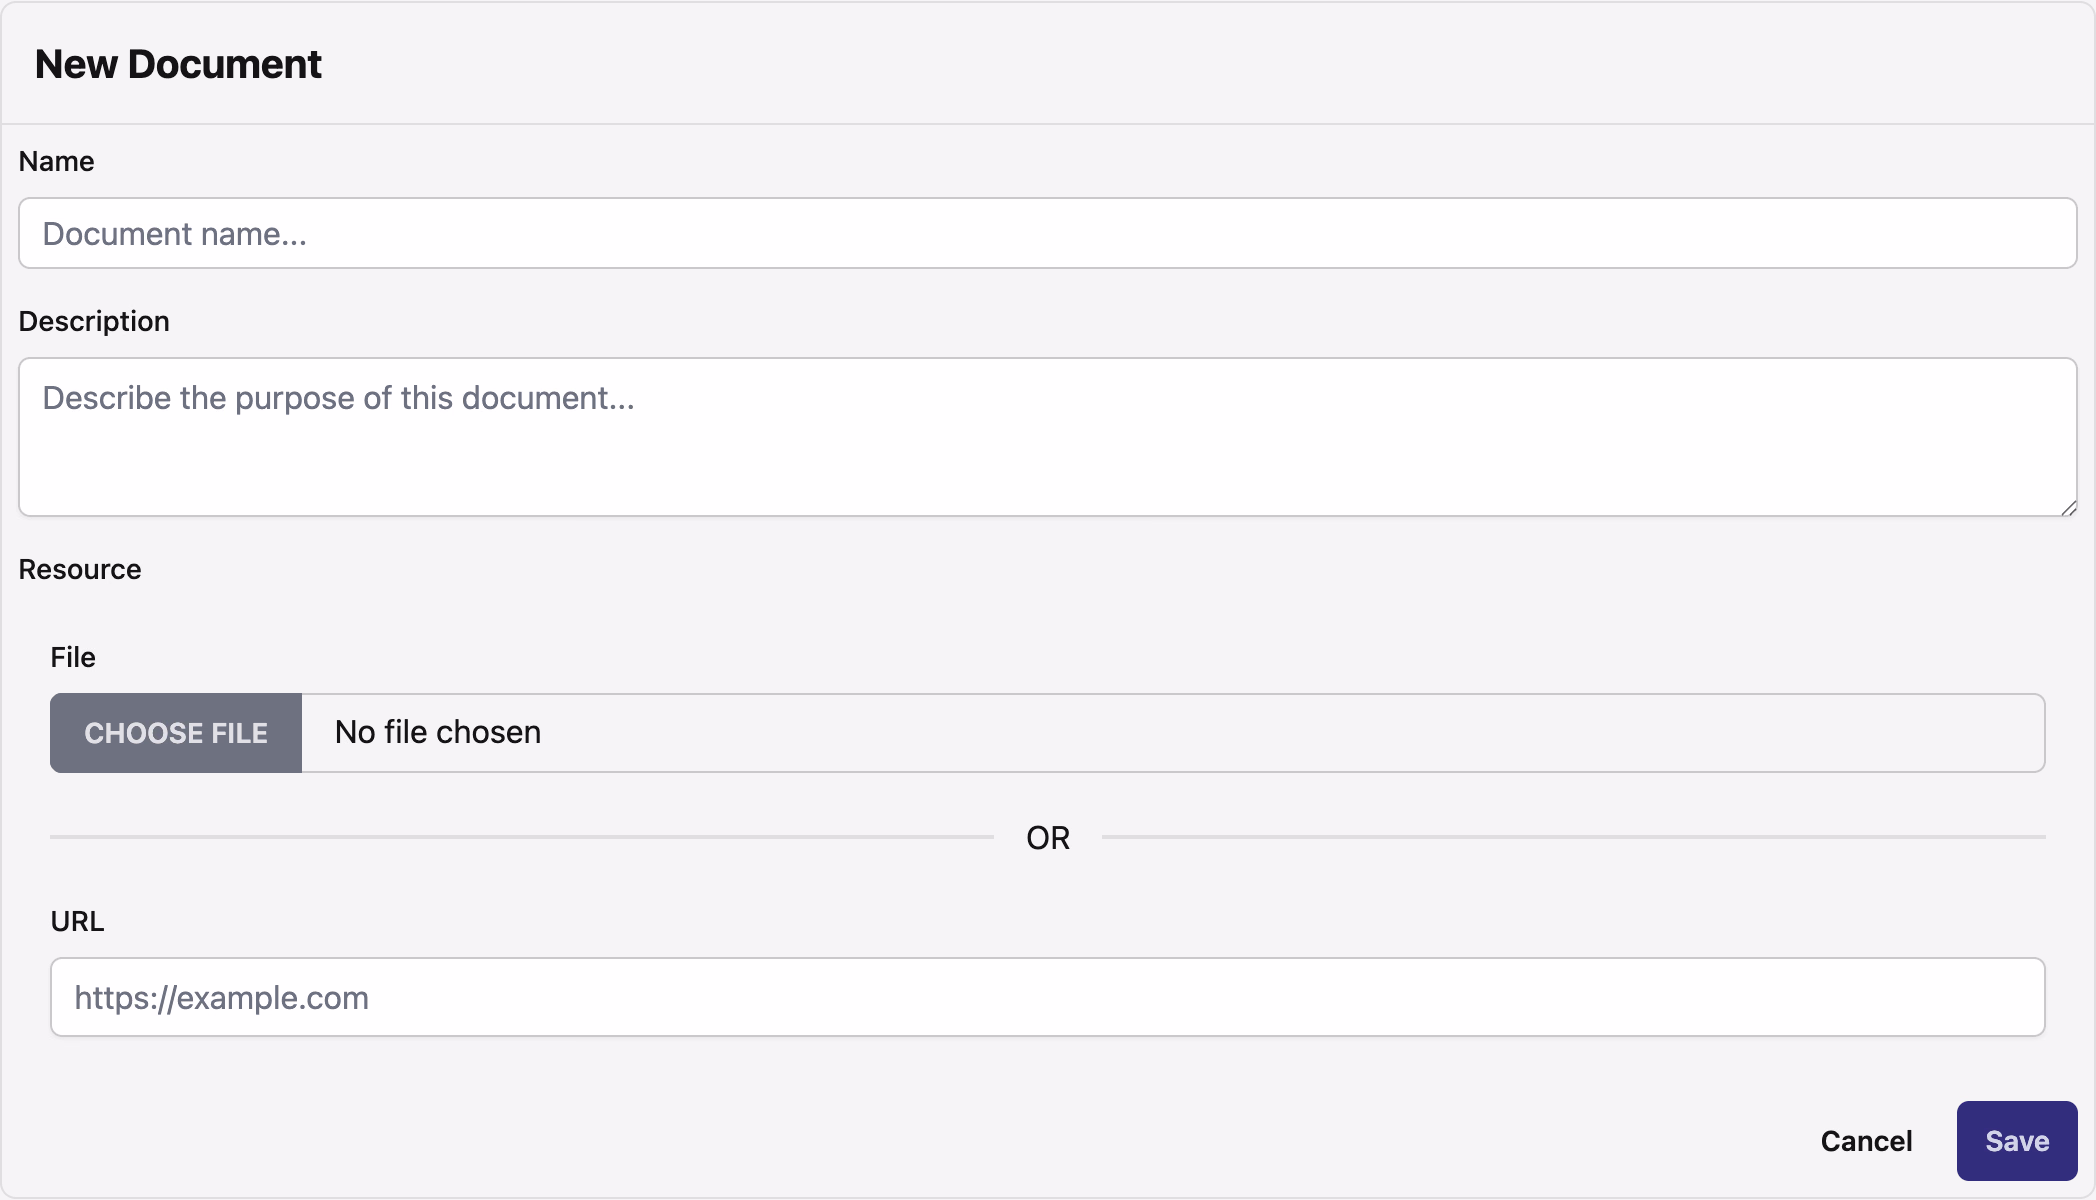
There are several fields in the Create New Document Form:
- Name (Required):
- The Document's Name, which will appear as a title.
- Description (Optional):
- Text entry box to provide a description of the uploaded Document.
- Resource (Required):
- Upload the File or paste the URL of the Document using the appropriate field.
Once all fields have been completed, click "Save" to create the Document (highlighted in the red box in the image below):
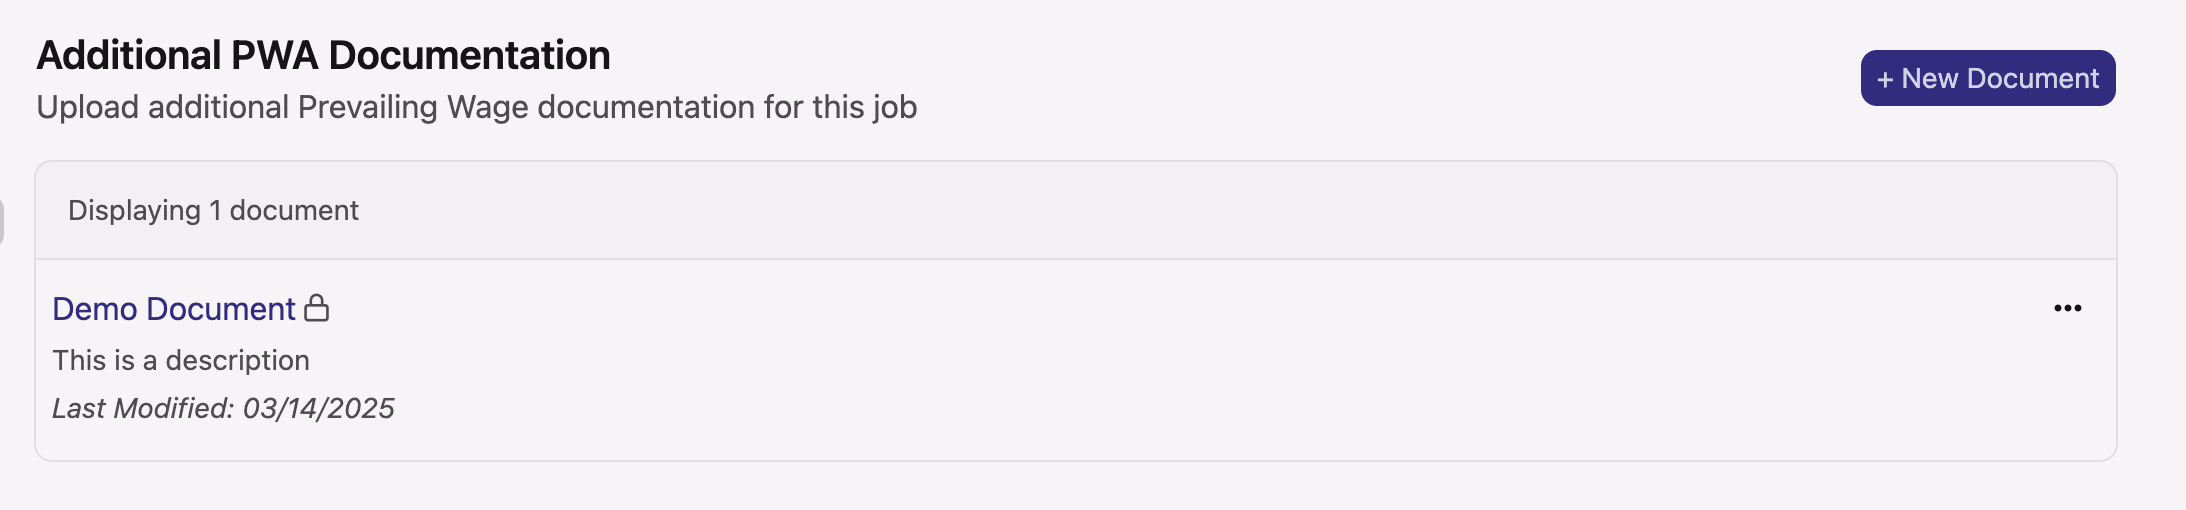
After successfully saving, the Document will be available in the PWA Documentation List (pictured below):