Time
The Job Card's Time Tab displays all the Time Entries associated with said job. In addition, you can approve time from this screen, as well as get customer signatures directly within DSPTCH.
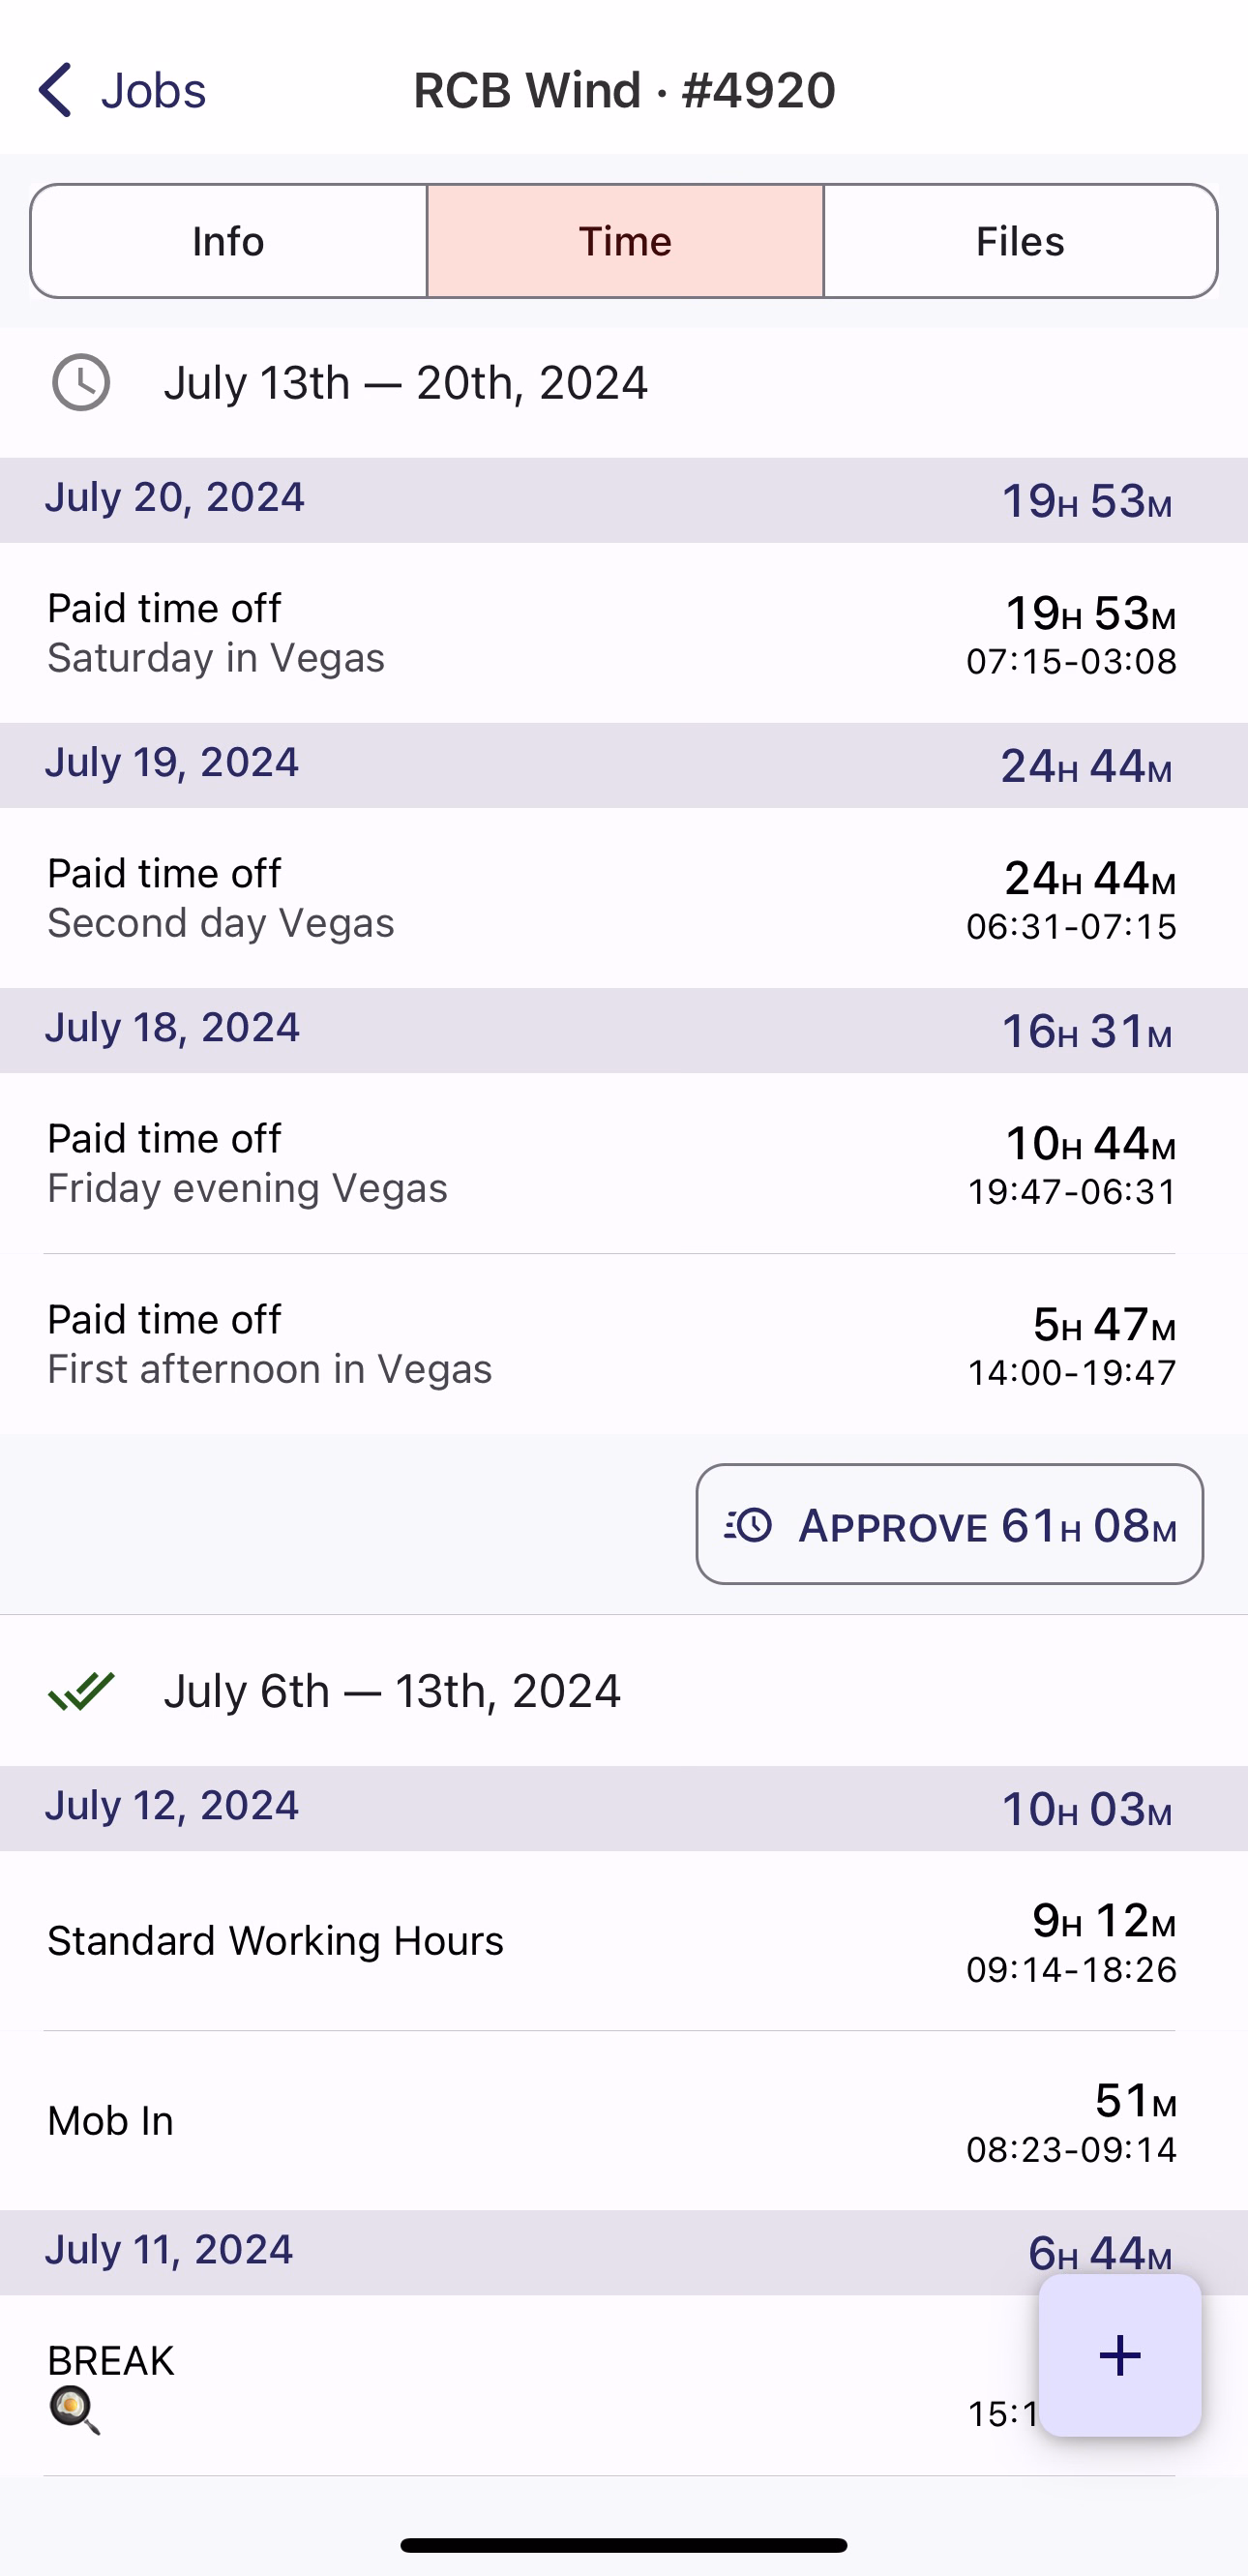
View of the Time tab in a Job page
Time Entries
You can see your time entries grouped together on a weekly basis. The Time Entries on the Job Card's Time tab are the same underlying Time Entries that can be found on the Time Cards screen.
Note that the Time Entries found on the Job Time tab might not reflect all of your time for a given week, especially if you work multiple jobs.
On the Job Time tab, time is always displayed per week, with the first day of the week (e.g. Monday, Tuesday) determined by how the job was setup. This may or may not line up with your Time Cards, depending on how your company configures Pay Periods.
Approving Time
It is possible to approve time from the Job Time tab. Select the Approve button to navigate to the Approvals screen for the selected week.
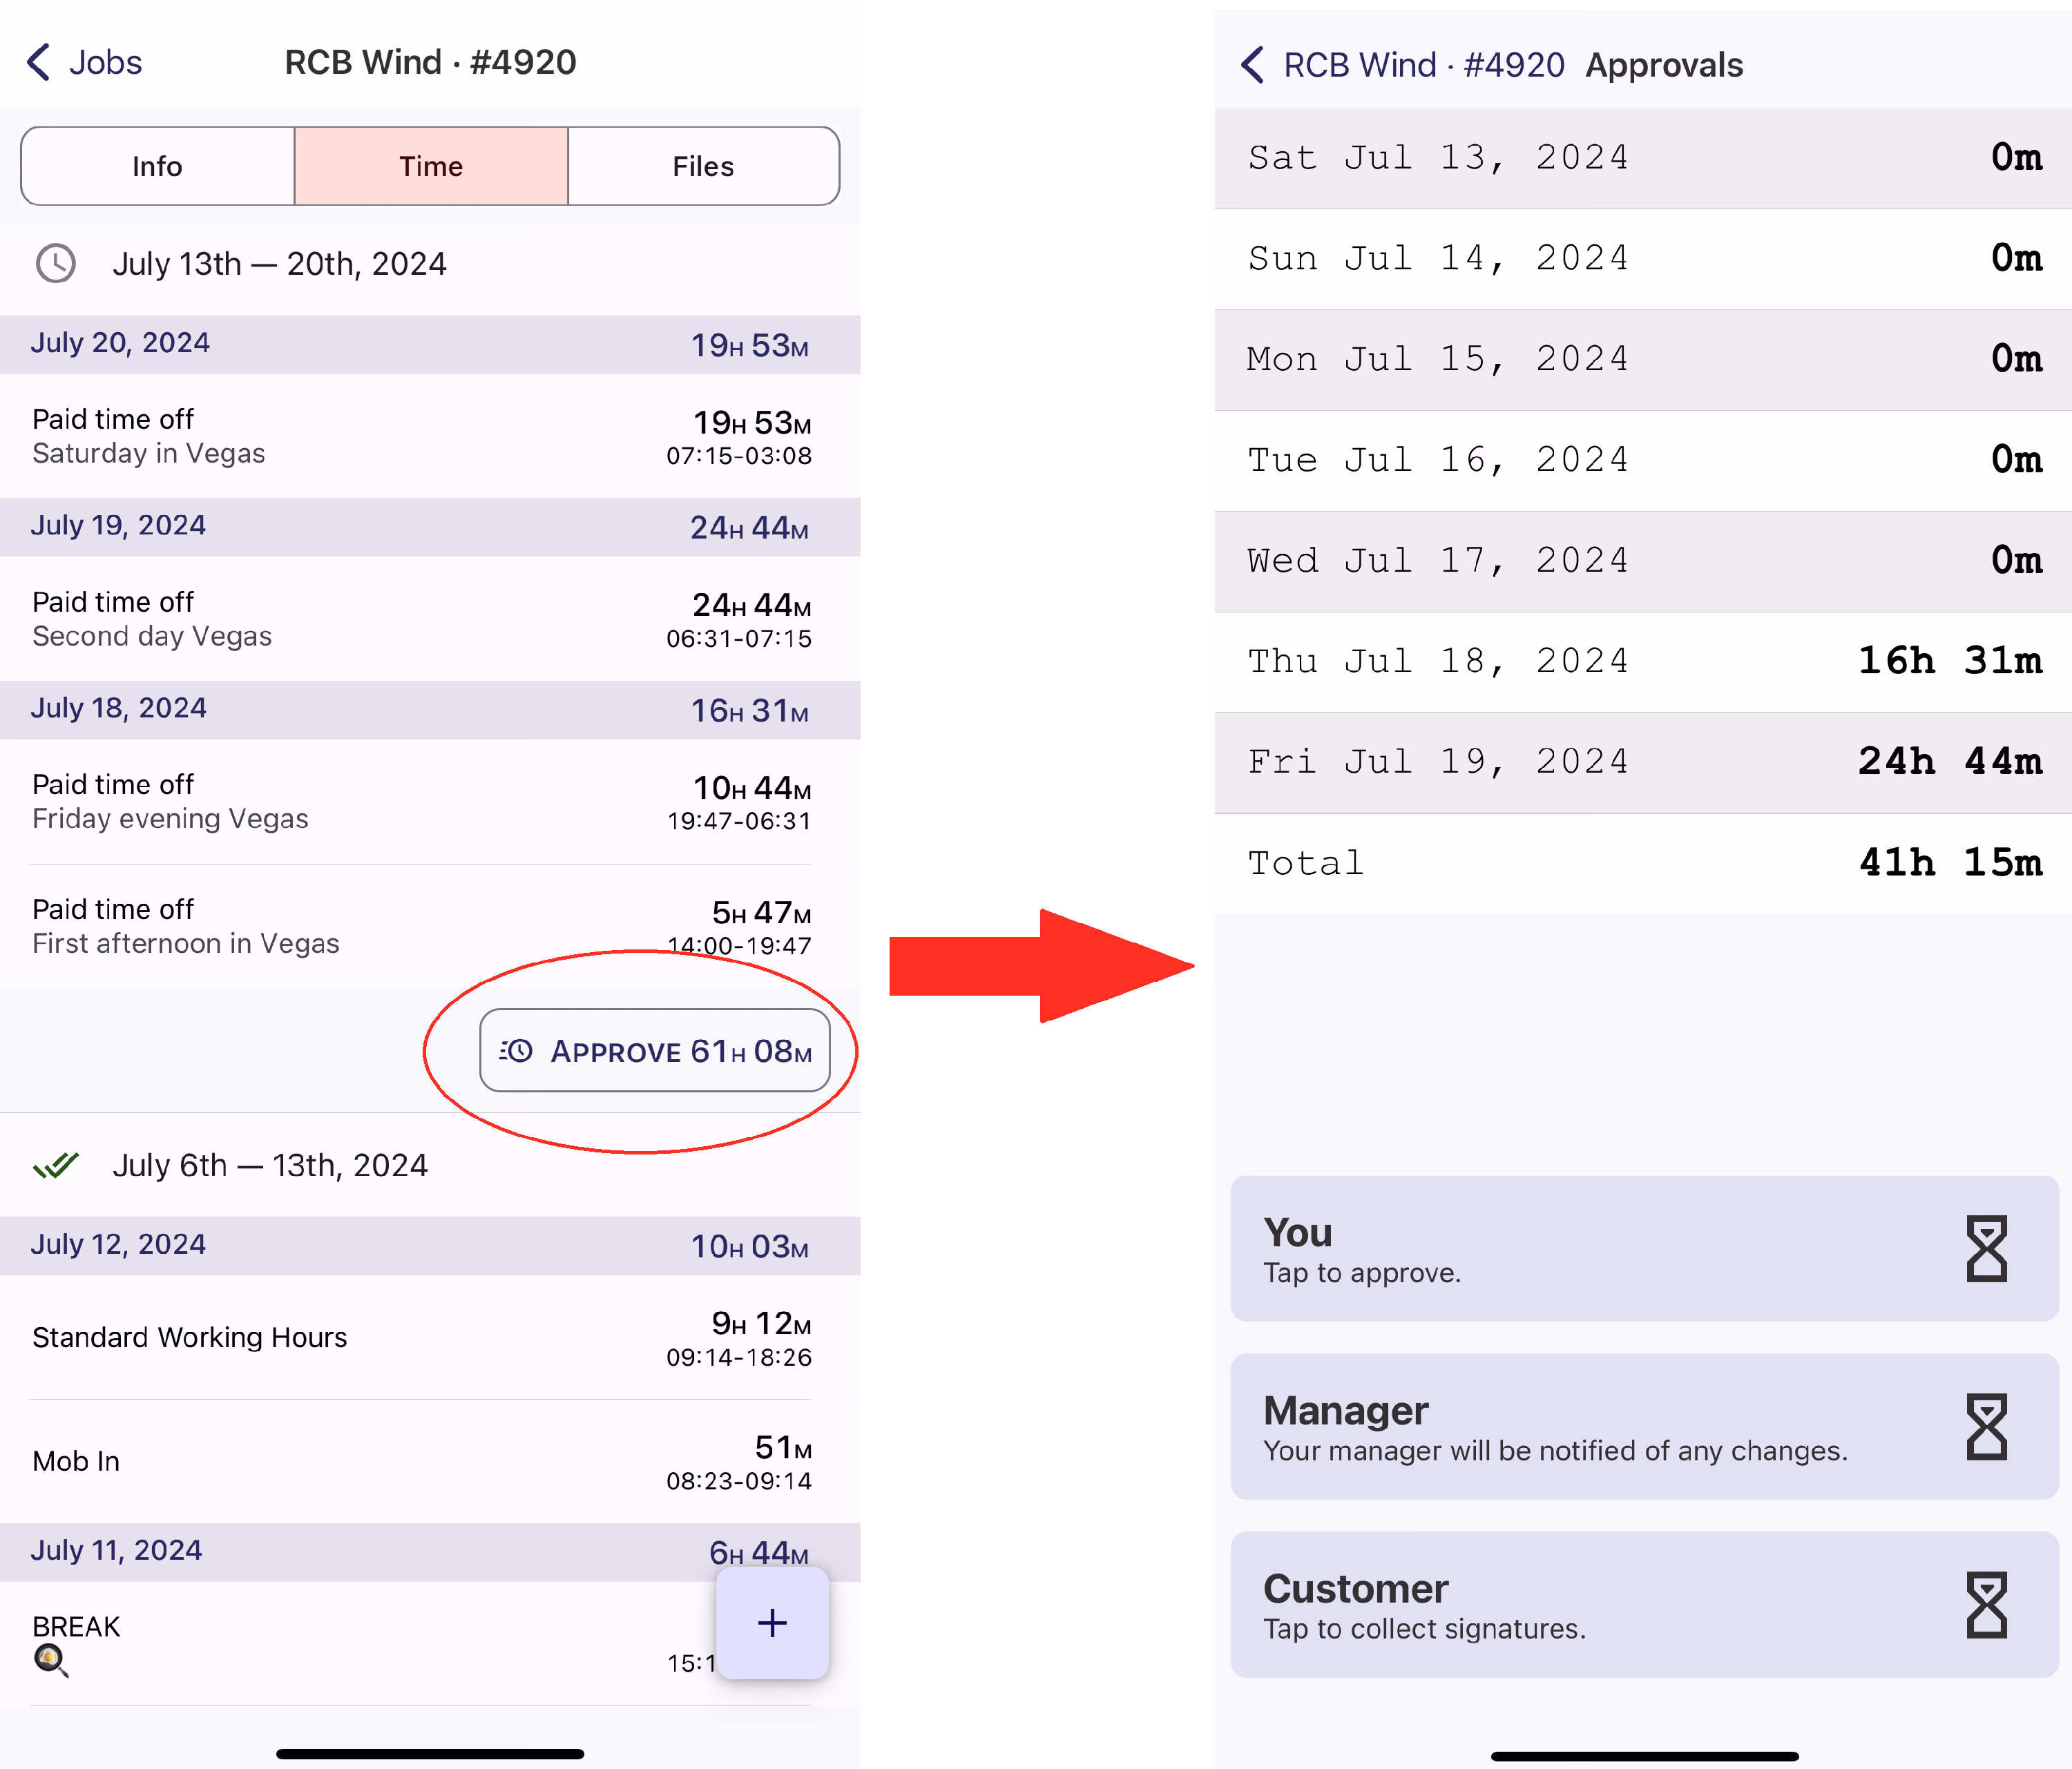
Tapping "Approve" will take you to that weeks approval screen
Tapping the You button will approve all Time Entries for the job in the given week.
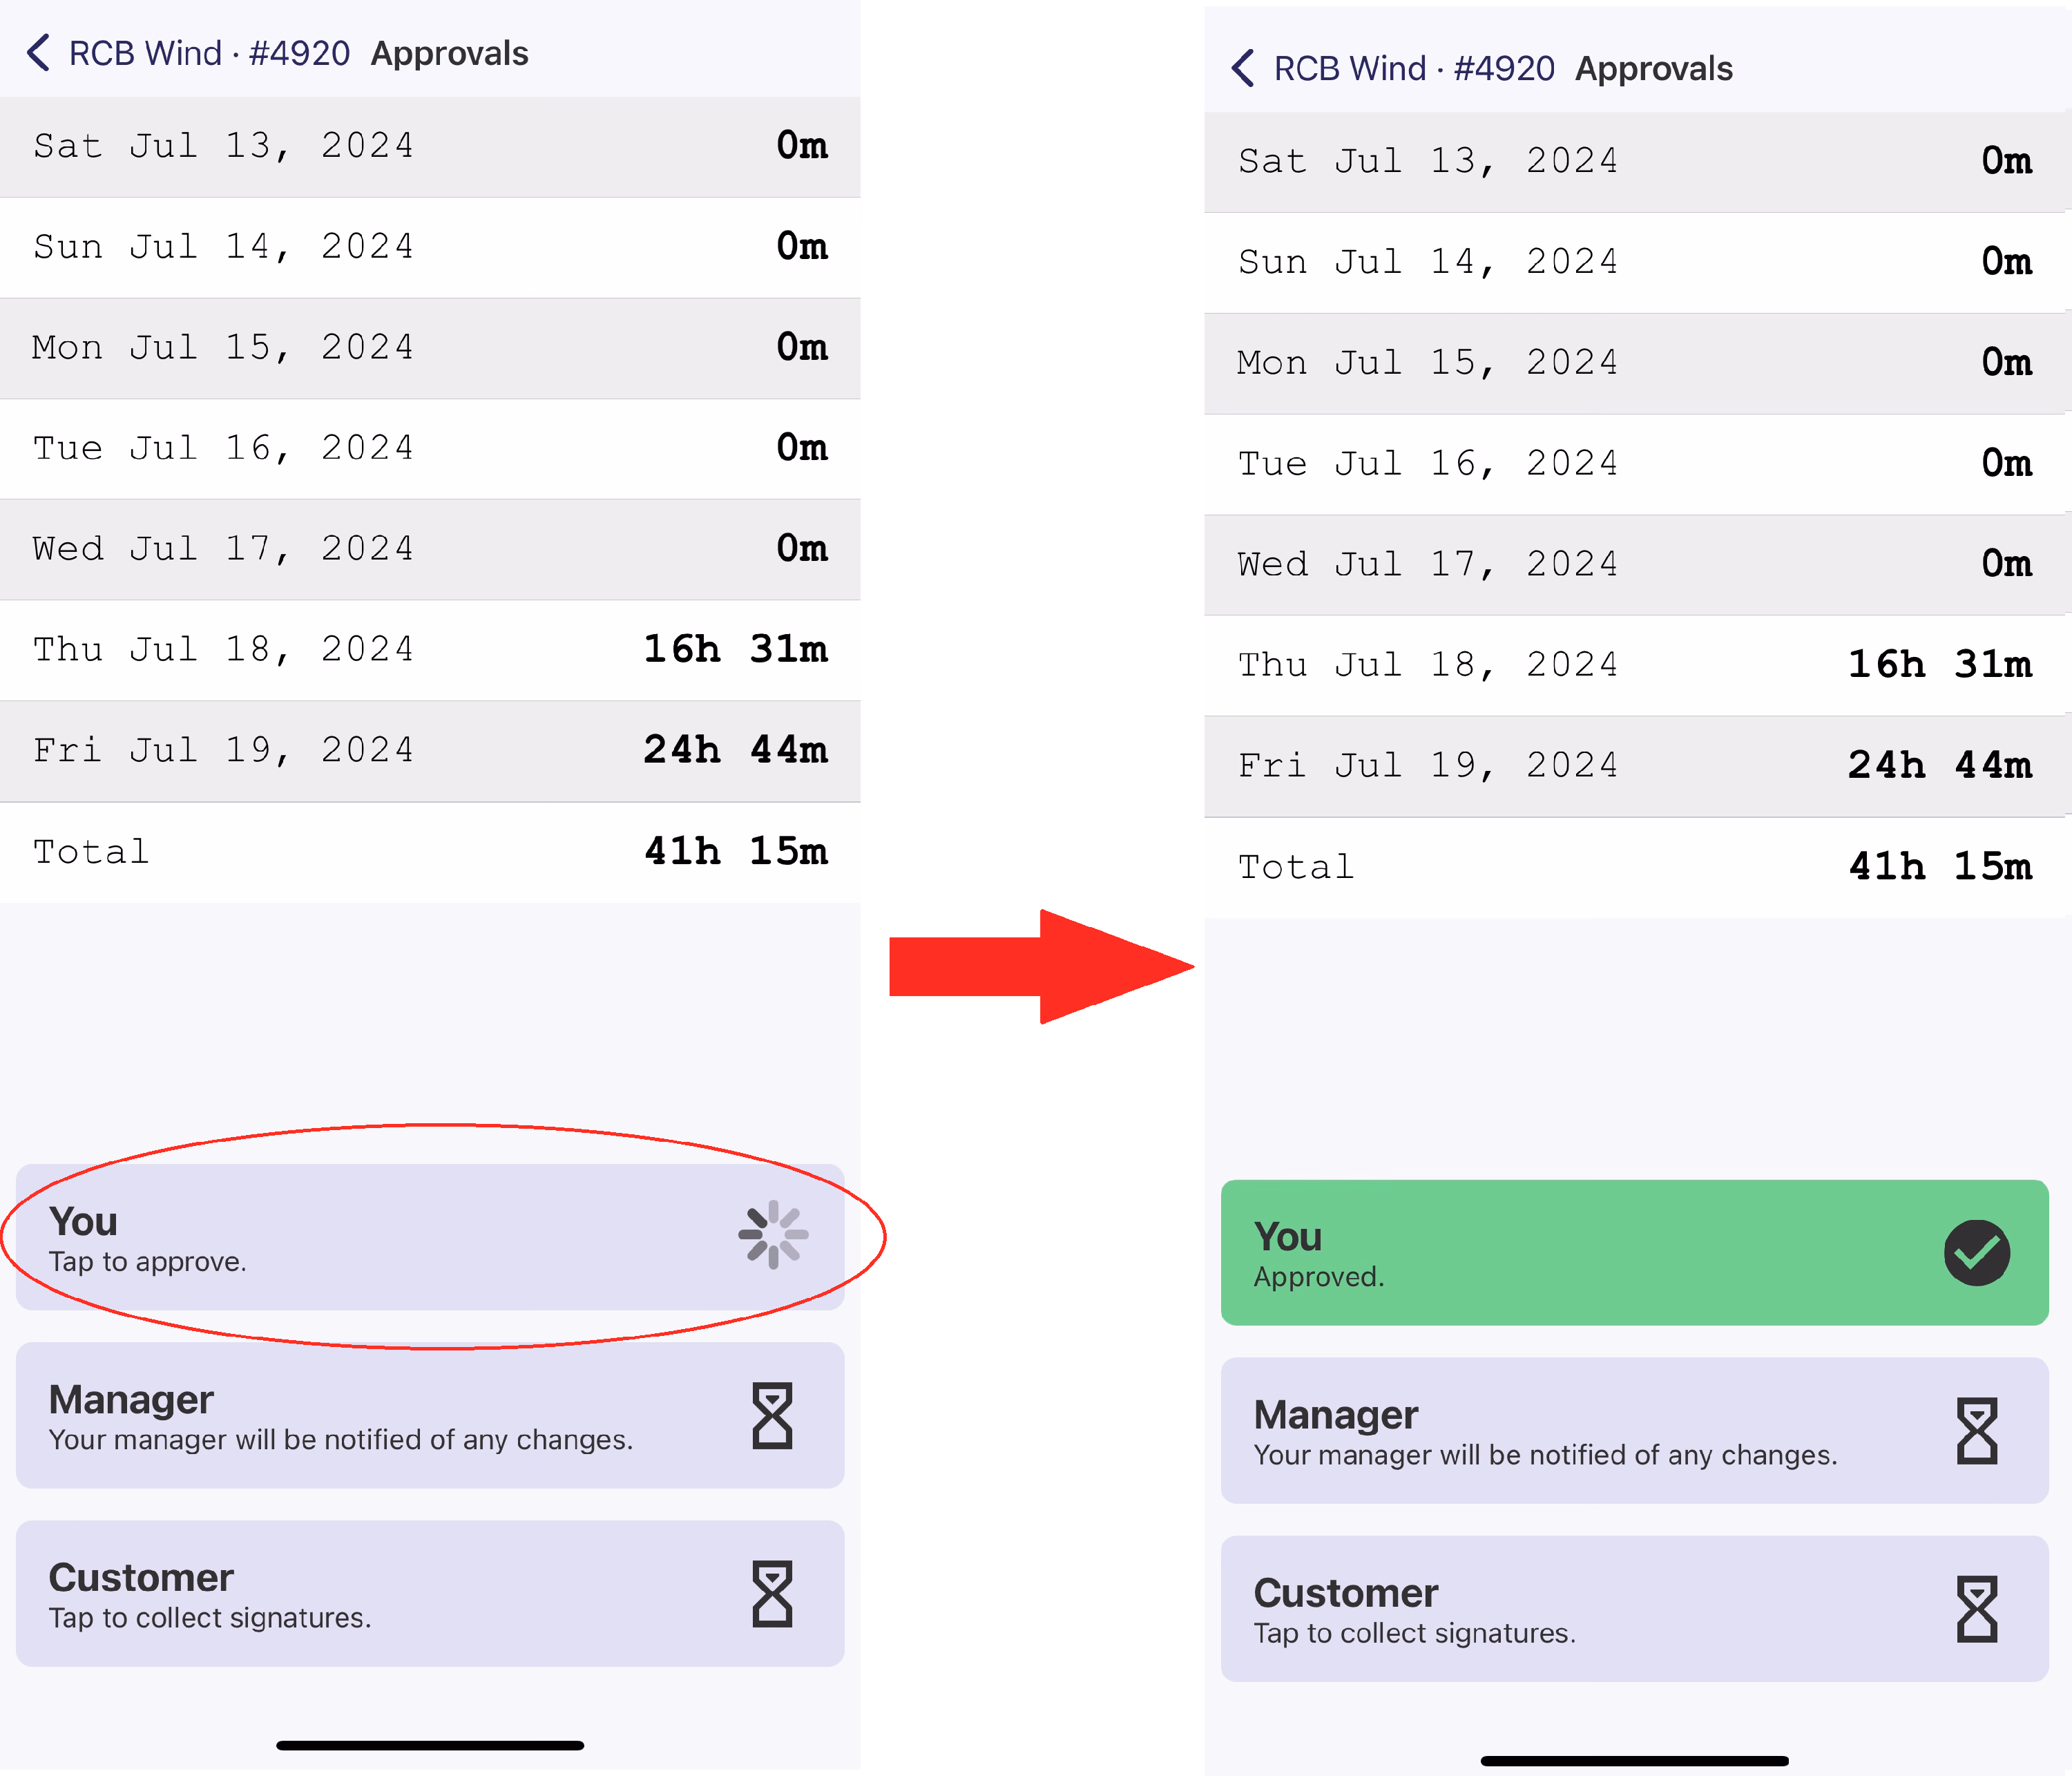
Tap "You" to approve the Time Entries. The button will turn green upon success.
If you have already approved the time on the Time Cards section, theYou button will be green.
Approving time on the Job Time Approvals screen does not guarantee that your Time Card is approved. If you have Time Entries for more than one job, or your pay period is longer than a week, it is best to approve your time in the Time Card section of the app.
Customer Signatures
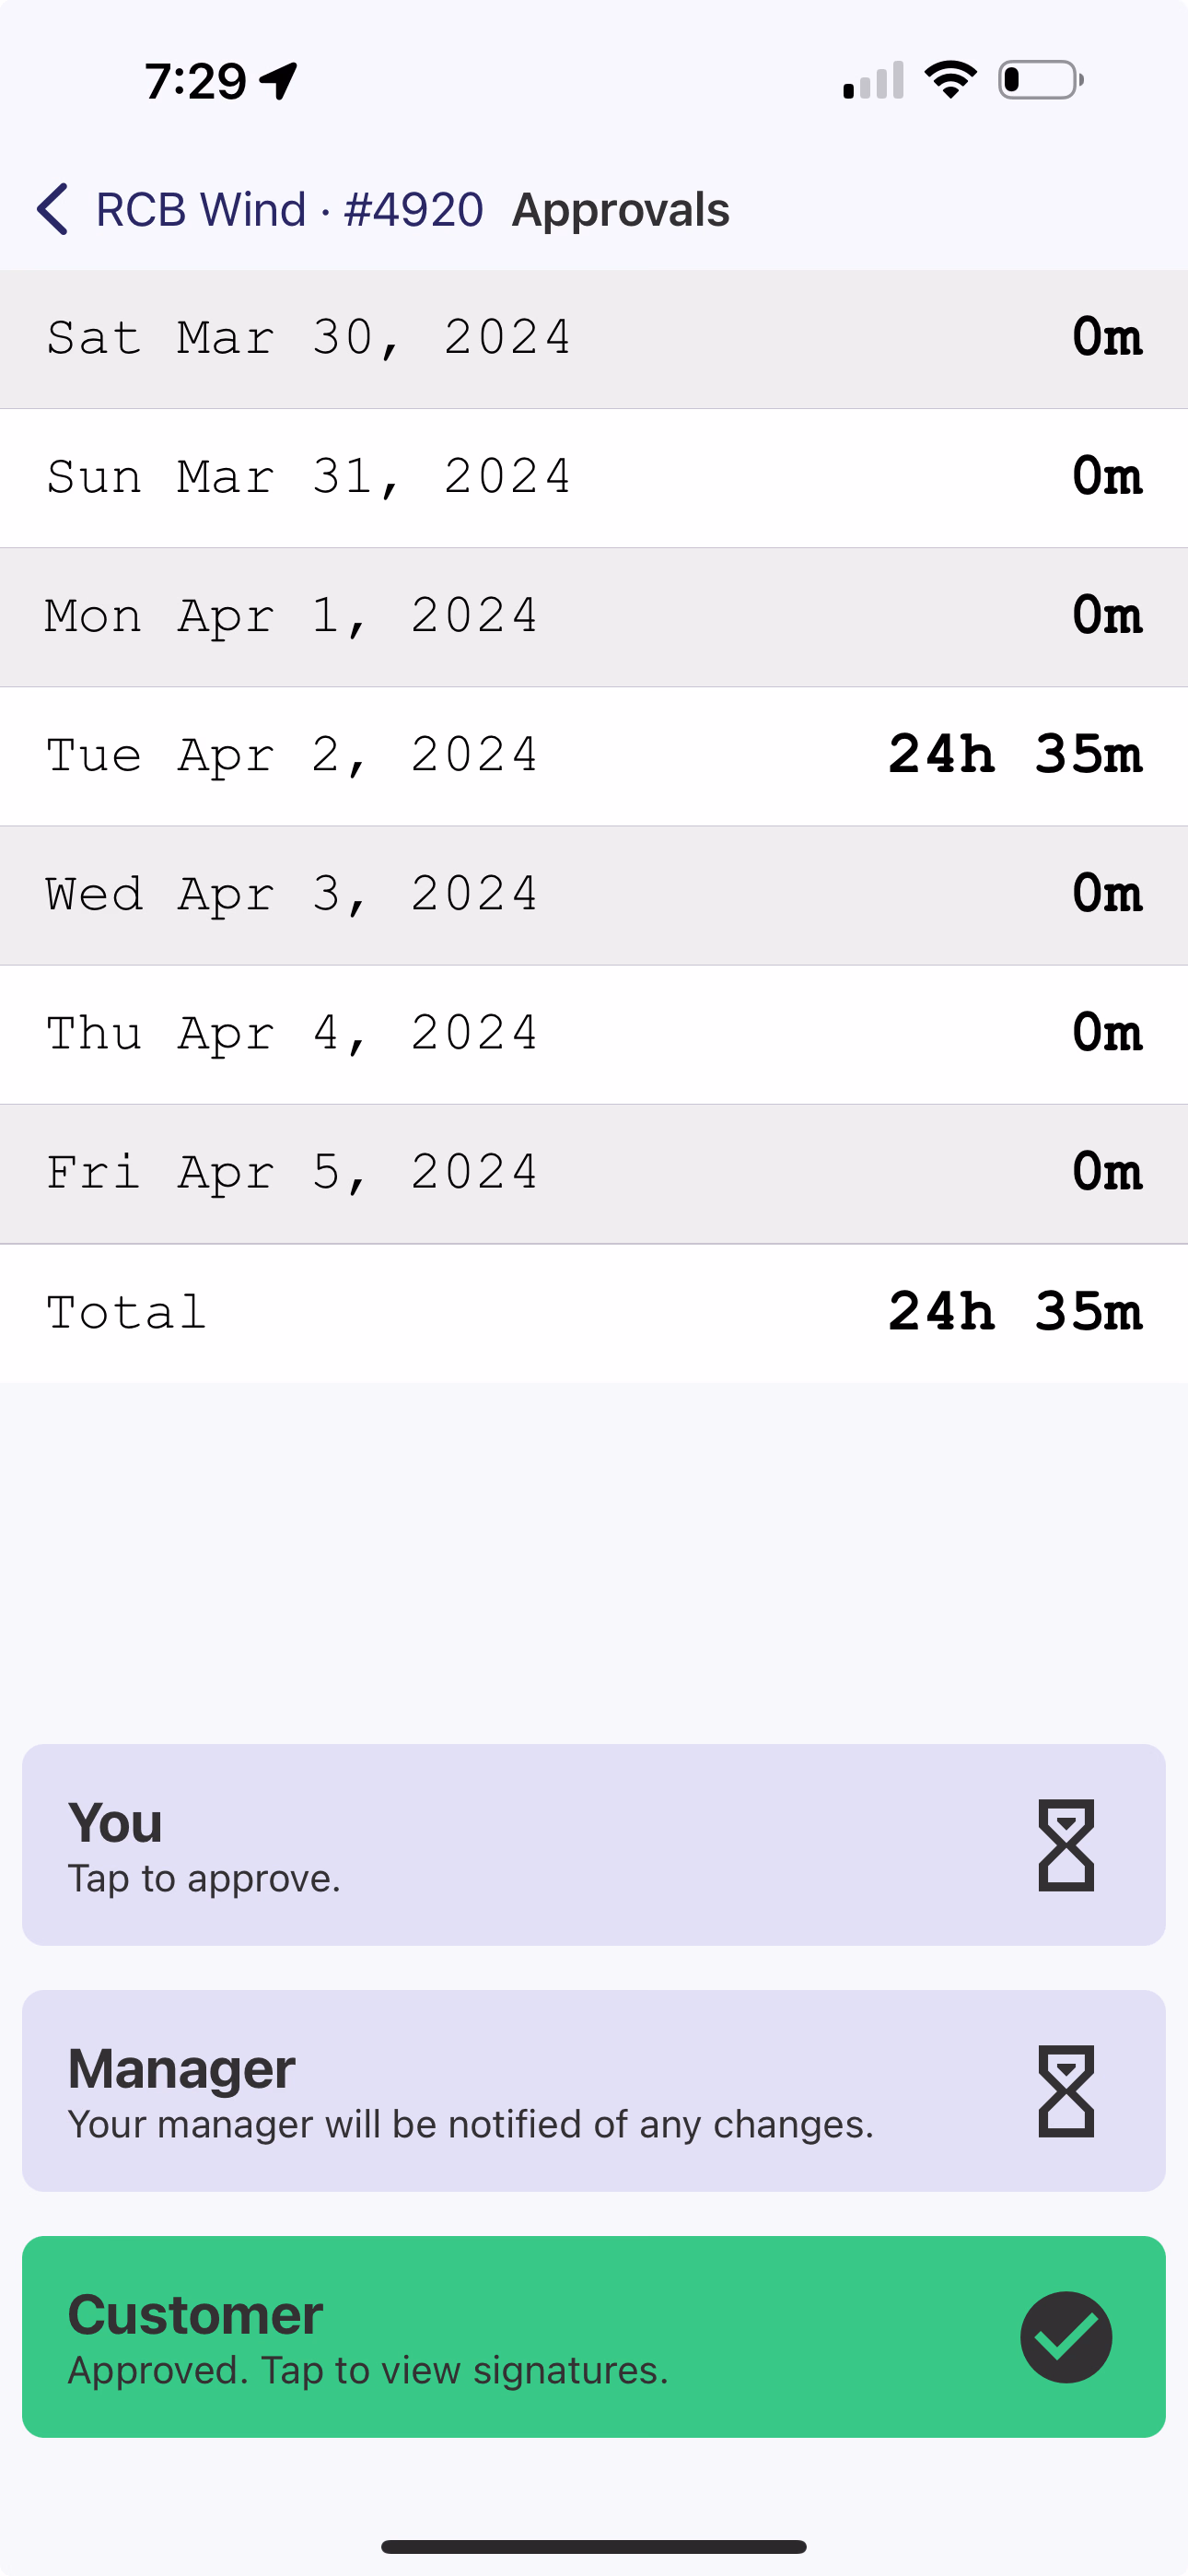
DSPTCH can capture customer signatures directly on the app. Tap Customer on the Approvals screen to get to the Signatures screen.
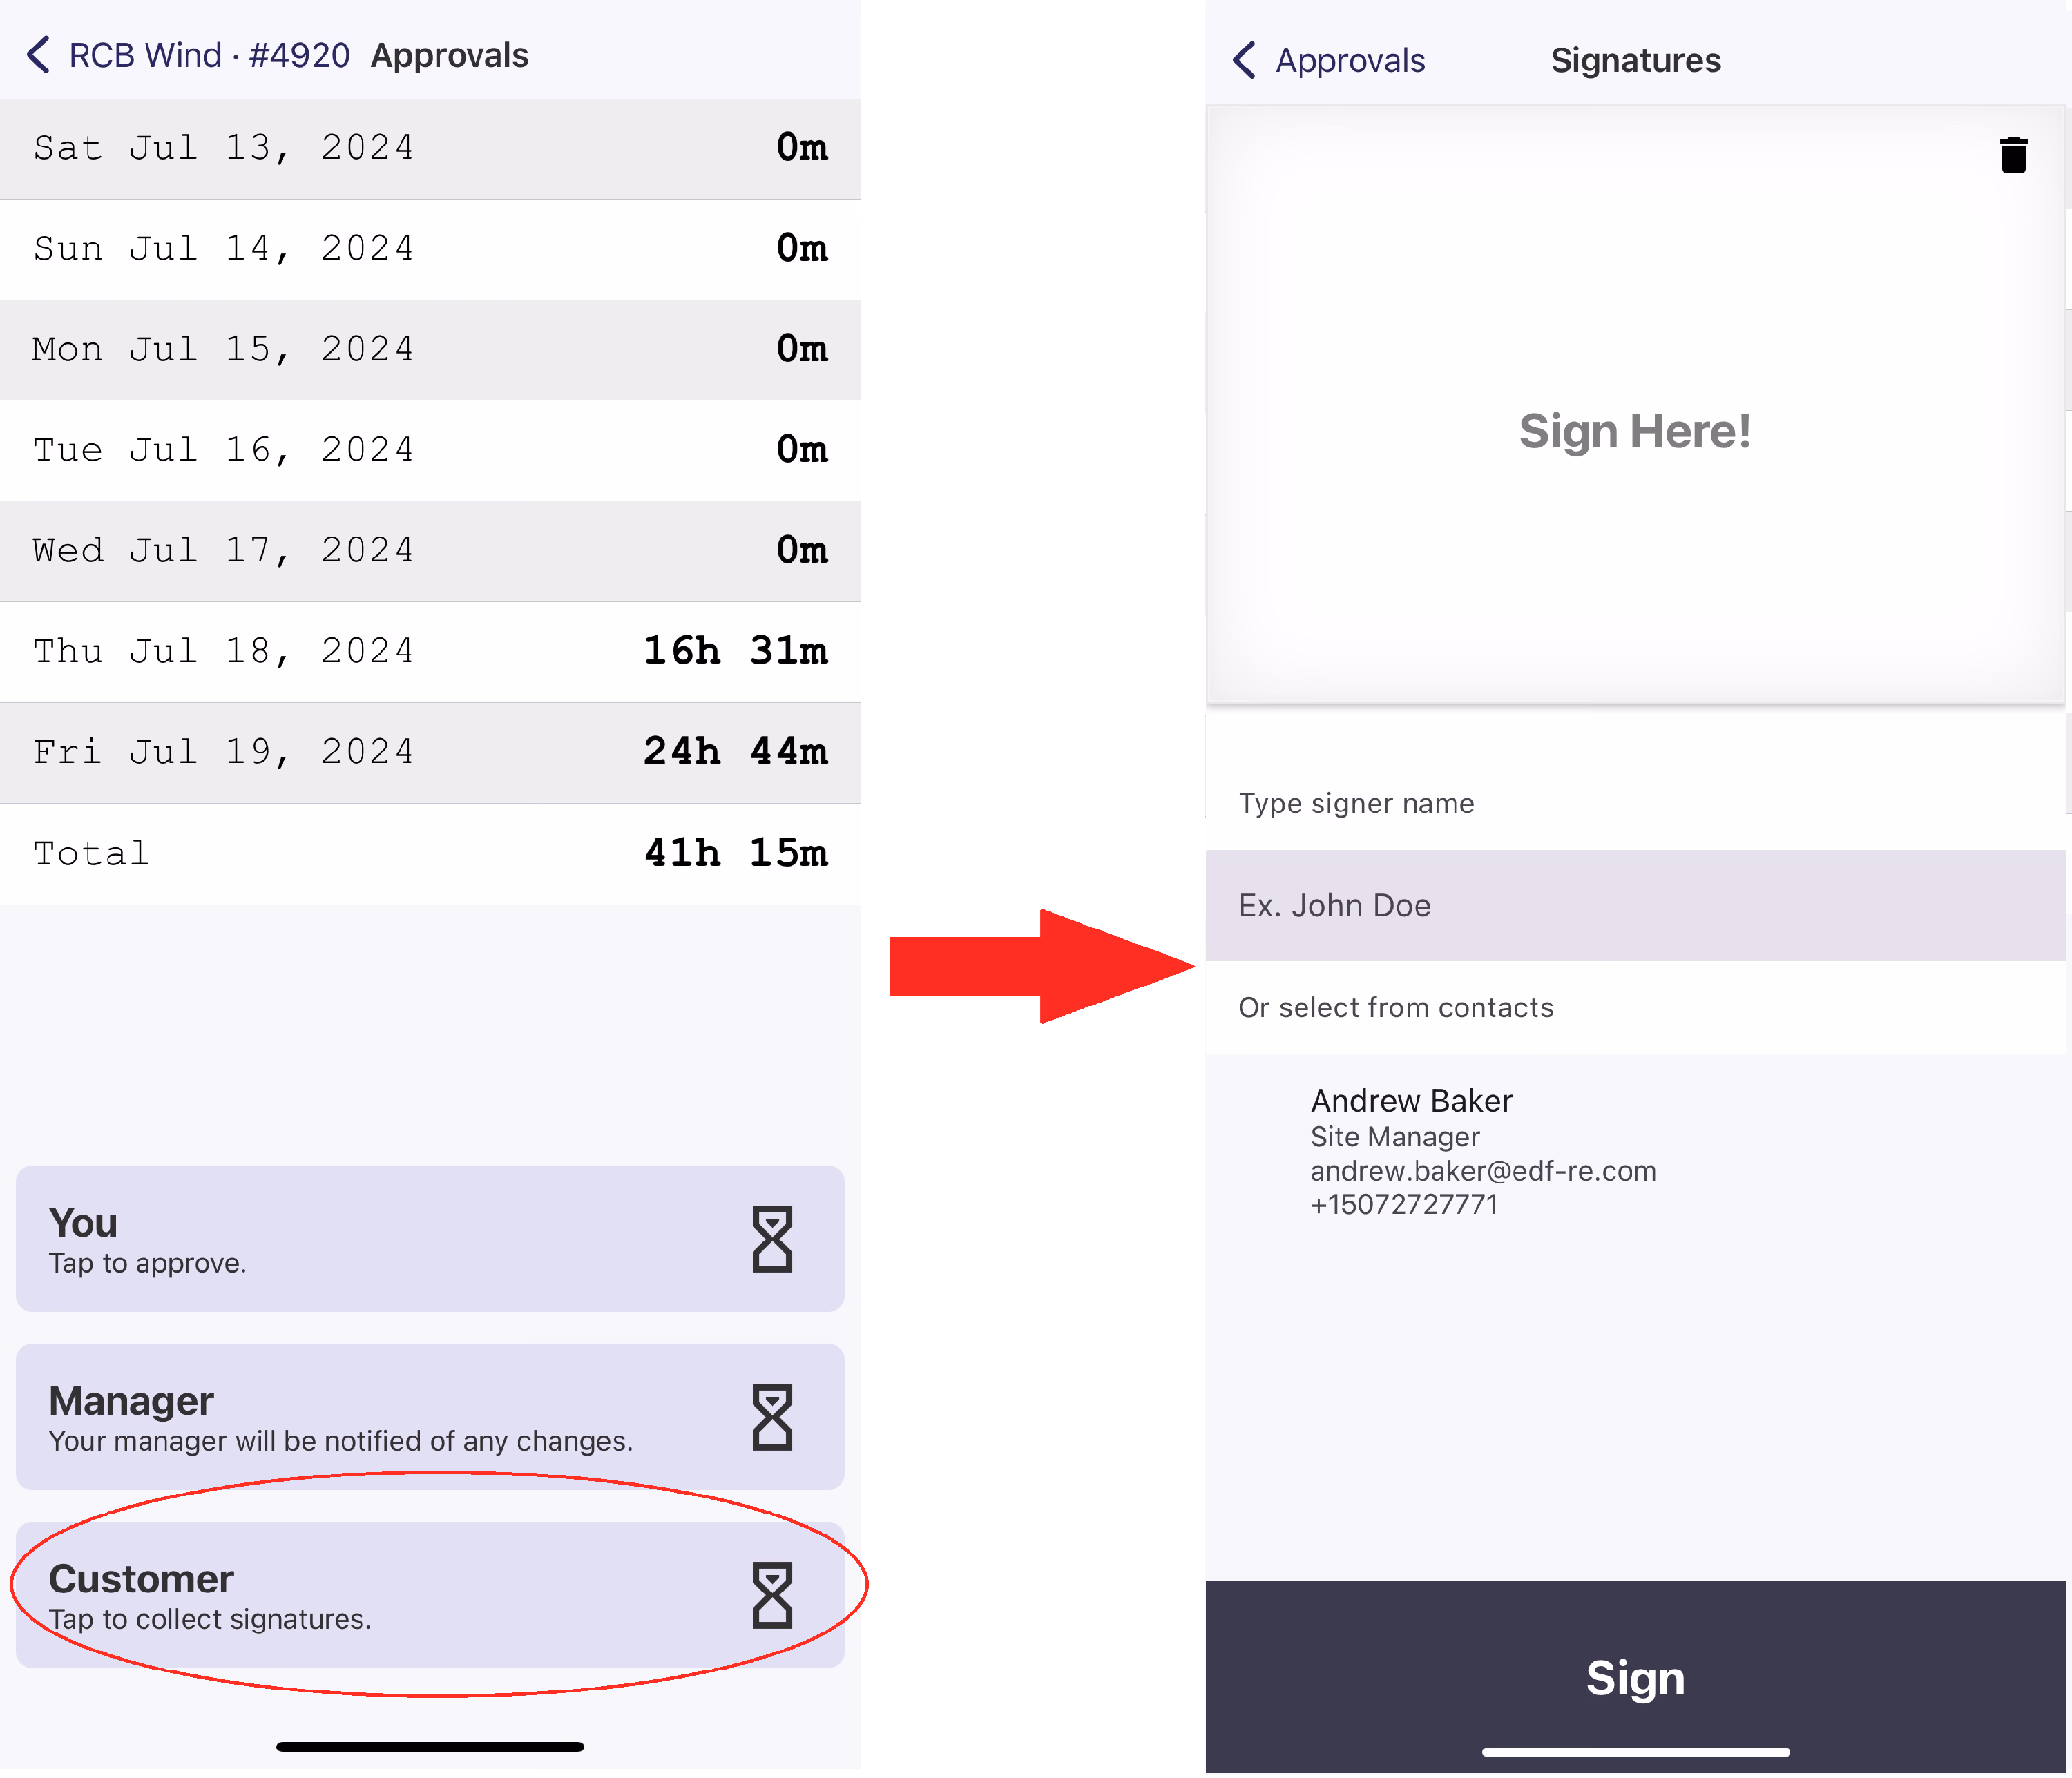
Tap "Customer" to get to the Signature screen.
Once on the Signature screen, depending on who is signing, you can either select a Job Contact or fill in the signee's name.
Once you know who will be signing, hand your phone to them to sign directly on the screen. To erase the signature, click the trashcan icon in the top right corner.
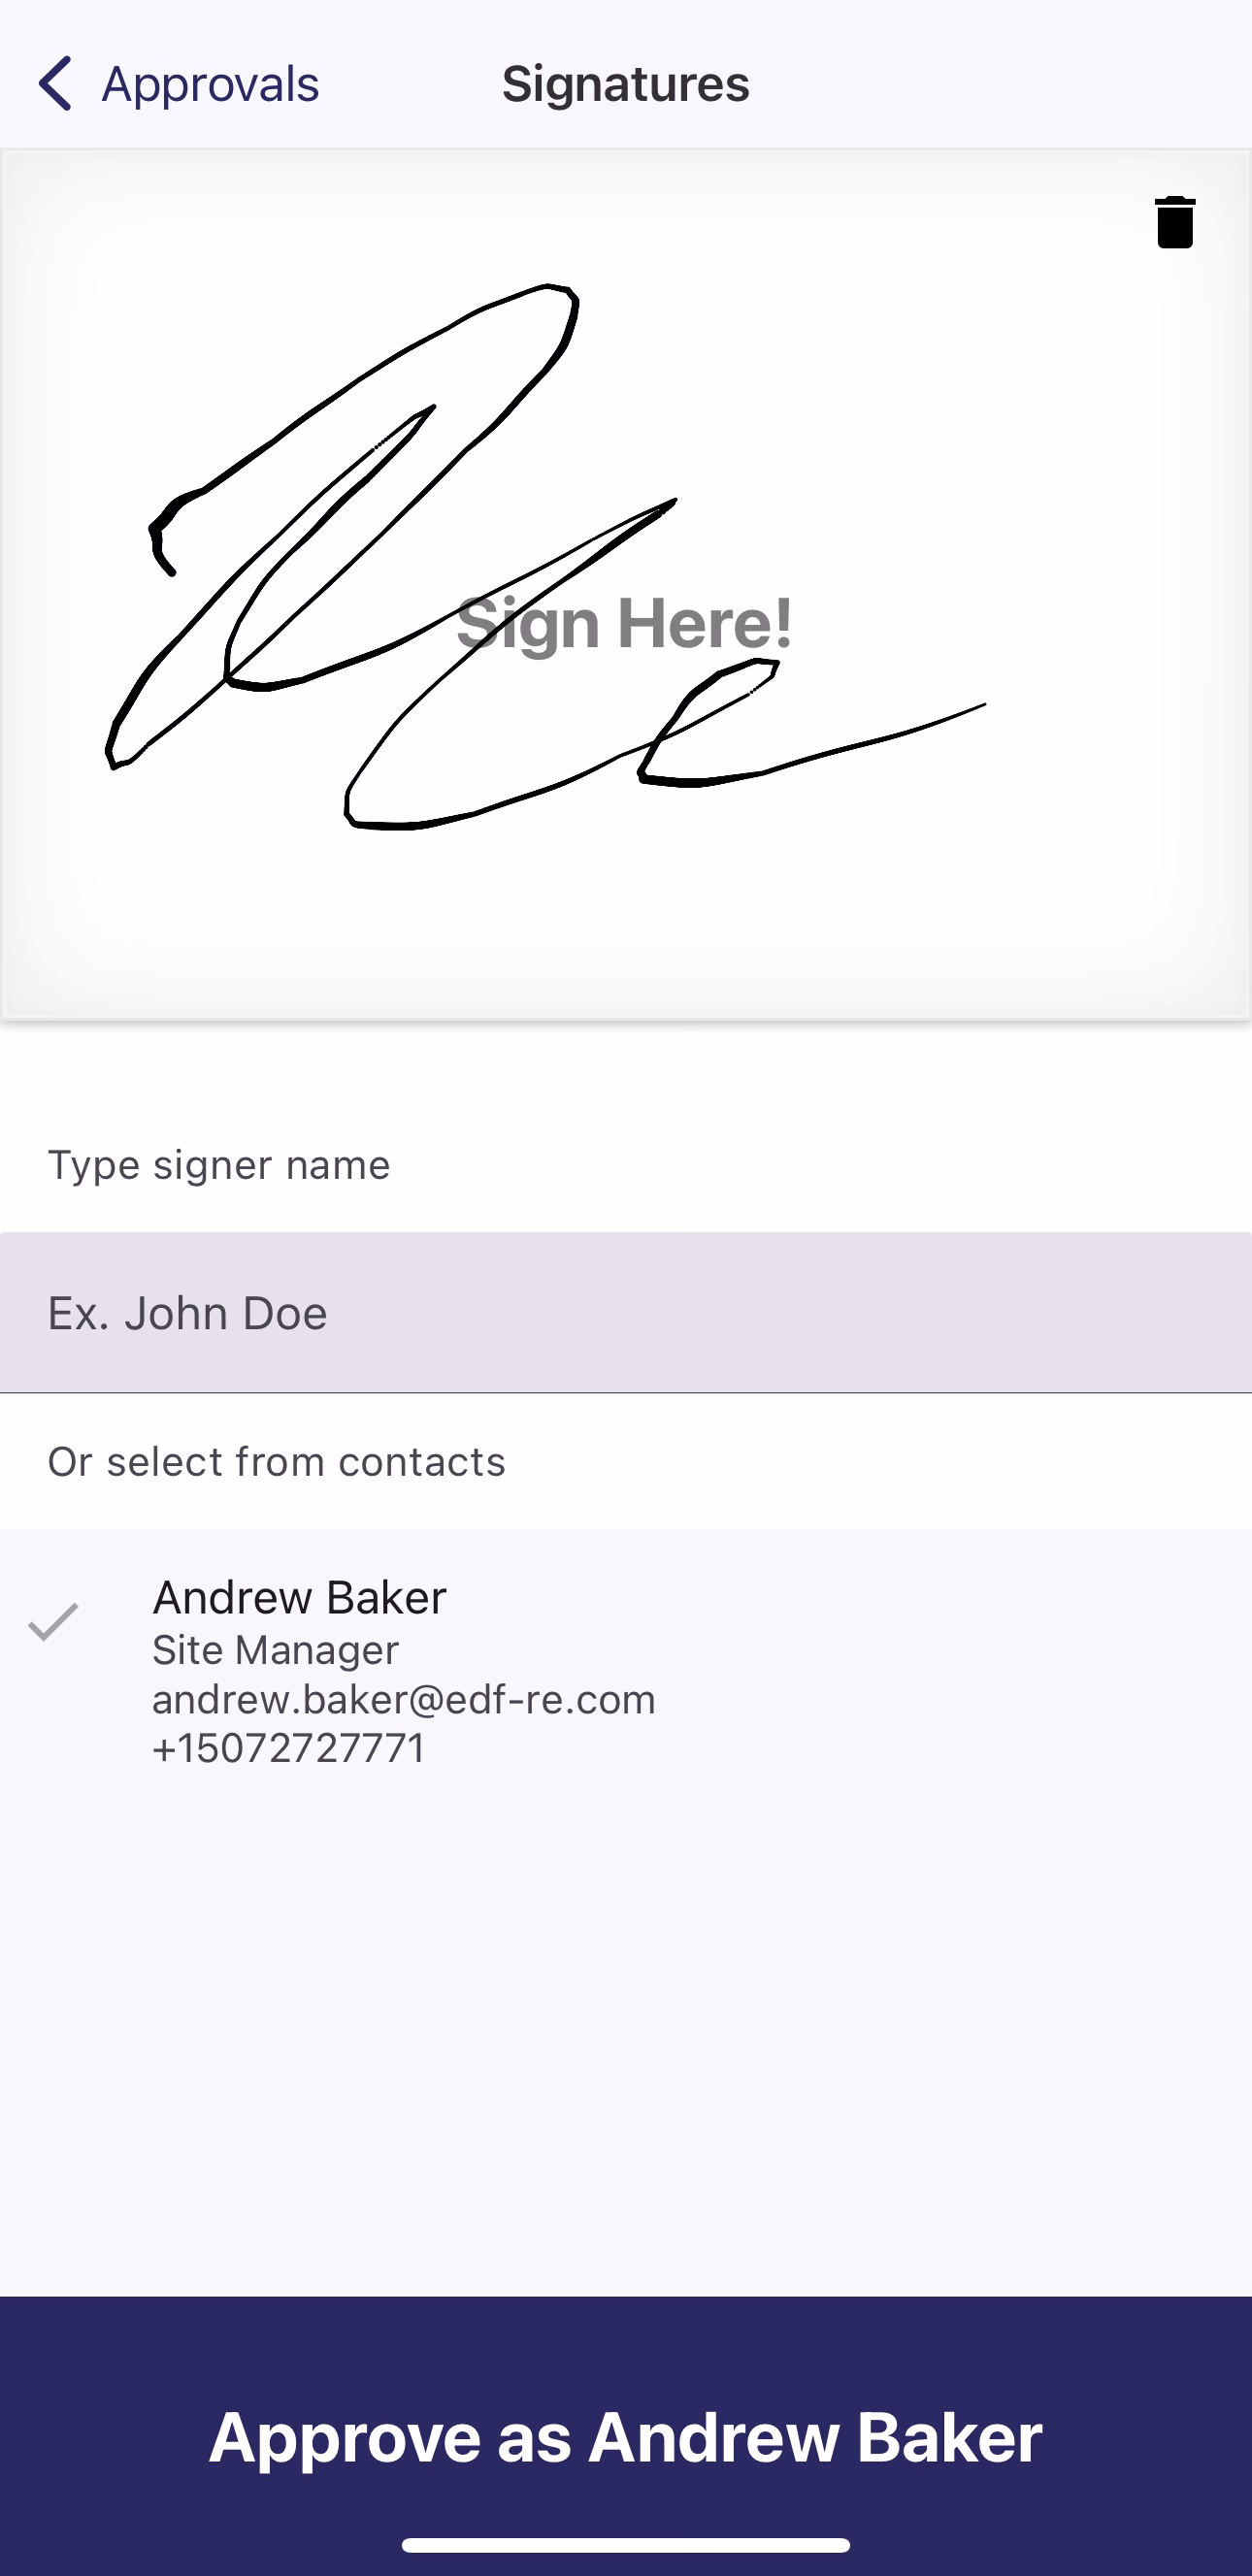
Here, "Andrew Baker" was selected as the signer.
After signing and hitting Approve as [Contact Name], their signature will be saved, and you can keep requesting signatures from any other contacts on that job or desired individuals.
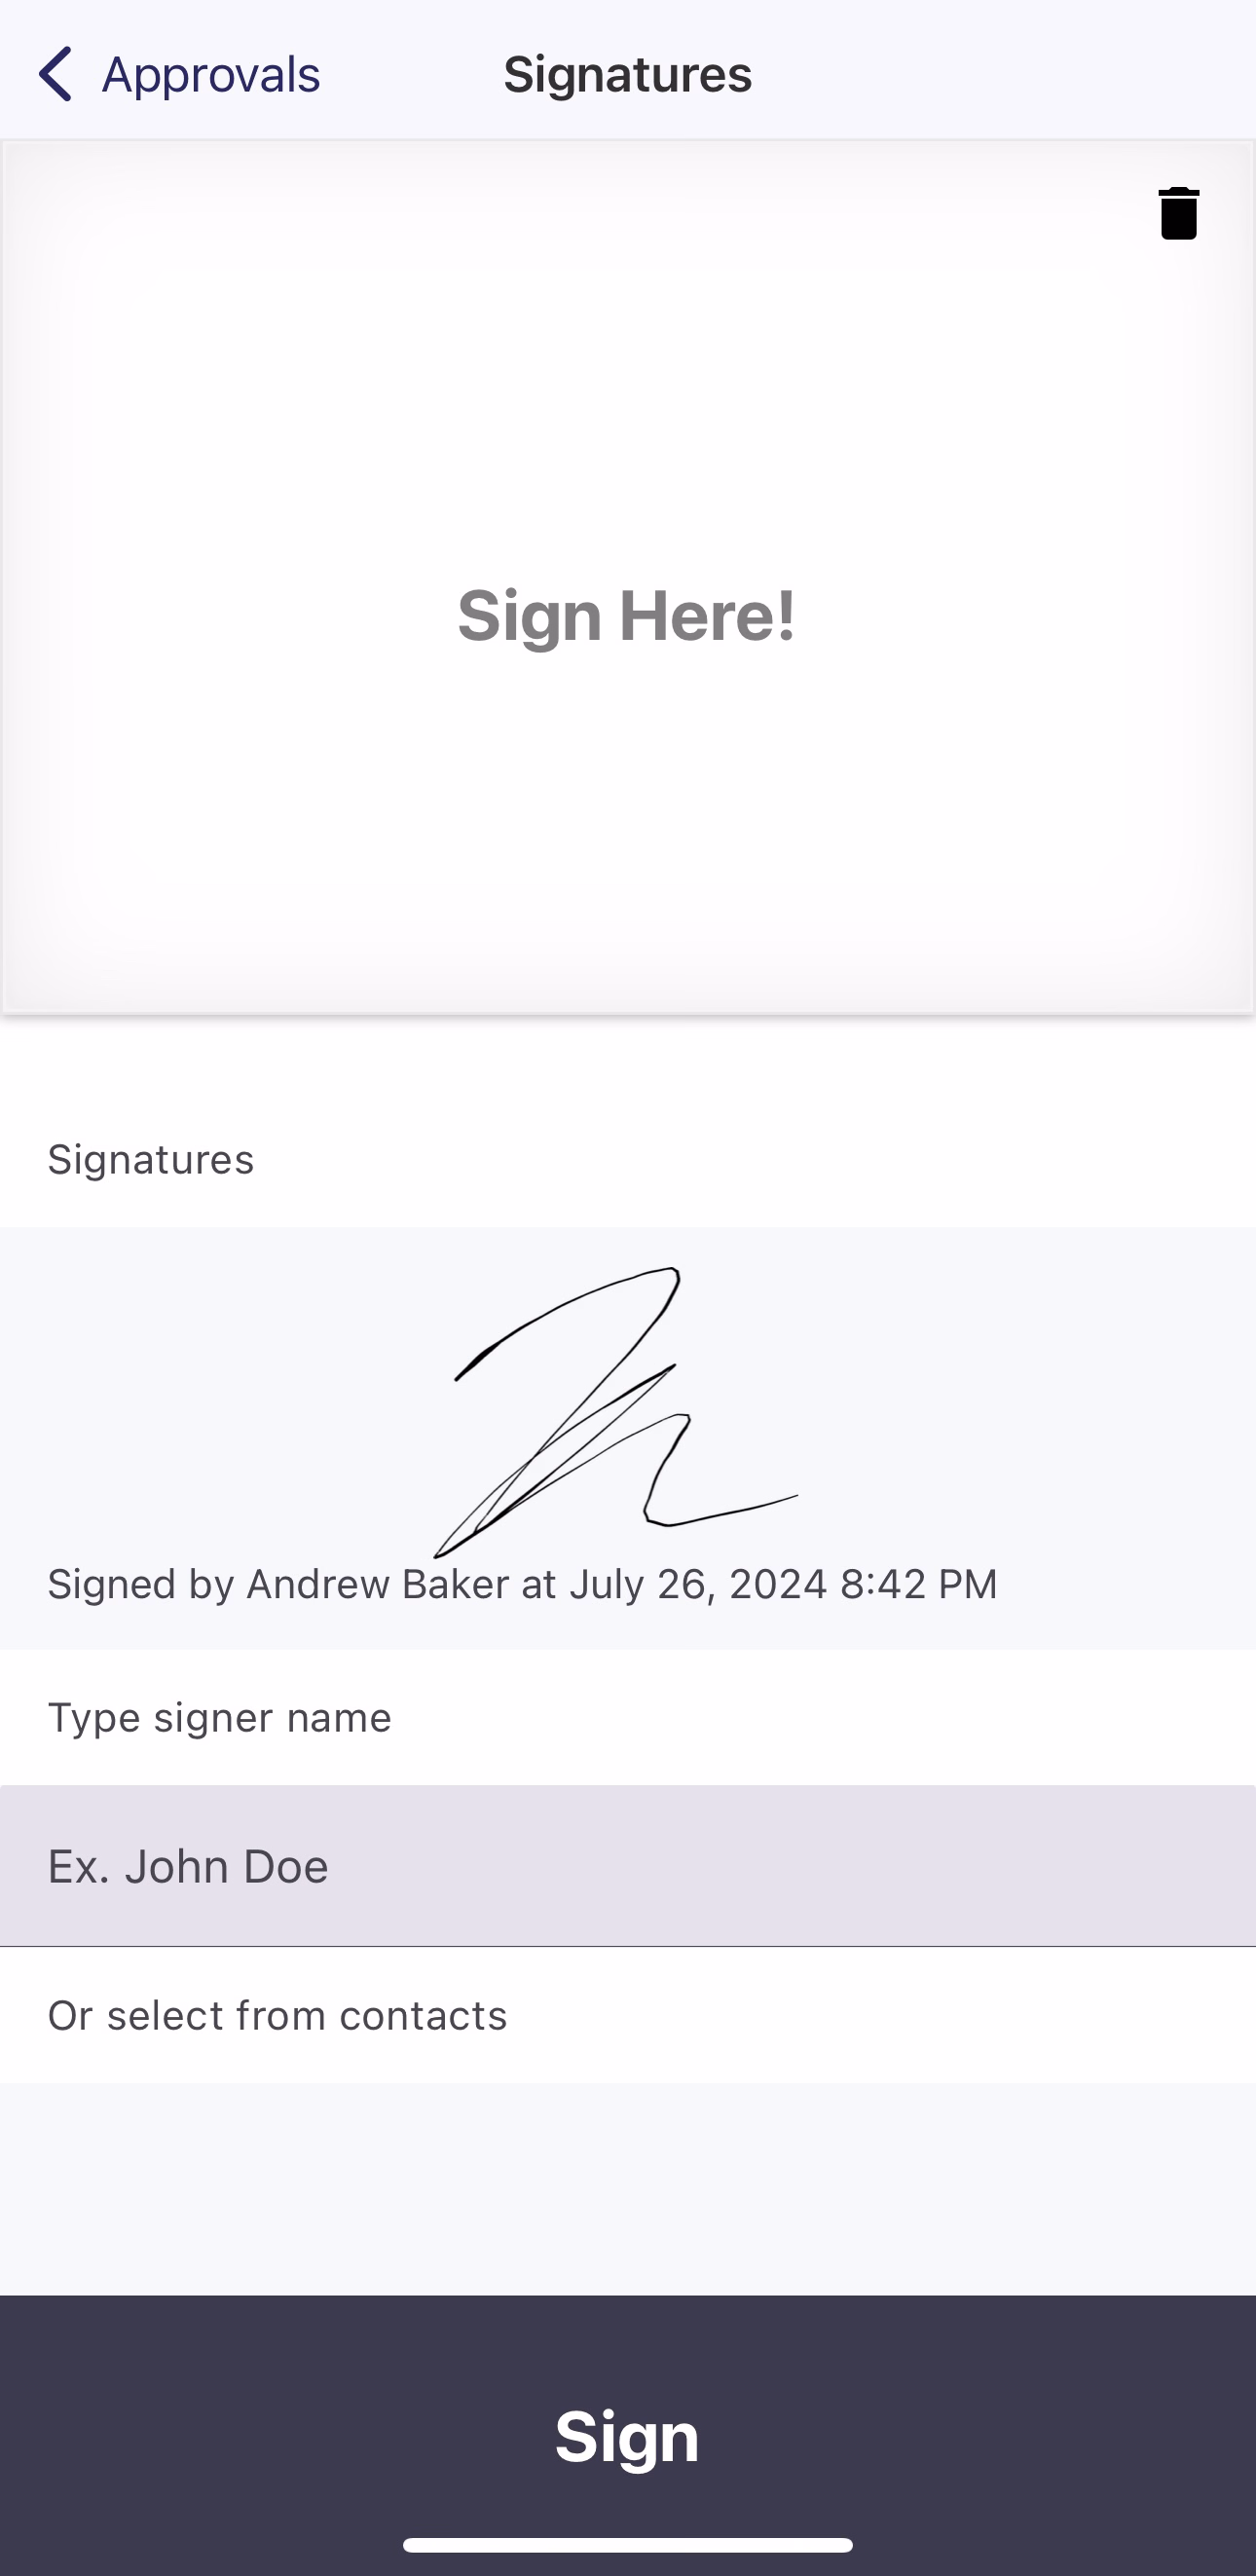
Signature by Andrew Baker saved, now ready for more signatures
Once finished with signatures, hit the *"**< Approvals*" button in the top right corner of the screen to return to the Approvals screen. Once signed, the Customer approval will turn green.