Payroll Integrations Setup
DSPTCH integrates with many payroll systems that allow it to pull out employee and payroll information. This article will go over the steps necessary to set up a payroll integration with DSPTCH.
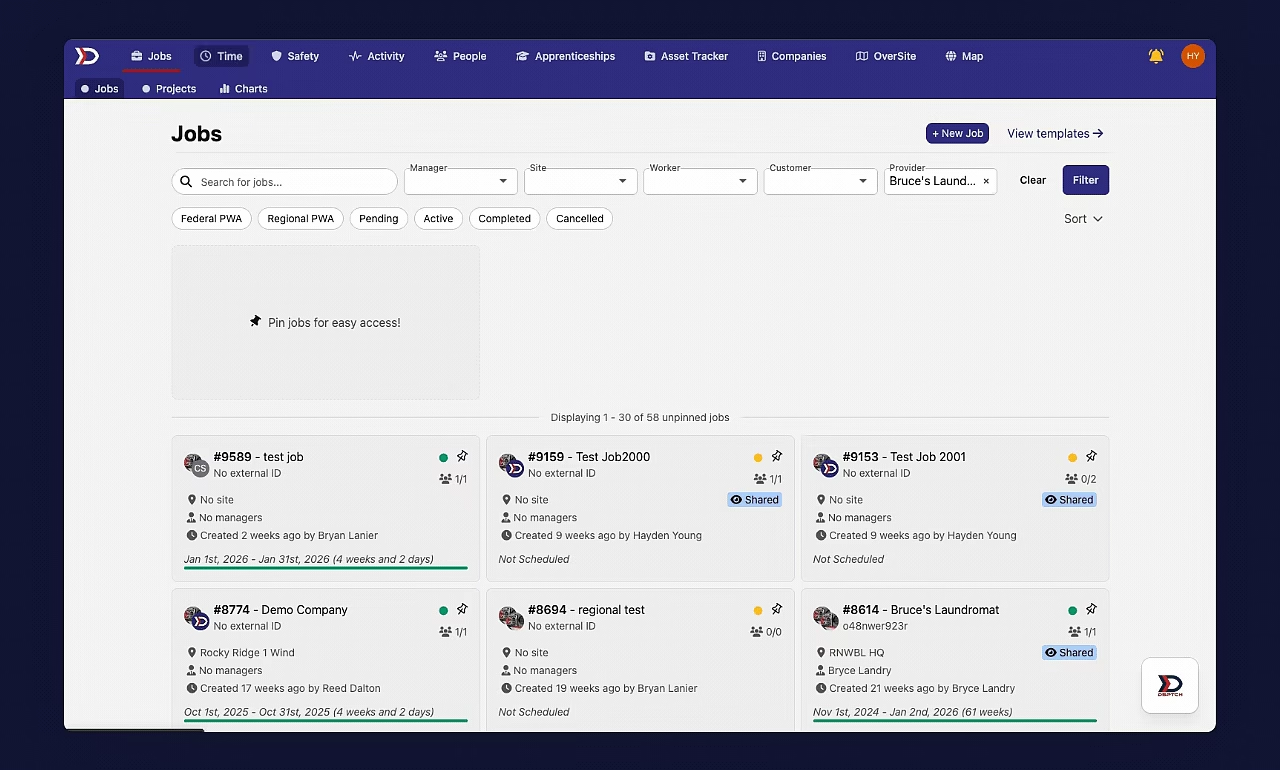
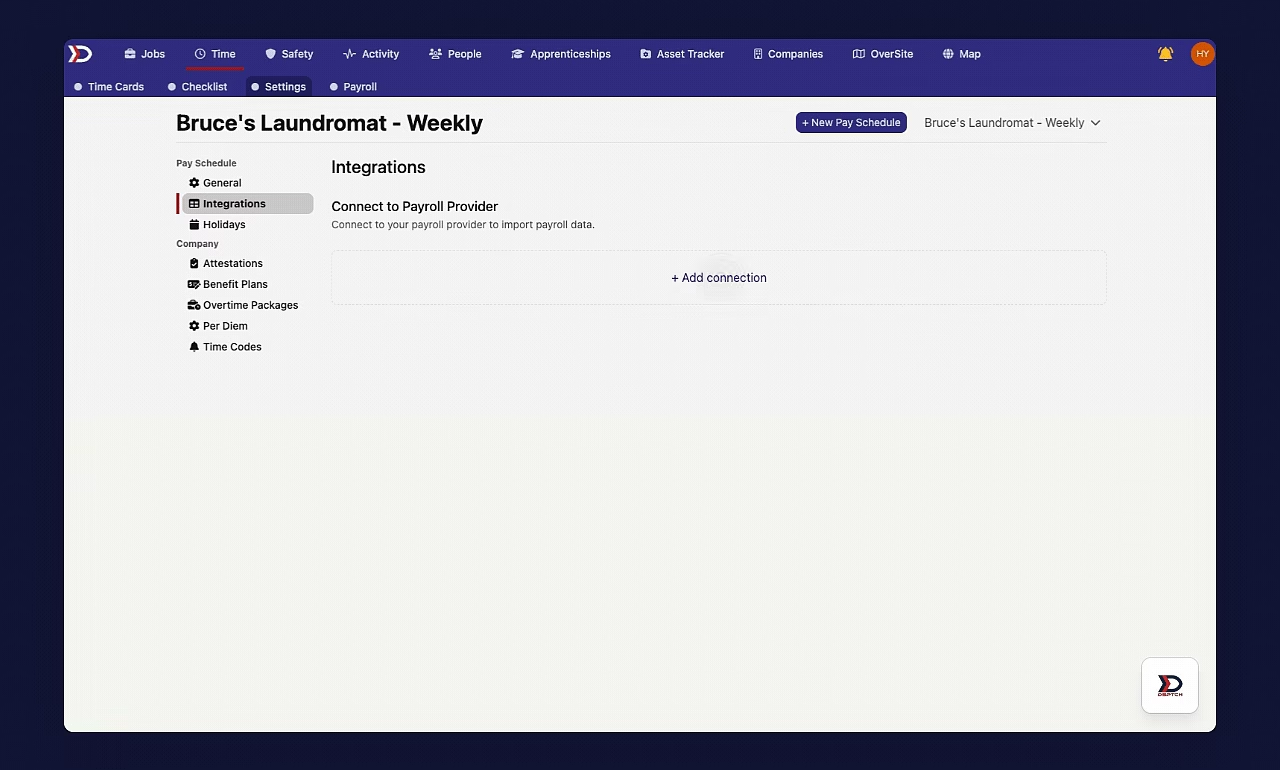
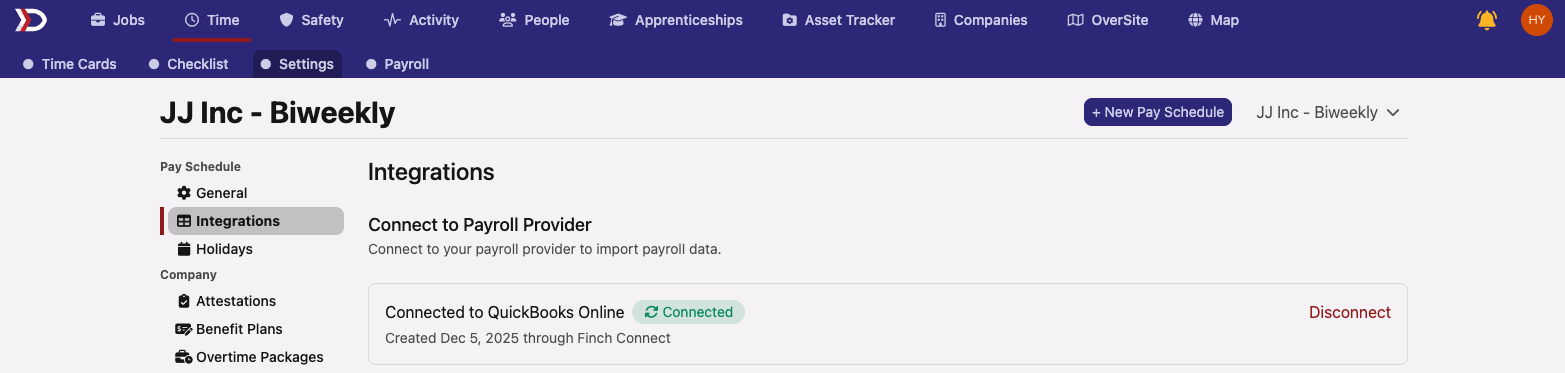
To find the payroll integration screen, first click the "Time" tab in the primary navigation bar at the top of the page. Once in the "Time" tab, click the "Settings" tab in the sub navigation bar near the top of the page. Finally, click "Integrations" under the "Pay Schedule" menu on the left side of the page.
At the payroll integration screen, click the "+ Add connection" button to start the integration process.
See the video below for a demonstration:
If the "+ Add connection" button is not visible, there are two troubleshooting fixes:
(1) Set up a pay schedule (instructions here)
(2) Request payroll integrations be enabled. Please do so by emailing help@dsptch.work to request the feature be enabled.
Clicking the "+ Add connection" button will open the "Payroll Provider" search form. Search for your payroll provider from the dropdown and select it. This will open the Finch integration screen.
See the video below for a demonstration:
The integrations window will give you some information about the system and ask you to continue.
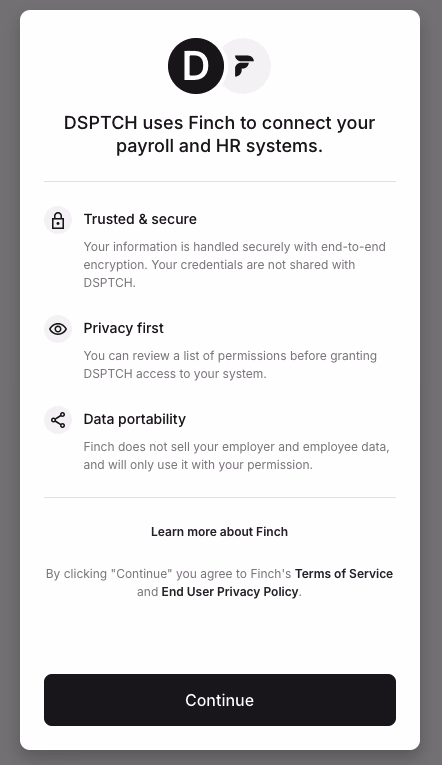
Integrations landing page.
After hitting continue, DSPTCH will list the data it is going to read from your payroll system. This is required for payroll information.
Review and click "Continue".
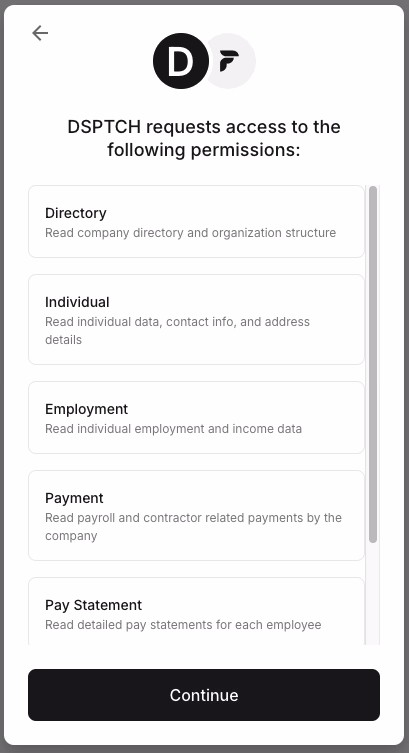
Required data feeds for DSPTCH to integrate with payroll
Then, find your provider among the list. Once the provider has been found, click on them to be brought to the login screen for that system.
For the rest of this guide we will be using QuickBooks Online as an example.
At the provider login screen, log in using your credentials.
Make sure an account with admin level permissions is used for login. Admin permissions are required on the account being used for login.
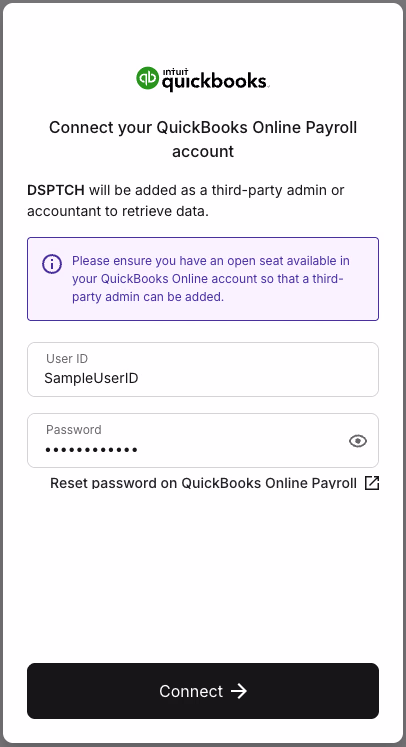
The provider login screen with sample credentials
If your login is tied to multiple accounts, be sure to select the correct one you are trying to integrate with.

example of an account with multiple logins.
Click on the correct account, and the integration process will begin.
The integrations process may take several minutes to complete. Please leave the page open while it does so!
Once the connection has successfully been created, DSPTCH will re-direct back to the payroll integrations page and a connection confirmation message should appear:
Payroll Mappings
Next, for payroll data to export from DSPTCH you will have to set up payroll Mappings. Check out our Payroll Mappings Help Document to learn more.