Creating Company Documents
This article will provide an overview of company-wide documents on DSPTCH Web and Mobile. Specifically, it will cover how to create, edit, and access socuments on DSPTCH Web and how DSPTCH Mobile users can view the documents after they are created.
Navigating to Company Documents – Web
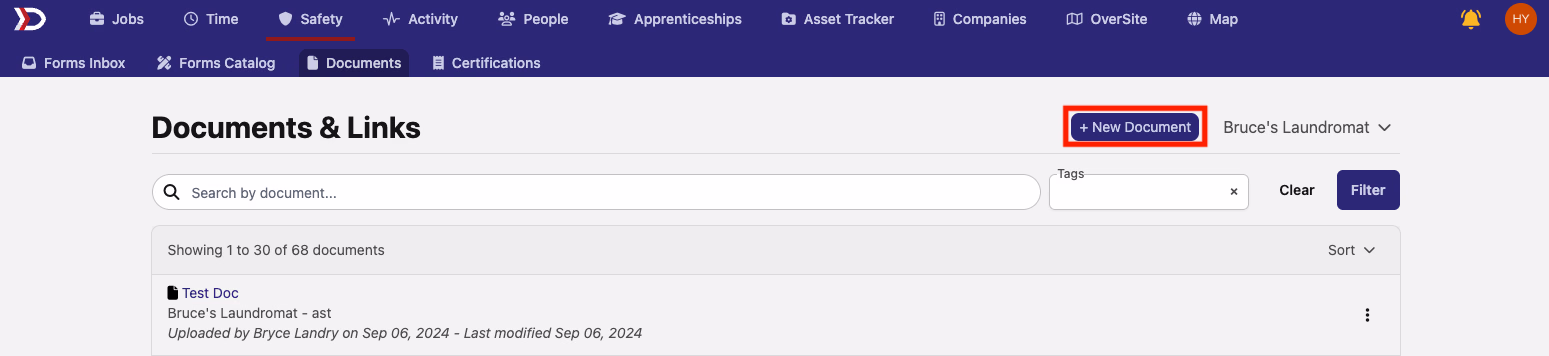
Start by clicking the "Safety" tab in the primary navigation bar at the top of the page. Then, click the "Documents" tab in the sub-navigation bar.
This will open the "Documents & Links" page. A list of all documents that have been uploaded will be visible here. To view a document on DSPTCH Web, click on the document title. This will open a document preview.
See the video below for a demonstration:
Creating a New Document
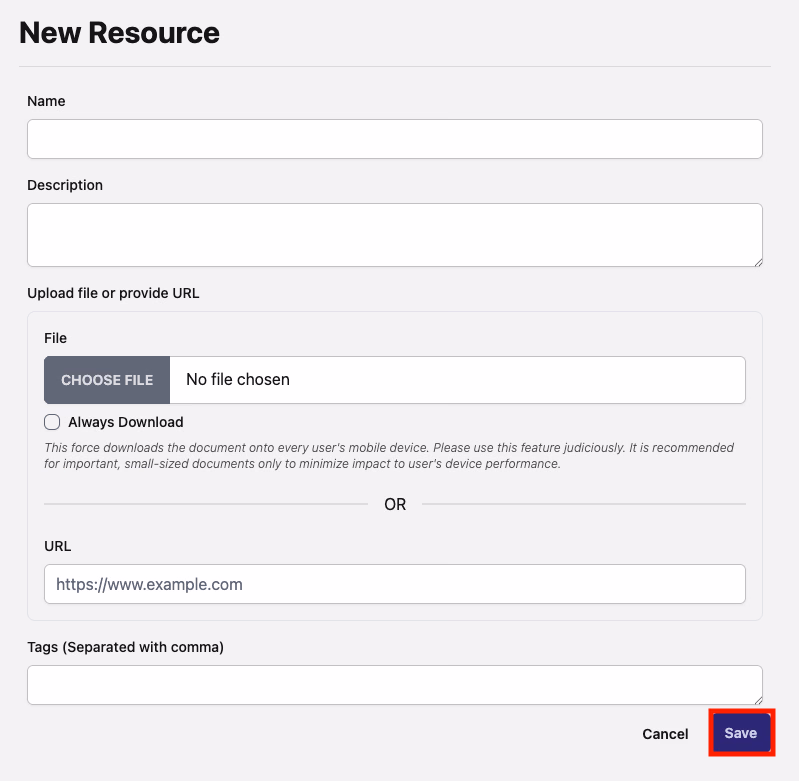
From the "Documents & Links" page, click the "+ New Document" Button (indicated by the red box in the picture below). This will open the "New Resource" form.
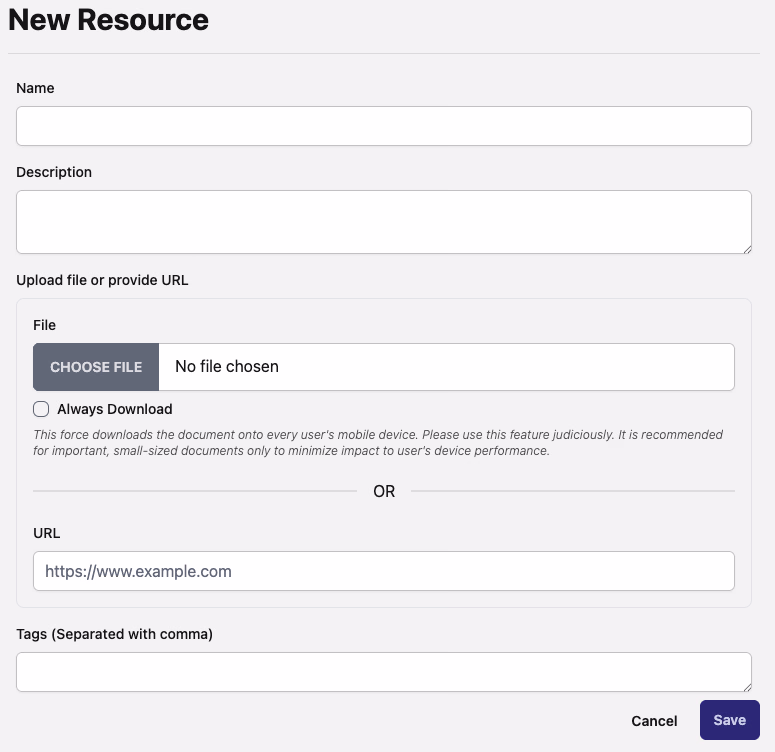
There are several fields in the "New Resource" form:
-
Name (Required):
-
The name of your document. This will be visible to all users in your company.
-
Description (Optional):
-
A textual description that will appear below your document name. This will also be visible to all users in your company.
-
Upload File or Provide URL (Required):
-
A file upload or URL entry field where the document can be uploaded/linked.
-
Always Download Toggle (Optional):
-
Toggle on to force download the document onto the mobile device of every user in your company.
-
Note: Please use this feature judiciously. It is intended only for important, small-sized documents. Excessive use of this feature can negatively impact users' device performance.
-
Tags (Optional):
-
Short descriptions (similar to hashtags) used to identify documents in the search function.
Once all required fields have been completed, click the "Save" button to create the document (indicated by the red box in the image below).
Edit an Existing Document
From the "Documents & Links" page, click the three dots icon on the right-side of the document profile (indicated by the red box in the image below). Then, click the "Edit" Button (indicated by the green box in the image below). This will open the "Edit Resource" form.
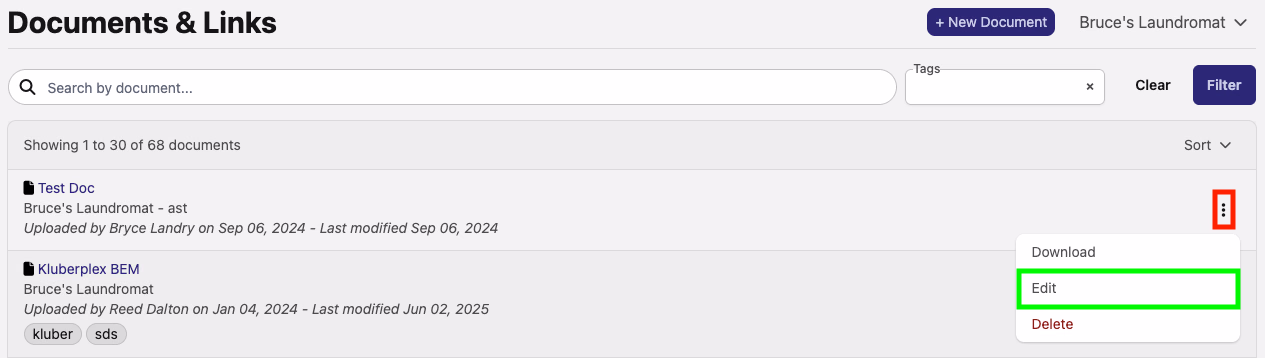
All fields are editable. For a full breakdown of each field, please read the Creating a New Document section above.
After saving any edits, a success message reading, "Company document was successfully updated" will appear at the bottom-right of the screen (see image below):

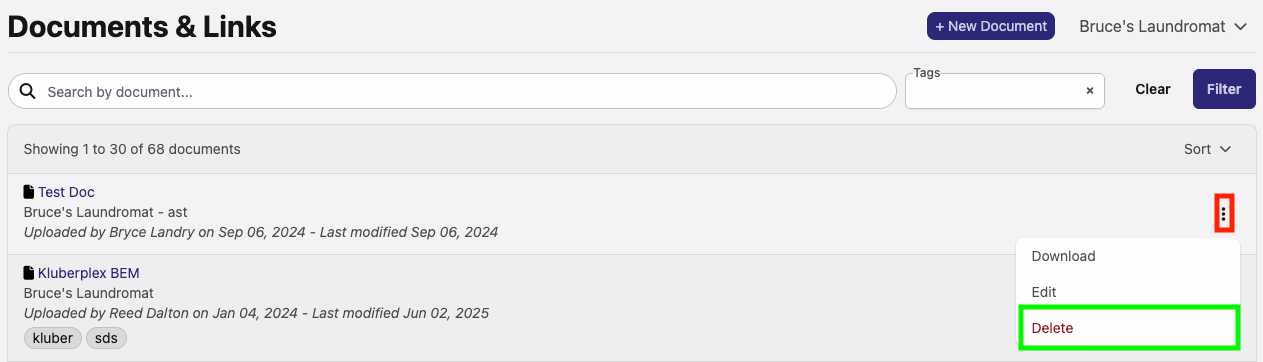
Delete an Existing Document
From the "Documents & Links" page, click the three dots icon on the right-side of the document profile (indicated by the red box in the image below). Then, click the "Delete" button (indicated by the green box in the image below).
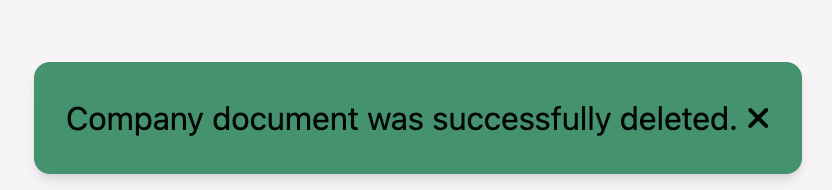
A success message reading, "Company document was successfully deleted" will appear at the bottom-right of the screen (see image below):
Viewing Company Documents on DSPTCH Mobile
Users can view company-wide documents in DSPTCH Mobile. To do so, click the DSPTCH icon in the middle of the primary navigation bar at the bottom of the screen. Then select the "Docs" button.
This will open a list of all company-wide documents. Users can use the search bar at the top right of the screen to filter the documents they are viewing.
To view a document, click on the name. The document will open directly within DSPTCH Mobile.
Please see the video below for a demonstration: