Check-ins
Check-ins are a way that technicians can let their team know they've arrived at the site, share details from their work, receive critical safety alerts, and track their all-time career stats to brag to their crew.
For context of the use cases for Check-ins, watch our overview video here.
For the OverSite views and how to create a Check-in on someone's behalf, see Check-Ins on OverSite.
For the mobile workflow, see Check-ins on mobile.
Viewing technician Check-ins from the Activity tab
The Activity tab gives you a company-wide view of Check-ins regardless of which sites your company has claimed in OverSite.
Filtering Check-ins
Click the Activity tab in the main navigation, then click the Check-ins sub-tab.
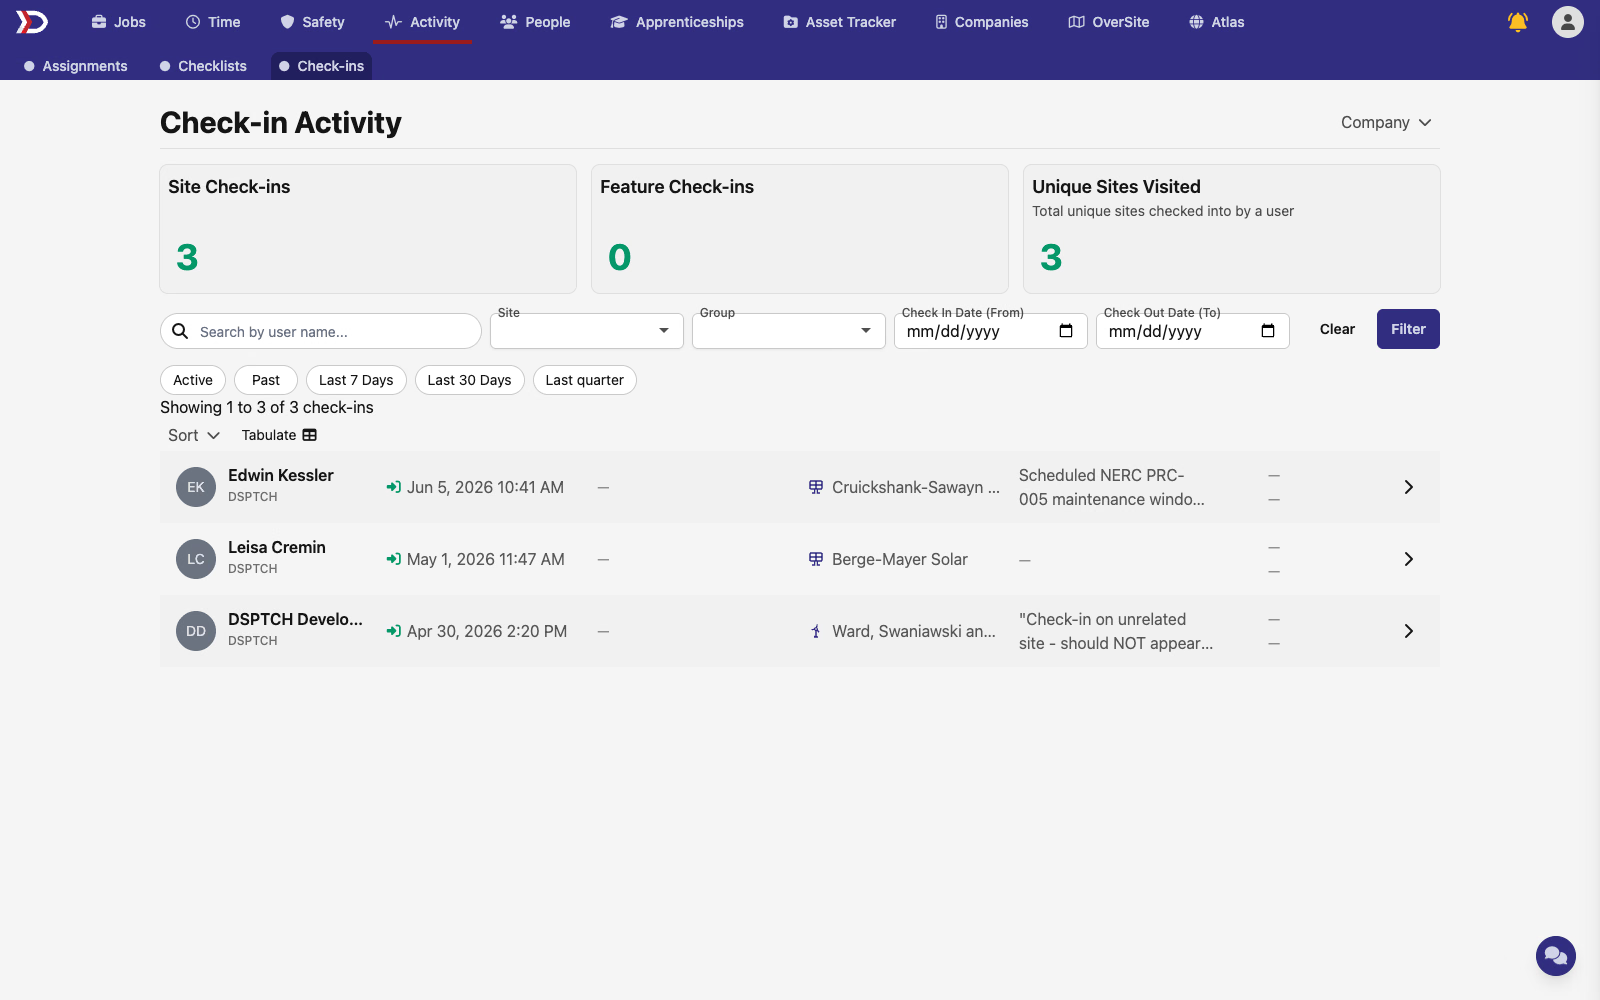
The page shows summary cards for Check-in activity at the current company, a filter row (including a Group filter for filtering by User Group) and quick-filter pills, and a Tabulate link to switch into the table view (see Exporting Check-ins with Tabulate). The company picker in the top-right lets a multi-company user switch which company's Check-ins they're looking at.
Viewing an individual Check-in
To open a Check-in, click the forward arrow icon on the right side of the row. This opens the Check-in Details Page.
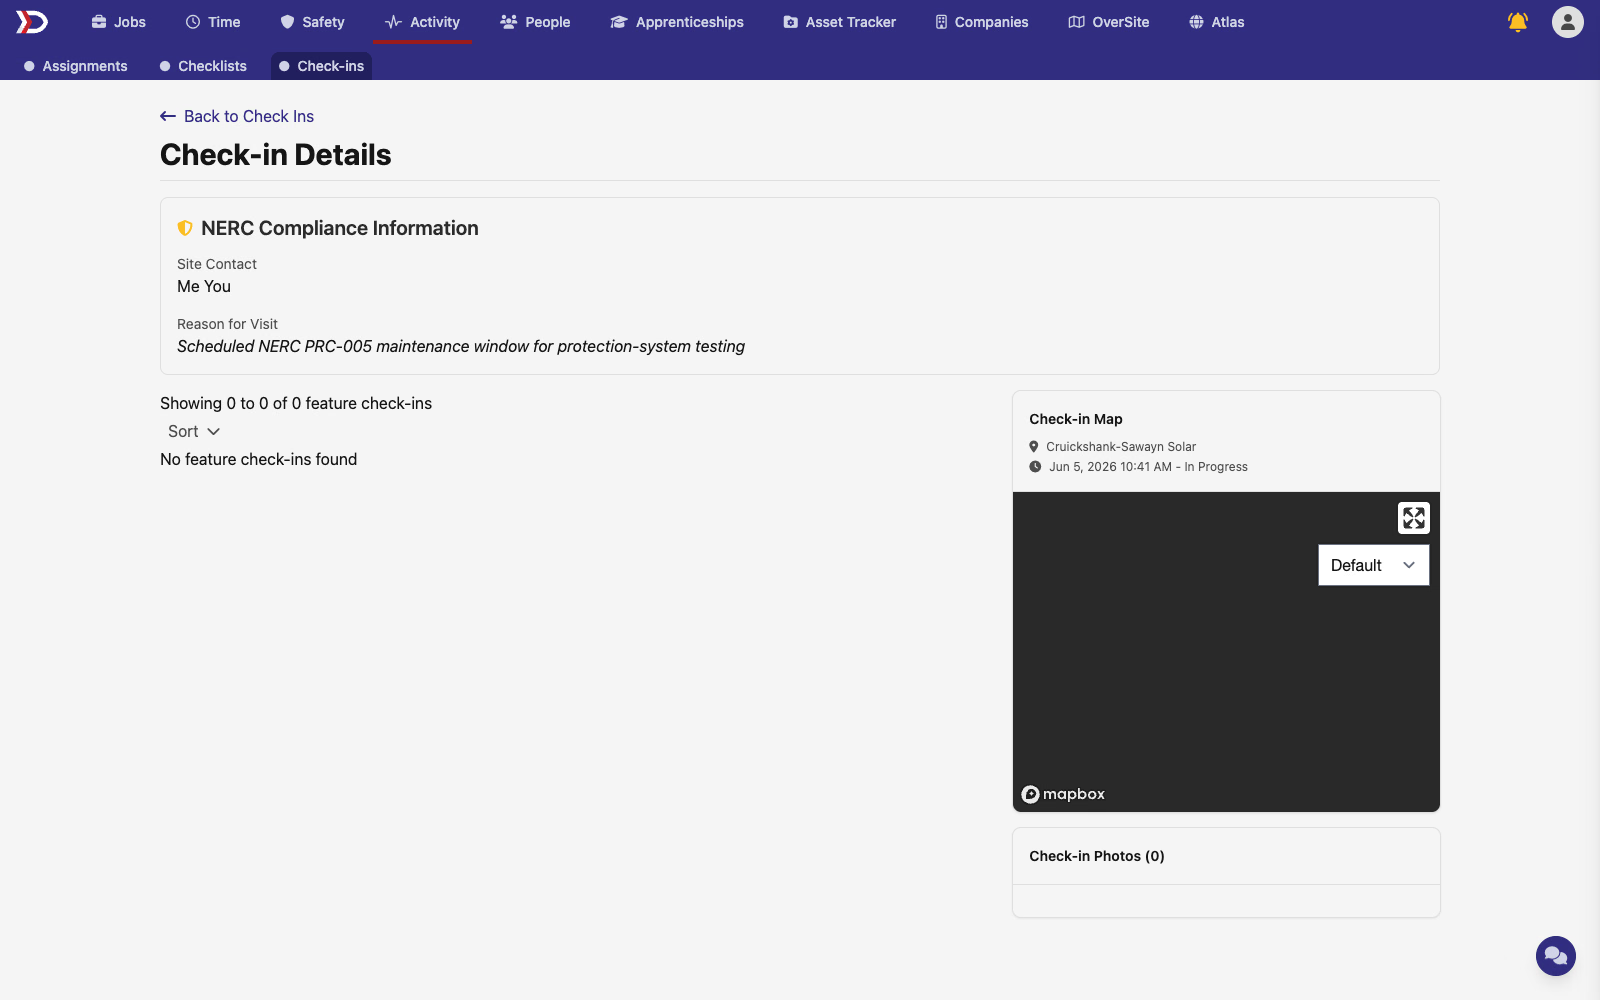
The Details Page is built from four content cards:
- NERC Compliance Information — Site Contact and Reason for Visit, recorded at check-in for NERC regulatory compliance.
- Feature check-ins — list of Features the technician checked into during the Check-in. If the technician didn't check into any Features, this list is empty.
- Check-in Map — site location, start time, and current status (e.g., In Progress).
- Check-in Photos — photos uploaded during the Check-in.
Use the ← Back to Check Ins link in the top-left to return to the Activity list.
Exporting Check-ins with Tabulate
Tabulate opens the current Check-ins list in a spreadsheet-style view, with the same filters applied, so you can export the data to CSV or Excel.
Click Tabulate from the Activity Check-ins tab or either of the OverSite Check-Ins pages to open it.
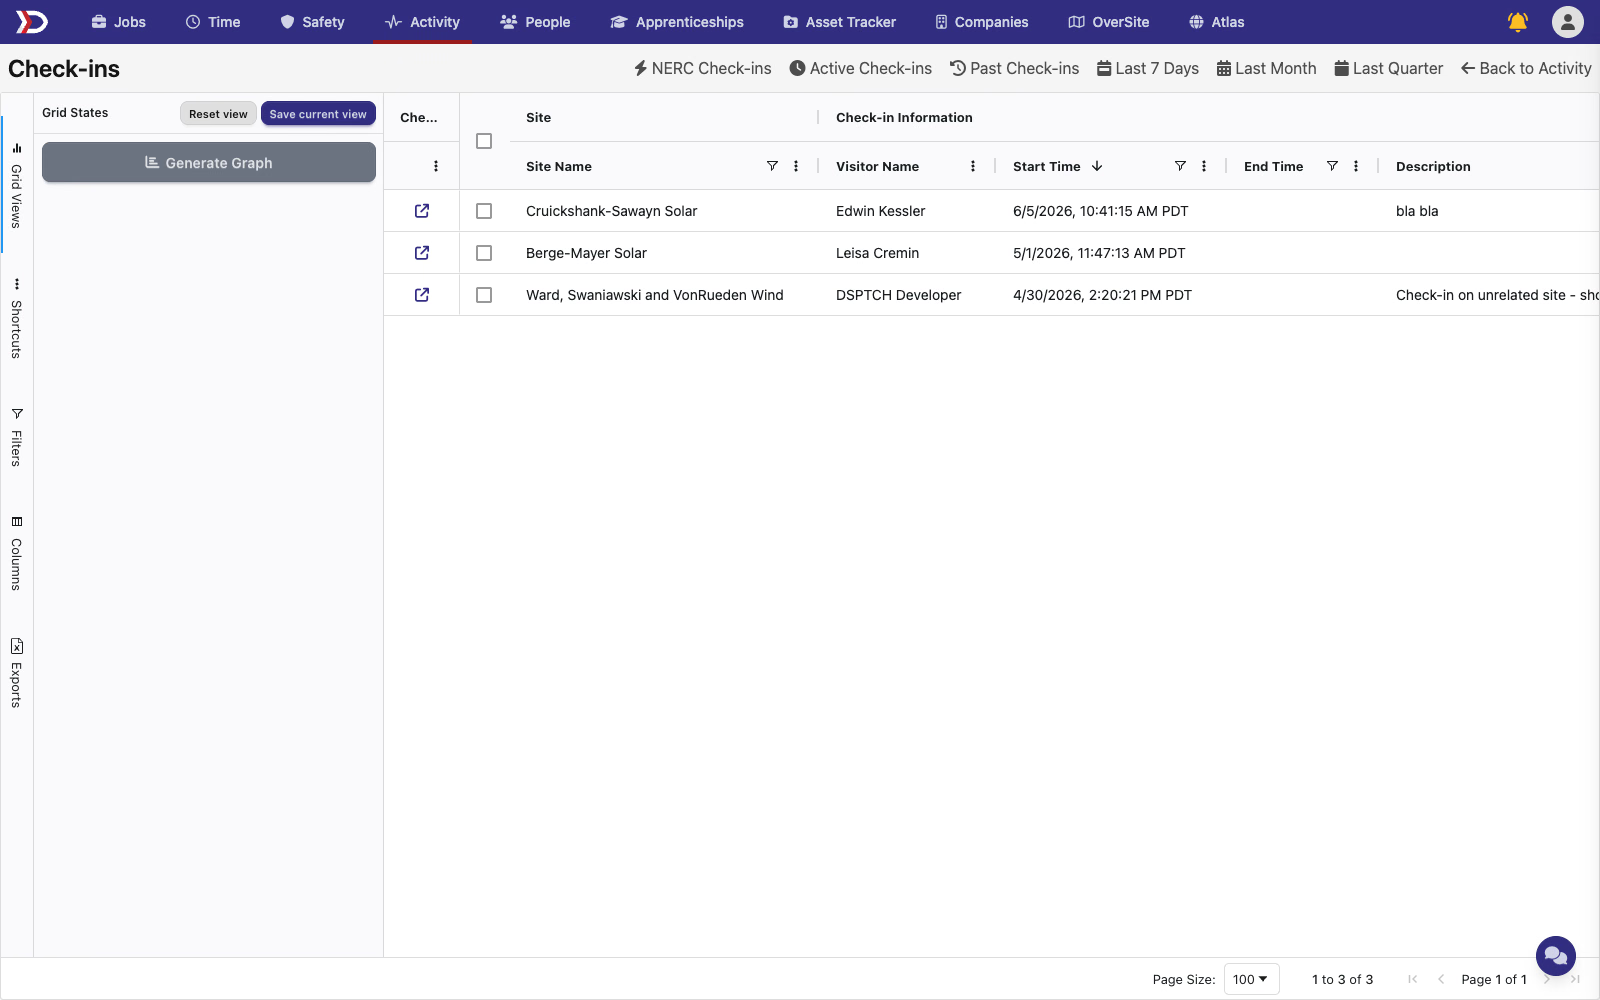
The toolbar at the top of the page provides quick filters for common ranges and a ← Back to Activity link to return to the list view.
To export, click the Exports tab in the left sidebar.
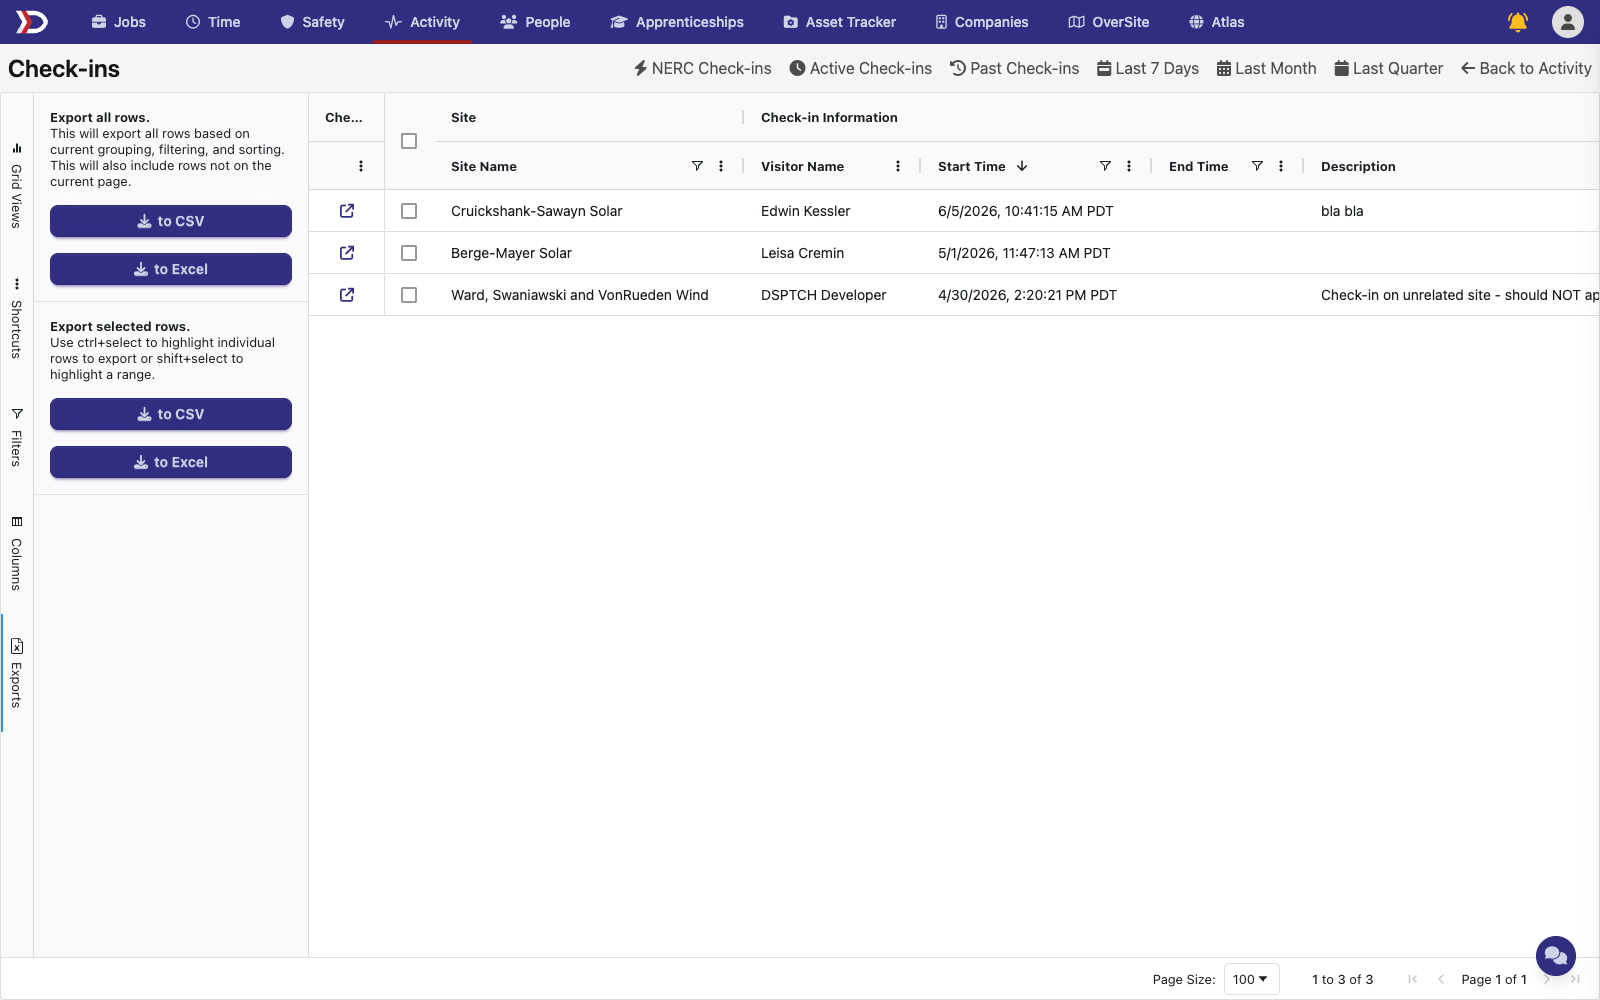
The panel offers two scopes:
- Export all rows — exports every row matching the current grouping, filtering, and sorting, including rows that aren't on the current page. Click to CSV or to Excel.
- Export selected rows — exports only the rows you've highlighted. Use Ctrl+select to highlight individual rows or Shift+select to highlight a range, then click to CSV or to Excel.